
From a technical standpoint, a firewall is a barrier against which any unauthorised service will come up against when attempting to gain access to your system. Mint comes preinstalled with a firewall, so let’s look at it in more depth.
UNCOMPLICATED FIREWALL
The Linux Mint Firewall is simply a graphical interface to the Linux Uncomplicated Firewall (UFW). However, at times UFW can be anything but uncomplicated. In fact, it’s actually quite complex.
STEP 1
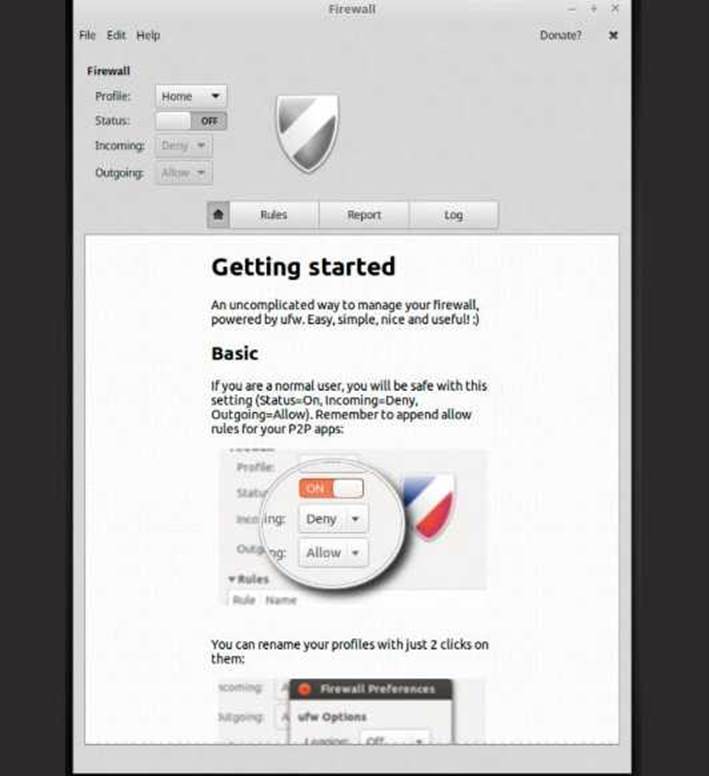
If you haven’t already activated the Linux Mint Firewall, as we covered in the 10 Things To Do After… sections, do so now by clicking on the Menu and typing firewall into the search box and clicking on the returned result: Firewall Configuration.

STEP 2
You need to enter your password to access the Mint Firewall Configuration console. Once in, you are presented with the main Firewall console window, displaying the Firewall’s Profile, Status and Incoming and Outgoing traffic policies.
STEP 3
The bottom section of the Firewall console displays a quick user guide that confirms the steps we mentioned in the previous sections; meaning that for a normal user, someone who simply uses Mint to work on and navigate the Internet, the default setup will suffice. In this case, you simply click the Status button to On.
STEP 4
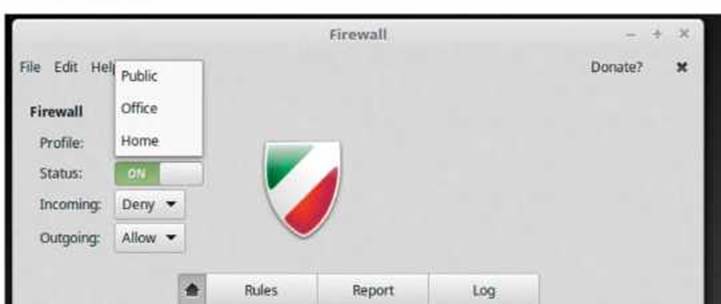
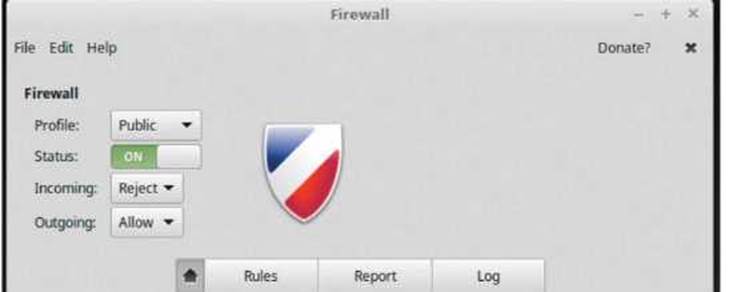
There are three predefined Profiles in the Mint Firewall: Public, Office and Home. The default is Home, where Incoming traffic is Denied and Outgoing traffic Allowed. This means you are still able to browse the Internet, going out from your computer but anything that’s trying to get in, incoming traffic, is denied access.
STEP 5
Changing Profiles alters the rules of the Firewall. In the case of Public, Outgoing traffic is allowed, whereas Incoming traffic is instantly Rejected. Obviously, you can further alter the defaults for the Profiles, by clicking on the Incoming and Outgoing drop-down boxes to change them from Reject, Deny and Allow, but it’s not advisable.
STEP 6
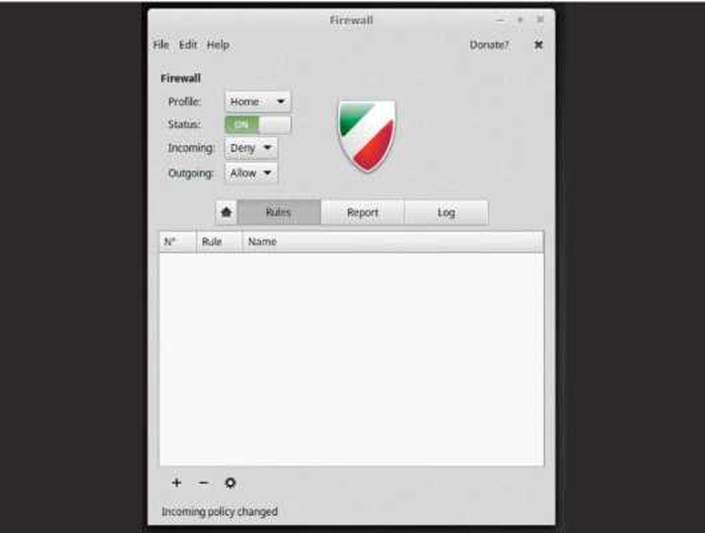
If you want to enforce a unique rule, let’s say to prevent access to a local, internal network resource such as a NAS drive then to begin with you need the IP address of the NAS drive in question. In our example, it’s 192.168.1.4. Click on the Rules button in the Firewall console.
STEP 7
What we need to do is enter a set of rules for Outgoing traffic to Deny access to 192.168.1.4. To do this, click the plus symbol at the bottom of the Rules section, followed by the Advanced tab.
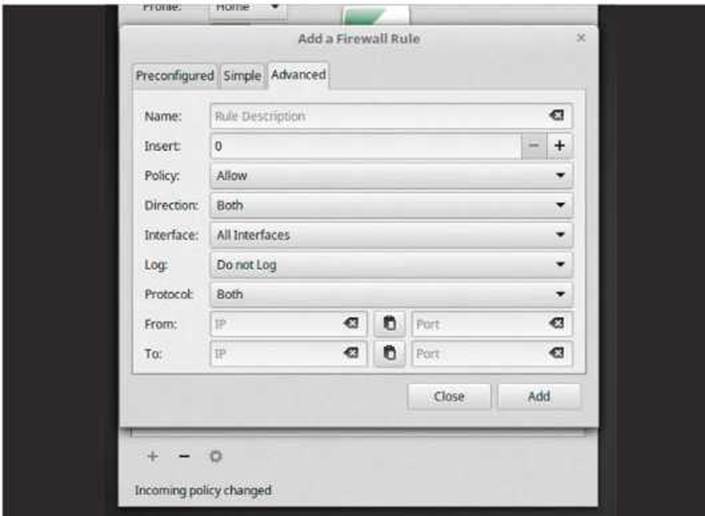
STEP 8
In Advanced, enter a name for the new Rule, NAS Access for example. In the Policy section select Deny. In Direction select Out. You can Log the traffic reports if you like, to monitor any access to the IP address, but it’s not necessary.
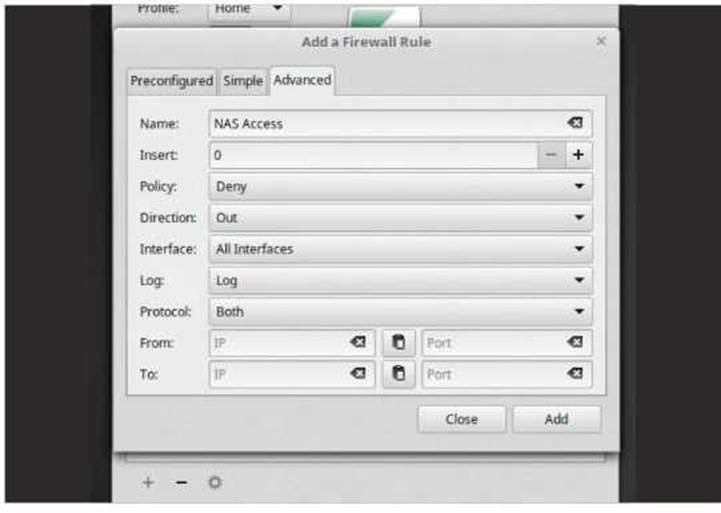
STEP 9
In the From section, click on the clipboard icon, which is between the IP address and Port text boxes; this will paste in your computer’s current IP address. In our example, this is 192.168.1.199. In the To section, enter the address of the NAS, which is 192.168.1.4. Keep the Ports sections empty.

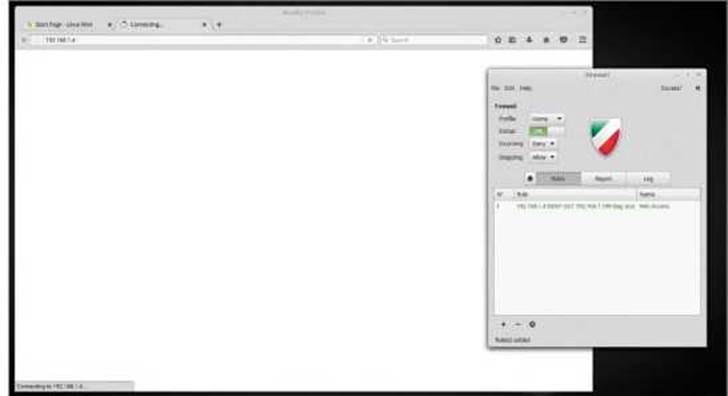
STEP 10
Click the Add button to apply the new Rule, then click Close to exit the Add Firewall Rules console window. Open Firefox and navigate to a couple of outside locations, such as Google, BBC News and so on. Now try a new Firefox tab and access the internal address that’s blocked, 192.168.1.4. What happens is that Firefox eventually times out.


What does the Office Profile do?