Table of Contents
Setting up Email with Thunderbird
Reading and composing email is a Fundamental element of a modern operating system. Thankfully Mint has this covered with Mozilla’s Thunderbird email client; a powerful but simple to use app that can connect to different email providers.
THUNDERBIRDS ARE GO!
Thunderbird can be easy and quite tricky to set up, depending on which email provider you currently use. Let’s look at how to set it up.
STEP 1
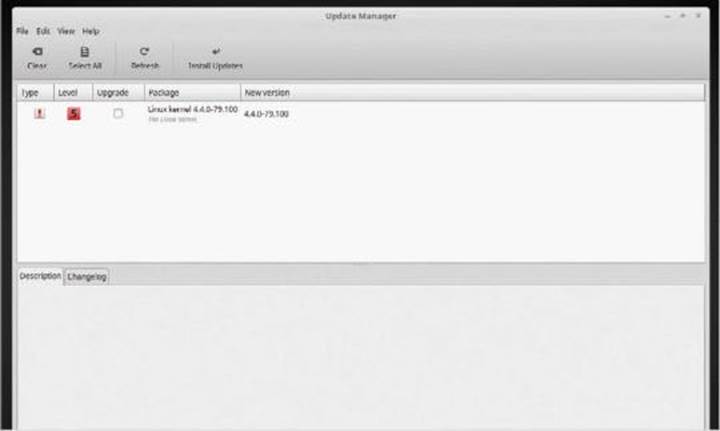
Thunderbird, along with Mozilla’s other contribution, Firefox, is a regularly updated program. To make sure you’re using the latest version, head to the Mint Update Manager via the shield icon in the bottom panel and click the Refresh button to apply any available level 3 or less updates.
STEP 2
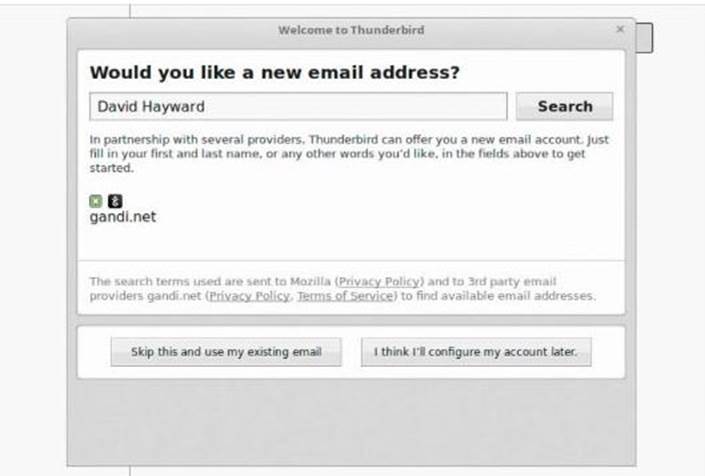
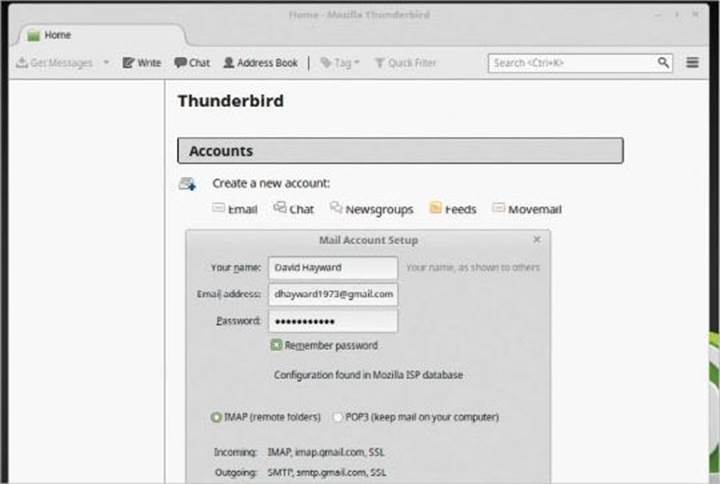
Thunderbird Mail can be Pound from the Menu > Internet. When you first launch Thunderbird you’re be asked by the app to create a new email address. The default email provider is Gandi.net, just enter your name and click Search to see if there’s an account available.
STEP 3
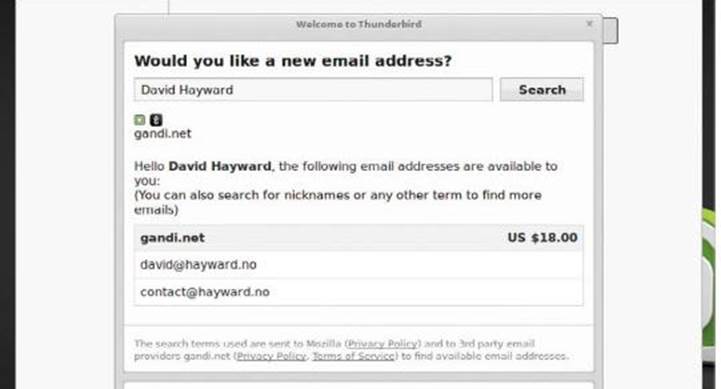
Clicking on Search will present you with a several possible email address options, and how much they cost based on your location. You can of course opt for one of the results displayed but Gmail and the like are free and you’re more than likely already using them. Click Skip this and use my existing email to set up Gmail etc.
STEP 4
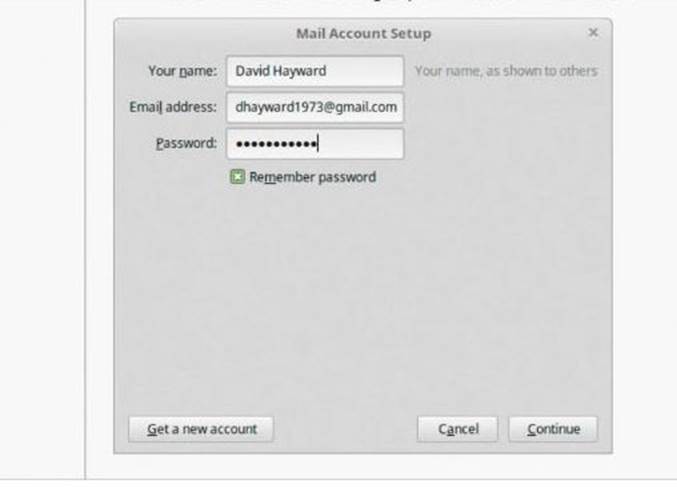
The first part of setting up your existing email is to enter your details: name, current email address and the password you use to access your current email address. Don’t forget to tick the Remember Password box to prevent you from having to enter it every time it’s accessed; unless you have specific security reasons.
STEP 5
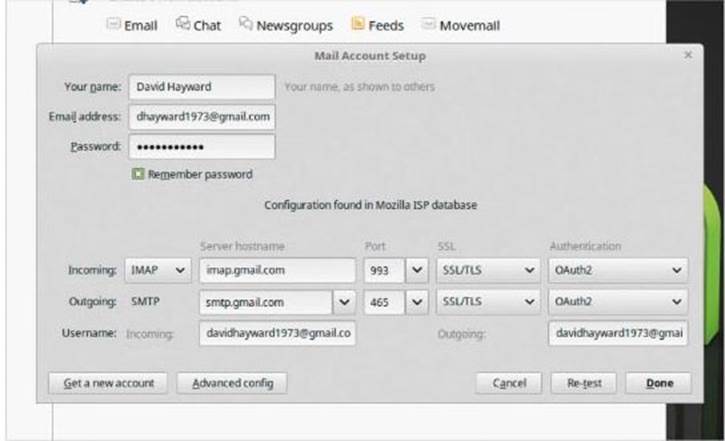
When you press the Continue button, Thunderbird will begin to automatically set up access to the email provider. If you use Gmail, for example, the relevant settings are configured for you. If your email provider’s details aren’t set up correctly, you need to do this manually.
STEP 6
To manually set up your email provider’s server settings, click on the Manual Config button. Then you need to look up the email provider’s unique incoming and outgoing server names, ports and other options. These you can usually find by searching the provider’s FAQs, Support or Forum pages.
STEP 7
If the settings are correct click the Done button.
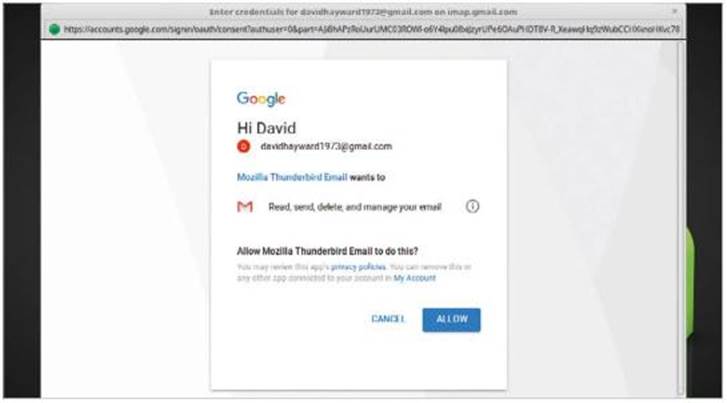
Depending on the provider, you may need to enter the account details in a separate window, such as the Gmail example here; username/email address and password. You may also be asked to allow Thunderbird access to view and manage the mail account. For everything to work correctly, click on Allow.
STEP 8
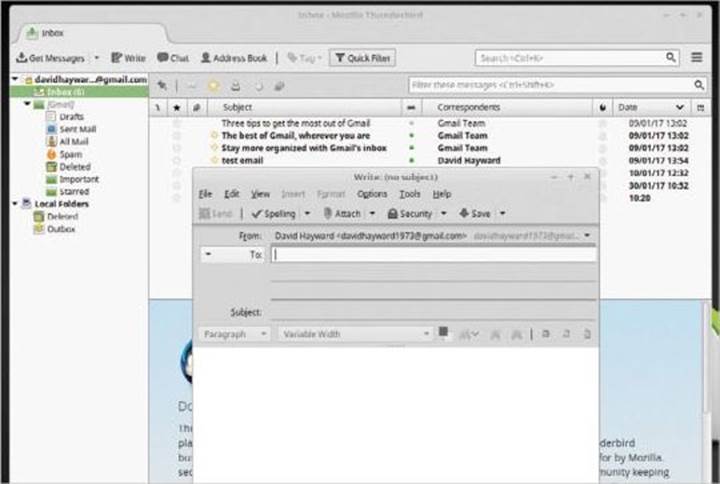
Thunderbird should now be set up and actively working with your current email provider. With luck, you can see your emails in the Inbox section, under your email address in the left-hand pane. From there you can click on Get Messages to check for new mail, Write to start a new email, or check the Address Book.
STEP 9
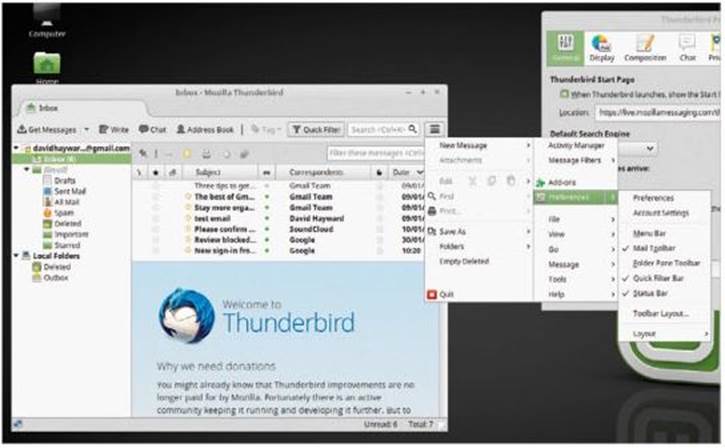
Thunderbird works much the same way as other email clients do. Look to the far right of the Thunderbird window for three horizontal lines, click this to enter the available options. Click Edit > Preferences to allow you to specify General, Display, Privacy, Security and more options.
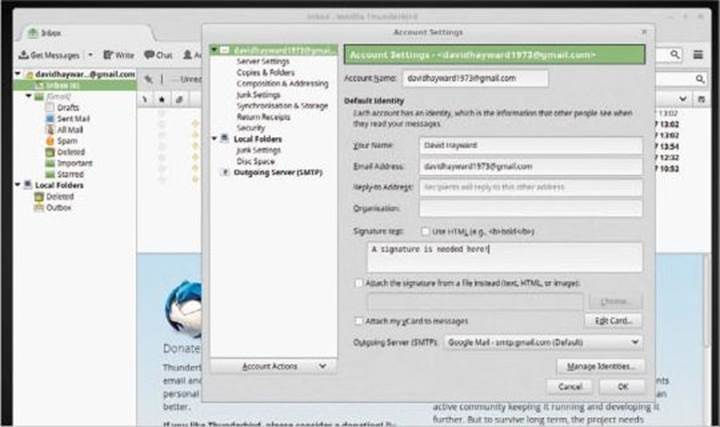
STEP 10
If you look to Preferences > Account Settings from the horizontal bars, you can set options such as a signature, server settings, folder options and further security. In the Synchronisation & Storage option, you can specify leaving messages on the server, and whether to delete older messages.
Running Windows Programs on Mint with Wine
It’s possible to run a native Windows app from within Mint. By using Wine some, not all, Windows apps can work extremely well. The project is continually improving, with thousands of Windows apps running flawlessly under Wine.
WINE TASTING
Windows-based games and apps are capable of being run with Wine (Wine Is Not an Emulator) and there’s a Pull list available at www.appdb.winehq.org/.
STEP 1
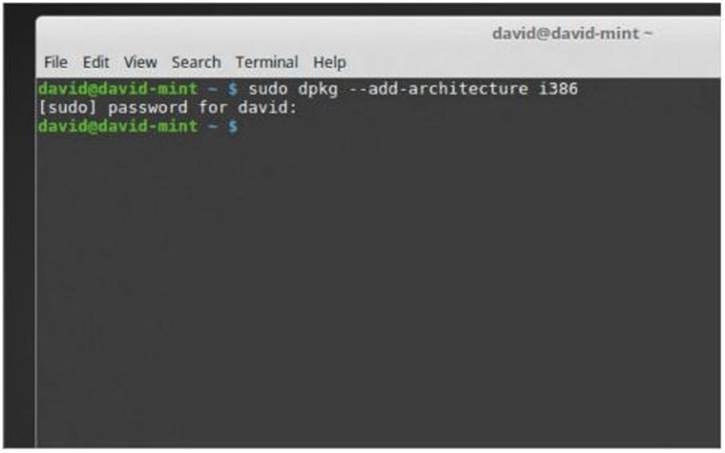
You need to enable the 32-bit system architecture First before installing Wine, this is to allow the maximum
compatibility. In the Terminal, type: sudo dpkg – -add-architecture i386.
STEP 2
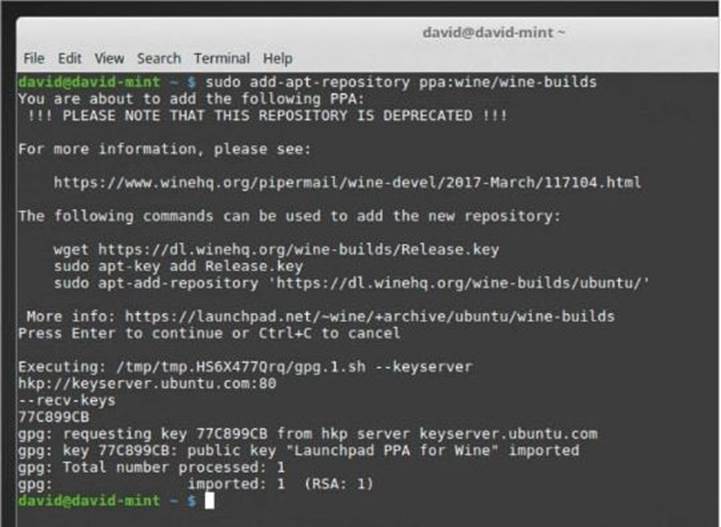
Now add the WineHQ respository, where you can get hold oP the installation Piles for Wine itself. Type: sudo add-apt-repository ppa:wine/wine-builds. Press Enter to add the repo and continue.
STEP 3
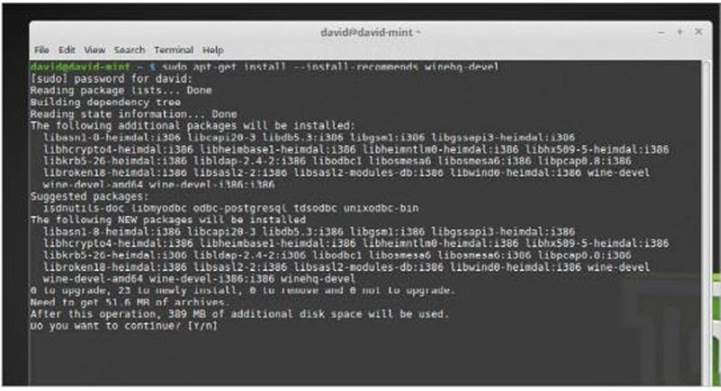
With the new repo added, run: sudo apt-get update. With the system updated and using the new repo, install the latest Development Branch of Wine (the Development Branch is used by most bleeding edge Wine users) with the command: sudo apt-get install –install-recommends winehq- devel.
STEP 4
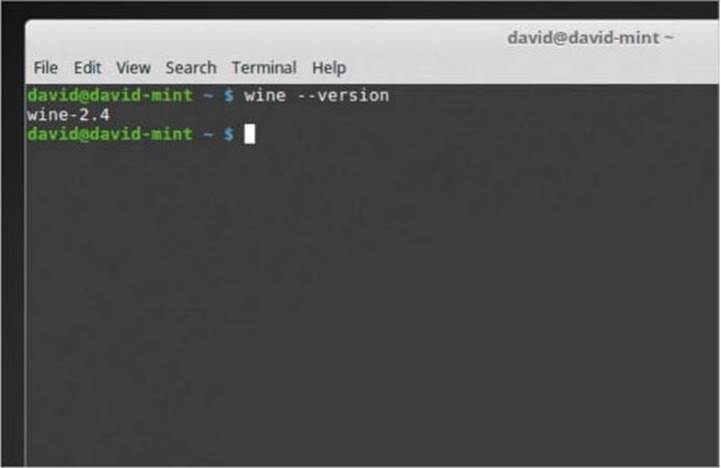
The installation for Wine is quite hefty, over 600MB. Once it’s all done, you can check the installed version with wine – – version. At the present time of writing, the latest development version was wine-2.4, which fixes numerous bugs associated with the running of several games and apps, as well as fixes for the core Wine Piles.
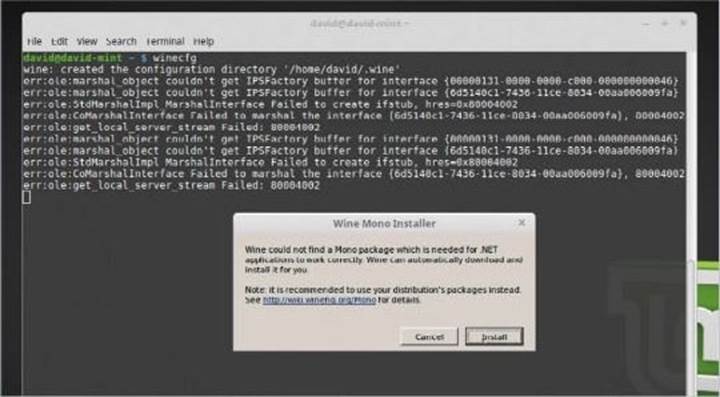
STEP 5
Still in the Terminal, enter: winecfg. This will launch the Wine configuration wizard, which will begin the process of setting up Wine for use. The first message box will ask you to install an extra package to handle .NET applications. Click on the Install button to continue. There may be more packages to install, so continue clicking Install until done.
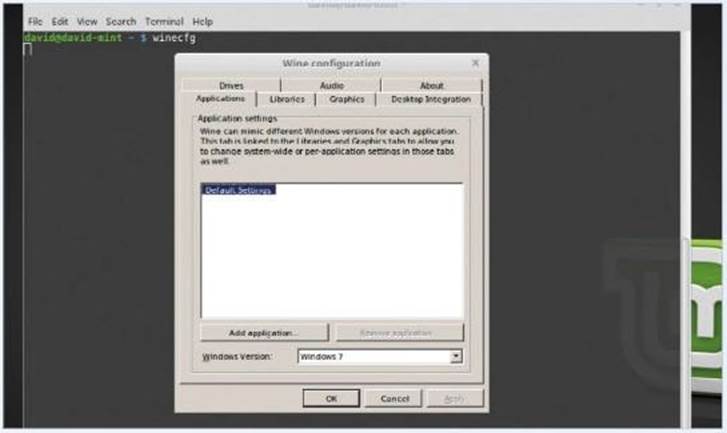
STEP 6
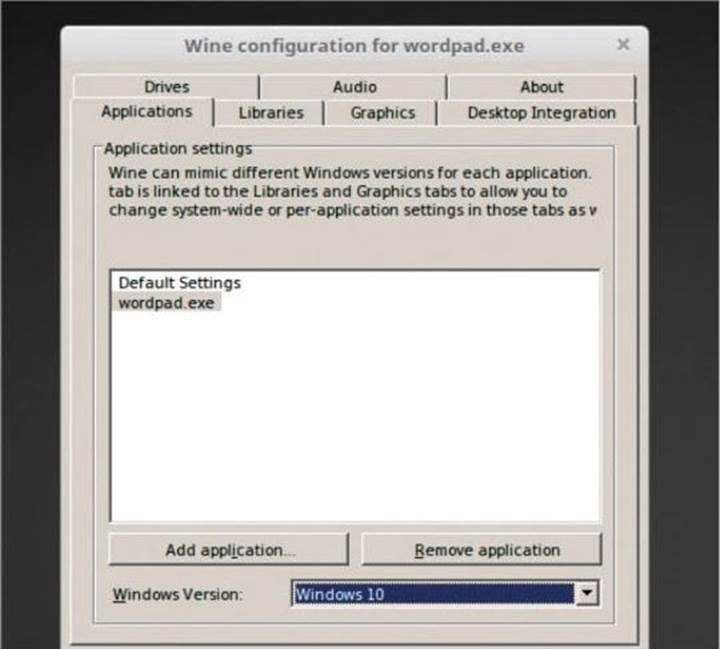
When the installations of the extra packages are complete, press Enter in the Terminal to return you to the command prompt. Type: winecfg again and the Windows Configuration app will be displayed. The Applications tab is where you can alter the way Wine runs Windows apps, specifying a certain version of Windows, for example.
STEP 7
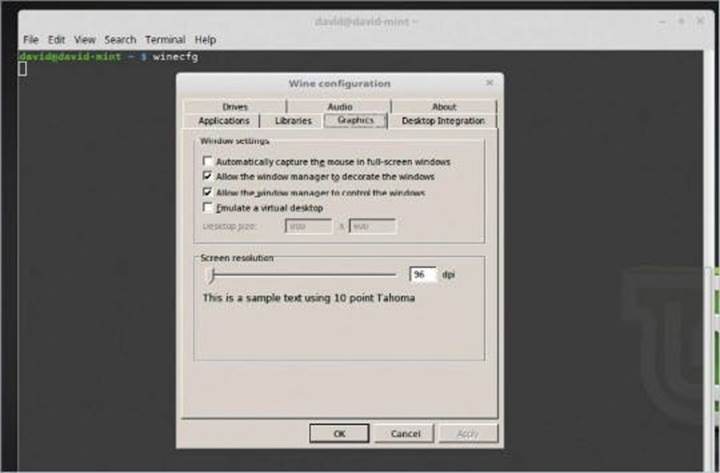
The Libraries tab allows you to alter any core Windows files to suit the app you’re running. Generally speaking, the defaults will suffice most apps. The Graphics tab can change the display of any running Windows apps, using an emulated virtual desktop.
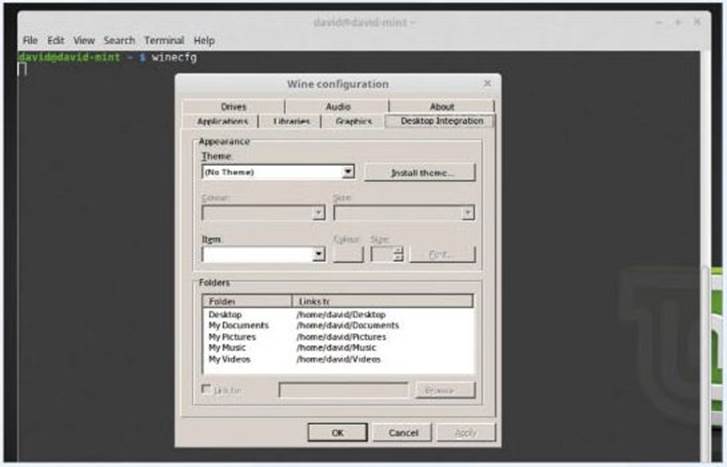
STEP 8
The Desktop Integration tab lets you change the Windows theme and it will link the usual My Documents, Pictures, Videos and so on with your Linux Mint Home folders: Documents, Pictures etc.
STEP 9
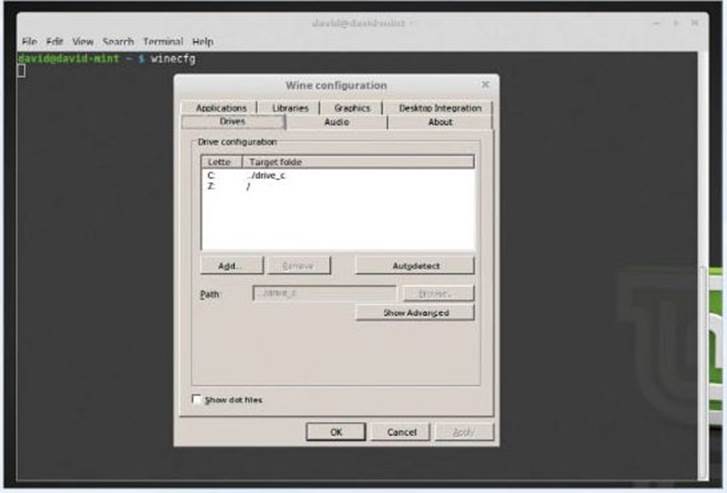
In the Drives tab you can specify a folder on your Mint system to be presented as a Windows drive letter. For example, any Windows games stored in a ~/Downloads/WinGames folder, can be mapped to a D: drive in Wine.
STEP 10
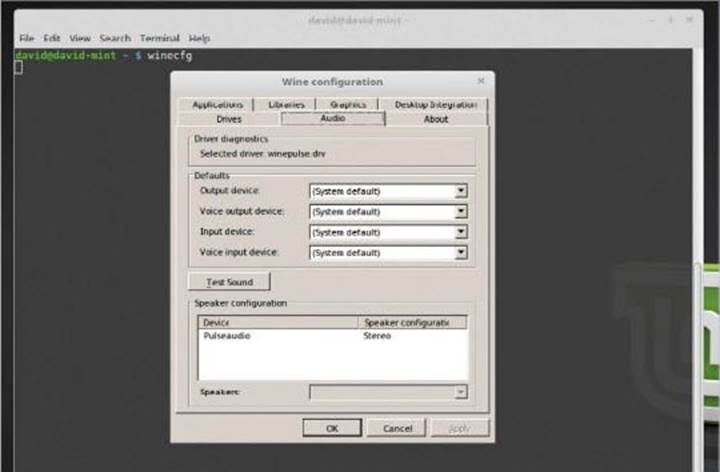
The Audio tab will ensure that any sounds generated from the Windows apps will be audible through your Mint sound setup. You can click the Test Sound button to make sure it’s all working.
Installing a Windows Program in Mint with Wine
With Wine running, you can begin to install some Windows programs. Like we said, not all Windows programs are going to work From the start as some require configuring within Winecfg; others may not work at all. Experimenting is key.
WINEAPPSWine isn’t always going to work the way you want it to. It’s running a program that wasn’t designed for the operating system, after all. It’s still fun to use though.
STEP 1
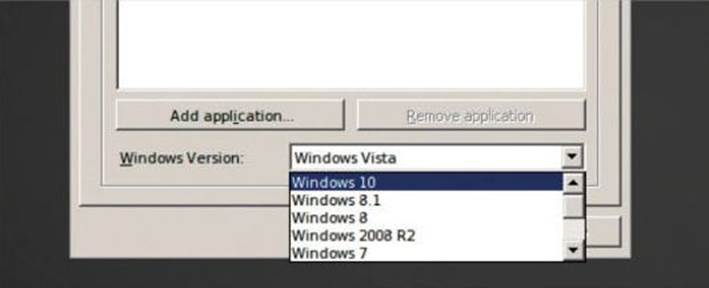
Let’s begin with one of the built-in Windows apps that comes with Wine, WordPad. If you haven’t already, start by running winecfg. When it launches in the Application tab, click on the drop-down box next to Windows Version and set it to Windows 10.
STEP 2
Now click on the Add Application button and using the File Manager window navigate to Program Files (x86) > Windows NT > Accessories. Click on wordpad.exe, then open. This will put the app into the Application Settings window list. You may need to change the app’s Windows Version to 10 again.
STEP 3
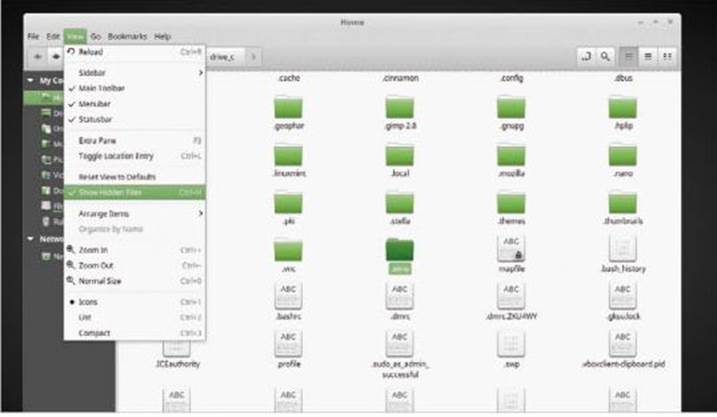
Click the OK button to close wincfg. You can now navigate to where the fake C: drive is installed in Mint. You can find this at ~/.wine/drive_c. The full stop preceding the wine folder indicates a hidden folder. To enable viewing of hidden folders in Nemo, click on View and choose Show Hidden Files.
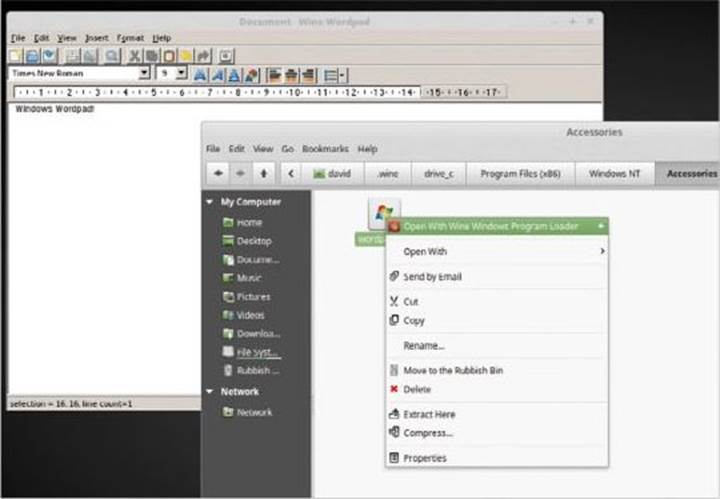
STEP 4
Using Nemo, navigate to .wine/drive_c/Program Files (x86)/Windows NT/Accessories. The wordpad.exe file should be there, all you need to do double-click it to open it through Wine. If it doesn’t work, right-click the file and choose ‘Open With Wine Windows Program Loader’, from the menu.
STEP 5
All being well, you should be able to successfully use Wordpad within Mint. Another handy Wine tool to have installed is Winetricks. Open the Mint Software Manager via the Menu, enter your password and search for Winetricks, click on the Install button.

STEP 6
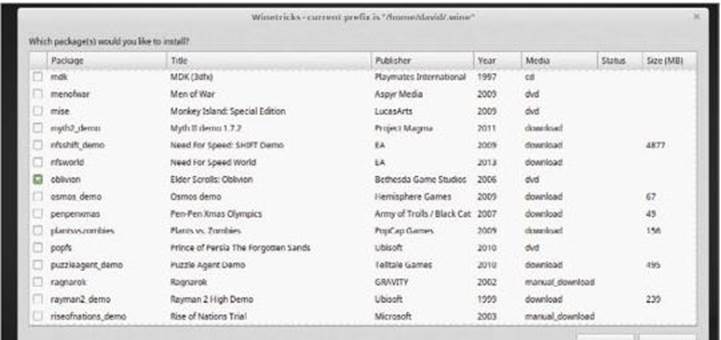
Winetricks should now be in a new Menu section. Winetricks is a script to help install Windows apps and games. If you have a game, such as Elder Scrolls: Oblivion, click Install a Game and choose the title from the list. Providing you have the disc or download handy, point Winetricks to it and it does the rest for you.
INSTALLING FROM A WINDOWS EXECUTABLE
At some point you’ll probably need to install a Windows app from its executable, the .EXE or .MSI file. Here’s how it’s done.
STEP 1
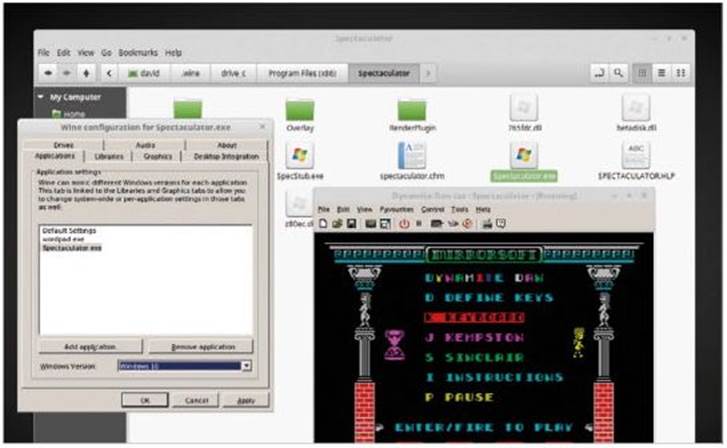
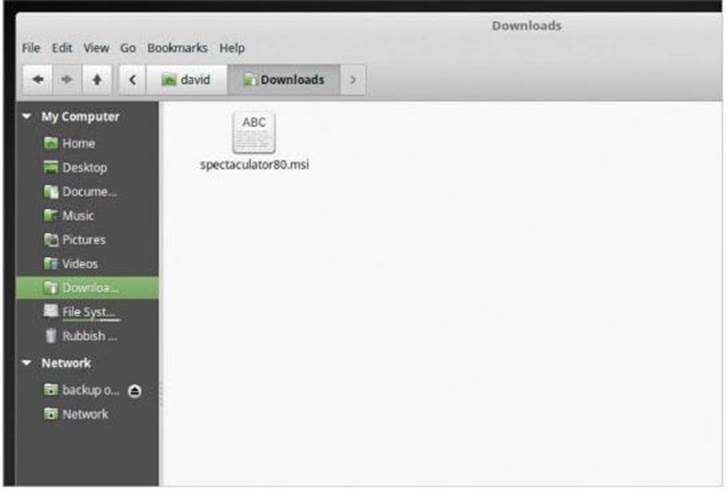
For this example you’re going to install a Windows app called Spectaculator, a ZX Spectrum emulator that runs in Windows XP and newer. You already have the MSI file to set it up, copied to the ~/Downloads folder in the Home area.
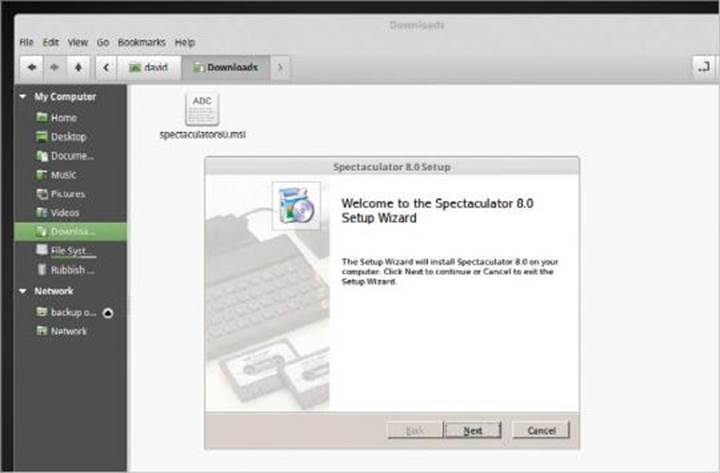
STEP 2
As you did with running the Wordpad.exe file, right-click the MSI file and choose ‘Open With Wine Windows Program Loader’. The app’s installer should open as it would if it was running on a Windows PC.
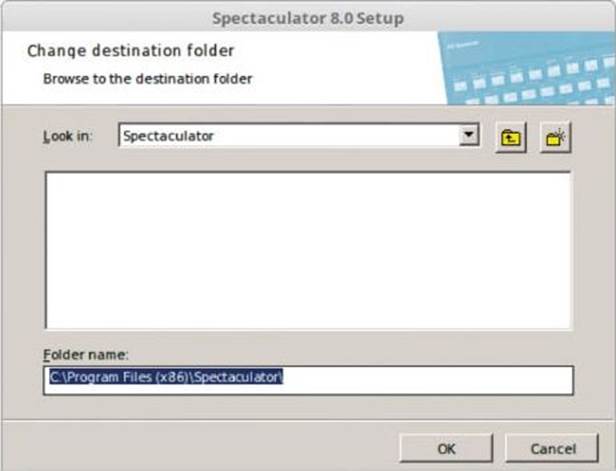
STEP 3
Run through the installation as you normally would. When you get to the installation destination part of the install, click to customise it and make sure it’s configured to the fake C: drive correctly.
STEP 4
If you now relaunch winecfg, use Application Settings > Add Application, to locate the newly installed app and add it to the Application Settings list. Highlight it and choose the Windows Version. Click OK, locate the app from Files in the fake C: drive and run it as you did with the Wordpad example.