Table of Contents
Downloading the Linux Mint ISO
Now that you’ve had a little look at the different versions of Linux Mint available, it’s time to actually get hold of the ISO for the particular flavour you’re interested in. In case you’re wondering what an ISO is, it’s a file that’s the perfect representation of the contents of an entire CD or DVD.
GETTING MINTY – Linux Mint Download
Your adventure with Linux Mint is just a Pew dicks away. First though you need to check whether you need the 32-bit or 64-bit version. Simply put, if your PC was built after 2010, then opt for the 64-bit version.
STEP 1
Start by opening a browser and navigating to www.linuxmint.com/download.php, This is the download area For the mainstream versions of Linux Mint (32-bit and 64-bit) covering Cinnamon, MATE, Xfce and KDE. IP you want LMDE 2, then you need to go to www.linuxmint.com/download_lmde.php, where there are 32 and 64-bit versions of Cinnamon and MATE available.
STEP 2
The hardest part of this section is deciding which version to opt For. We’ll look a little deeper into the different desktops later on but For ease of use, we’re going to use the Cinnamon 64-bit version of the mainstream Linux Mint. Click the 32 or 64-bit version links to be taken to the mirror download page.
STEP 3
In the download section you can see some information regarding the version, how big the ISO is and release notes (worth reading). Below is a long list of regional servers or mirrors that contain the ISO. Locate one nearest to you and click the link to begin the download.
STEP 4
The closer the mirror’s location to you, the quicker it downloads. When you click one of the links you are asked to open or save the Pile. At this stage, make sure the Save File option is highlighted and click the OK button to initiate the download. When Finished, the ISO will be in the Downloads Folder of your computer.
Installing Linux Mint
You’ve been introduced to Linux Mint and its different versions, you have what you need to get the operating system on to your computer and you’re ready to go. The only thing left now is to test it and see how it works; and then finally install it.
Thankfully the process is easy to get to grips with and shouldn’t take you more than an hour at most. Make sure you have an active Internet connection, either wireless or wired and if possible a second computer or device with an Internet connection in case you need to look anything up.
Over the coming pages you’ll learn how to transfer the downloaded Linux Mint image to a USB stick or DVD, how to set up VirtualBox and how to install Mint onto a PC and in a virtual environment. So let’s get cracking.
Transfer Mint to DVD or USB
You need to transfer the downloaded Linux Mint ISO to either a DVD or a USB key before installing it onto a computer. This will be a live environment, which we’ll look at in a moment, but first you need to create the bootable media.
DVD BOOTABLE MEDIA
We’re using a Windows 10 PC here to transfer the ISO to a DVD. If you’re using a version of Windows from 7 onward the process is extremely easy.
STEP 1
First locate the ISO image of Mint you’ve already downloaded. You can usually find this in the Downloads folder of Windows 7, 8.1 and 10 computers; unless you specified a different location when saving it.
STEP 2
Next insert a recordable DVD disc into your computer’s optical drive. After a few seconds, while the disc is read, Windows will display a pop-up message asking you what to do with the newly inserted disc; ignore this, as you’re going to use the built-in image burning function.
STEP 3
Right-click the Mint ISO and from the menu select Burn Disc Image. Depending on the speed of the PC, it may take a few seconds before anything happens. Don’t worry too much, unless it takes more than a minute in which case it might be worth restarting your PC and trying again. With luck, the Windows Disc Image Burner should launch.
STEP 4
Right-click the Mint ISO and from the menu select Burn Disc Image. Depending on the speed of the PC, it may take a few seconds before anything happens. Don’t worry too much, unless it takes more than a minute in which case it might be worth restarting your PC and trying again. With luck, the Windows Disc Image Burner should launch.
USB BOOTABLE MEDIA
USB media is Paster than a DVD and it’s often more convenient as most modern PCs don’t have an optical drive installed. The process of transferring the image is easy but you need a third-party app first and a USB flash drive of 4GB or more.
STEP 1
First open up a web browser and go to www.rufus.akeo.ie. Scroll down the page a little and you come to a Download heading, under which you can see the latest version of Rufus (2.12 in this instance). Left click the link to start the download.
STEP 2
Double-click the downloaded Rufus executable; you can click ‘Yes’ to the Windows security question and ‘Yes’ to checking for updates. With Rufus launched it should have already identified your inserted USB flash drive; if not just remove and reinsert.
STEP 3
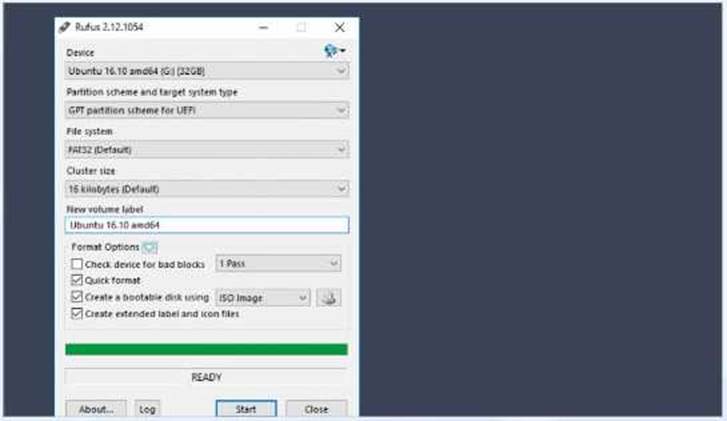
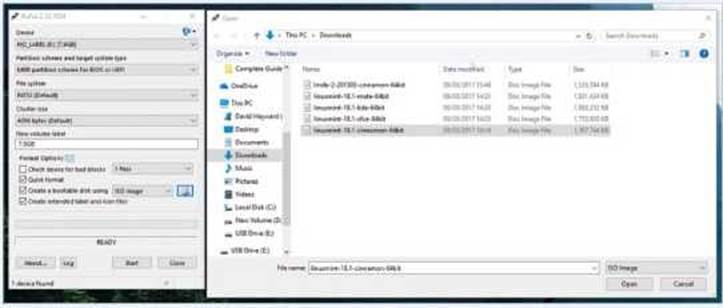
At first glance the Rufus interface can look a little confusing, don’t worry though it’s really quite simple. To begin with, click on the disc and drive icon next to the ‘Create a bootable disk using..’ section and the ‘FreeDOS’ pull-down menu. This will launch a Windows Explorer window where you can locate and select the Linux Mint ISO.
STEP 4
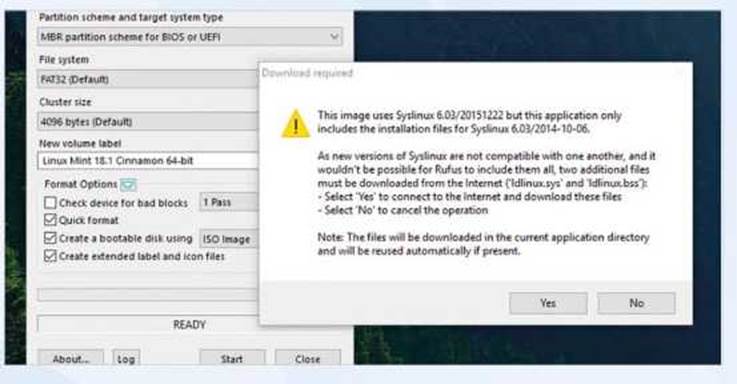
When you’re ready, click on the Start button at the bottom of the Rufus app. This will open up another dialogue box asking you to download and use a new version of SysLinux. SysLinux is a selection of boot loaders used to allow a modern PC to access and boot from a USB flash drive. It is necessary, so click on ‘Yes’ to continue.
STEP 5
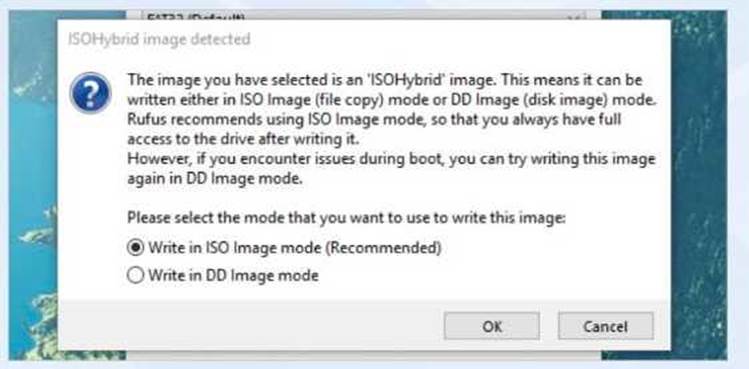
The next step asks which image mode you want the Mint ISO to be written to the USB flash drive in. Both methods work for different situations but generally, the recommended ISO Image Mode is the more popular. Make sure this mode is preselected and click OK to continue, followed by OK again to confirm the action.
STEP 6
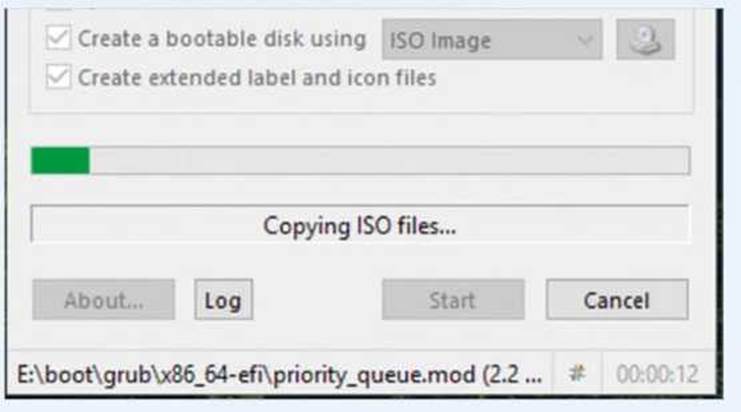
The Mint ISO is now being transferred to the USB flash drive. The process shouldn’t take too long, again depending on the speed of the USB device and the PC. You may find Rufus will auto-open the USB drive in Windows Explorer during the process; don’t worry you can minimise or close it if you want. When the process is complete, click on the Close button.
Testing Linux Mint s Live Environment
With the DVD or USB boot media ready you can now test Mint in a Live Environment before deciding to install it. A Live Environment is a functioning version of Mint that’s running from the boot media as opposed to running off your computer’s hard drive.
UEFI BIOS
The Unified Extensible Firmware Interface (UEFI) is used to identify hardware and protect a PC during its boot-up process. It replaces the traditional BIOS but can cause issues when installing Linux Mint.
STEP 1
Insert your DVD or USB flash drive into your PC and, if you haven’t already, shutdown Windows. In this instance we’re using the USB boot media but the process is virtually identical. Start the PC and when prompted press the appropriate keys to enter the BIOS or SETUP; these could be, for example, F2, Del or even F12.
STEP 2
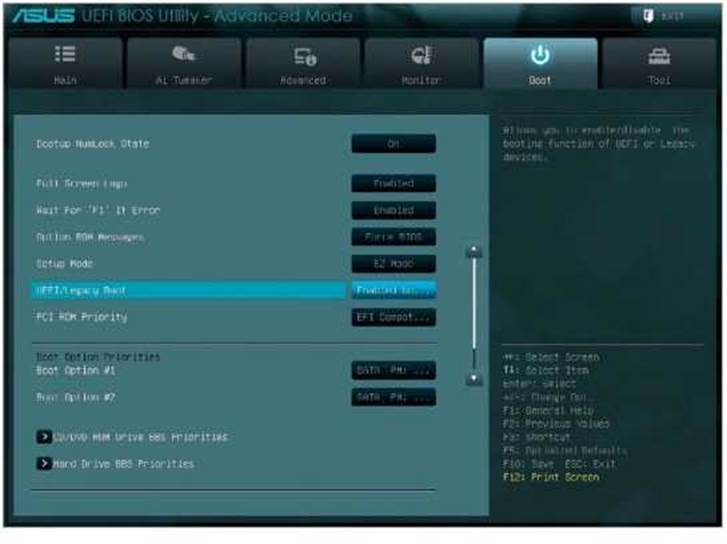
There are different versions of a UEFI BIOS, so covering them all would be impossible. What you’re looking for is a section that details the Boot Sequence or Boot Mode. Here you have the option to turn off UEFI and choose Legacy or disable Secure Booting. Mint does work with UEFI but it can be a tricky process to enable it to boot.
STEP 3
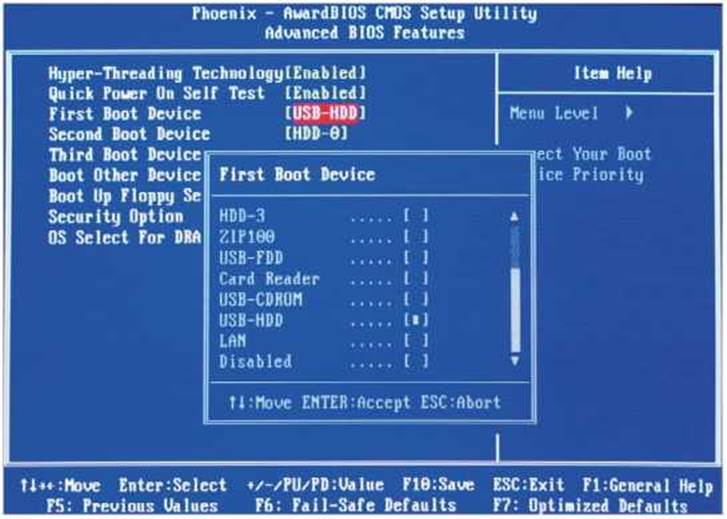
With UEFI turned to Legacy mode, there are now two ways of booting into the Mint Live Environment. The first is via the BIOS you’re already in. Locate the Boot Sequence and change the first boot device from its original setting, usually Internal HDD or similar, to USB Storage Device for the USB media option; or DVD Drive, for the DVD media option.
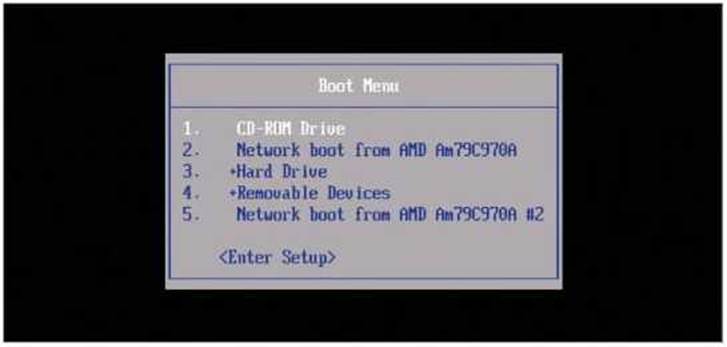
STEP 4
Alternatively use the Boot Option Menu. With this option you can press F12 (or something similar) to display a list of boot media options; from there, you can choose the appropriate boot media. Either way, you can now save and exit the BIOS by navigating to the Save & Exit option and choosing Save Changes and Exit.
TESTING MINT
With the UEFI BIOS side of things behind us, it’s time to see what the Linux Mint desktop has to offer, albeit in the test, Live Environment.
STEP 1
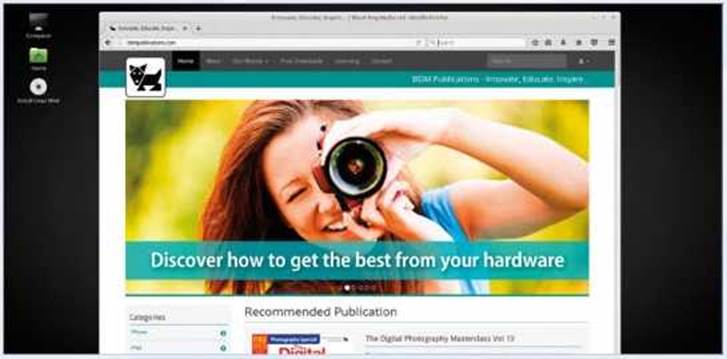
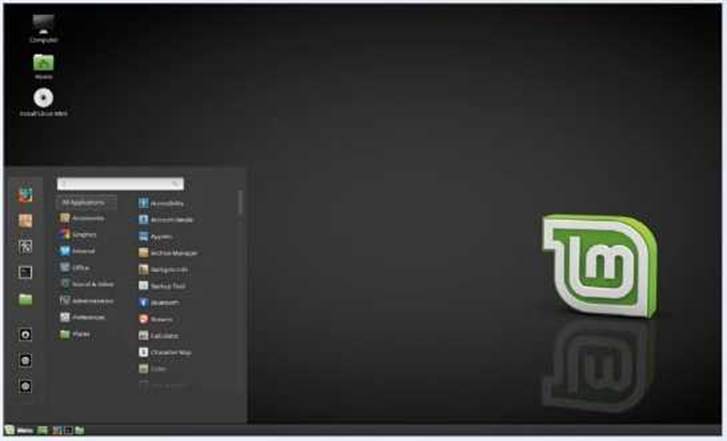
Linux Mint now boots up and you are taken directly to the Mint default desktop; we have the Cinnamon mainstream version in the screenshot here. You can see three icons on the desktop: Computer, Home and Install Linux Mint.

STEP 2
Along the bottom of the desktop is the Mint Panel and the Mint Menu. Click the Menu and it displays the core applications along with a search bar and various icons lined up down the left-hand side. These are quick launch icons that will change to the more recently used apps as you use Mint.
STEP 3
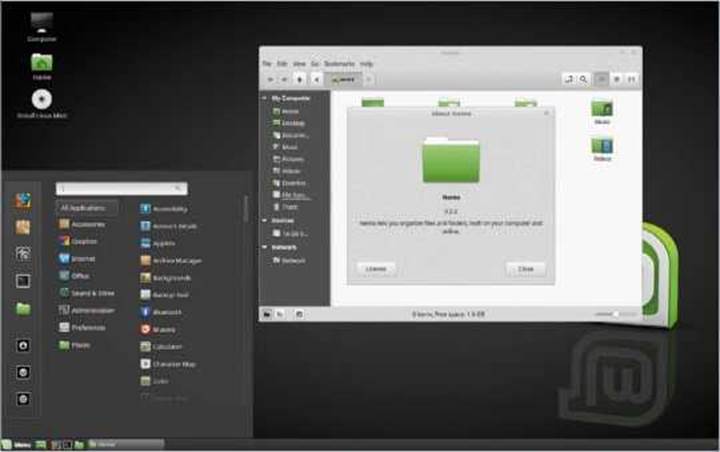
The three icons to the bottom of the quick launch strip indicate the session options: Lock Screen, Logout and Quit (shutdown Linux Mint). Just above the Lock Screen icon is Files, clicking this will launch Nemo, the Linux Mint Cinnamon file manager.
STEP 4
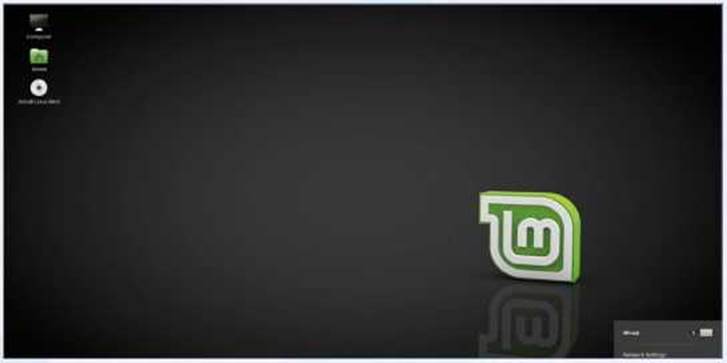
To the far right of the Panel, you can see several icons; these indicate the current logged in user account (which is Live Session User at present), active network connections (where you can adjust or setup your WiFi or wired internet connection), volume controls, time and date, and All Windows, which when clicked displays all opened apps.
STEP 5
There are also some quick launch icons on the Panel next to the Mint Menu: Show Desktop, which will return you to a blank desktop while minimising all open apps; Firefox web browser; the Terminal command line; and Nemo file manager. You can use any of these in a live session but anything stored won’t be saved on quitting.
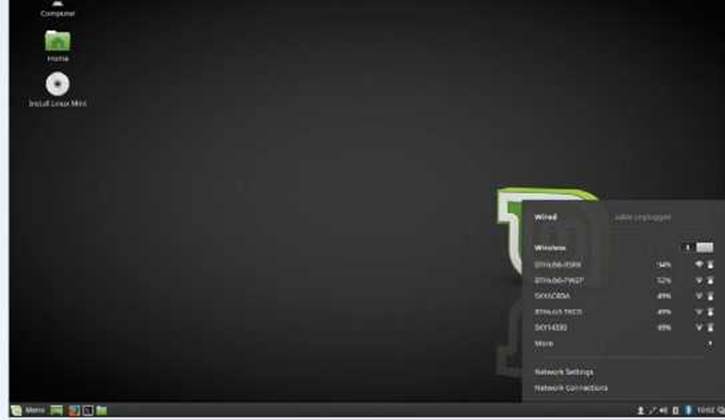
Before you install Mint, you need to make sure you have an active Internet connection. If you have a wired, Ethernet connection, and it’s not already plugged into the computer, do so now. If you’re using Wi-Fi, click on the network connection icon in the bottom right of the Panel, find your router id and enter the details.
Installing Linux Minton a PC
You’ve picked your Linux Mint desktop version and you’ve played around in the Live Environment. Now it’s time to get Mint onto your PC as a permanent replacement for Windows. Thankfully the process is extremely easy.
GOING MINT
We’re assuming at this point that you’re still in the Live Environment and that you’ve set up and activated your Wi-Fi connection, or plugged your computer into your router via a wired connection.
STEP 1
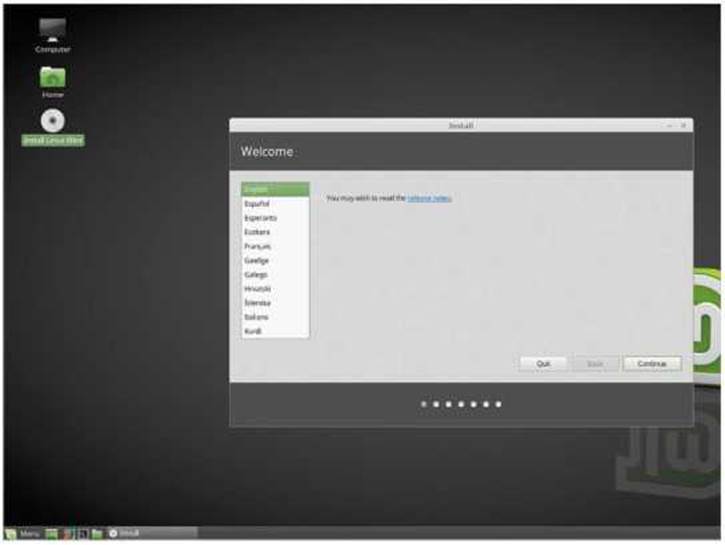
Providing you’re connected to the internet (if not then do so now) and you’re in the Live Environment, start the installation process by double-clicking on the Install Linux Mint icon on the desktop.
STEP 2
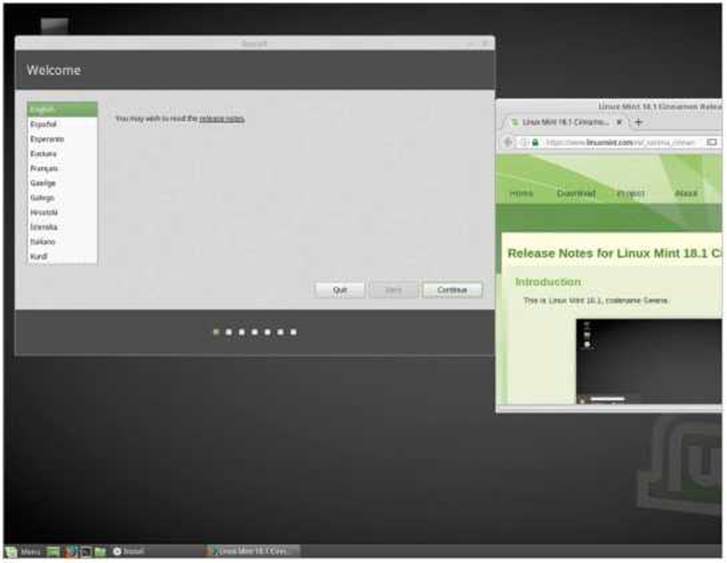
Launching the Install Linux Mint app will open up the Welcome screen. Make sure your language is selected from the list on the left and if you want to click the Release Notes link to read what the latest changes and additions are to Linux Mint 18.1 Cinnamon. When you’re ready, click the Continue button.
STEP 3
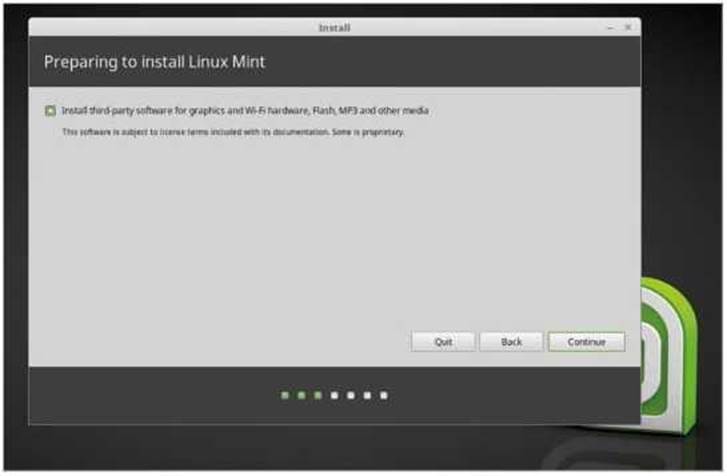
After clicking Continue you’re asked if you want to Install Third-Party software. Providing you’re connected to the internet, as from Step 1, then tick the box. This will make sure that hardware drivers, Adobe Flash and codecs for MP3 and video Piles are installed with the main Mint system. Click Continue for the next stage.
STEP 4
This next stage asks you how you want to manage the installation of Linux Mint onto your PC. In our example, we’re going to Erase Disk and Install Linux Mint, which will wipe the current OS and ALL DATA replacing it with Mint; make sure you have a good backup, just in case. Click Install Now to continue.
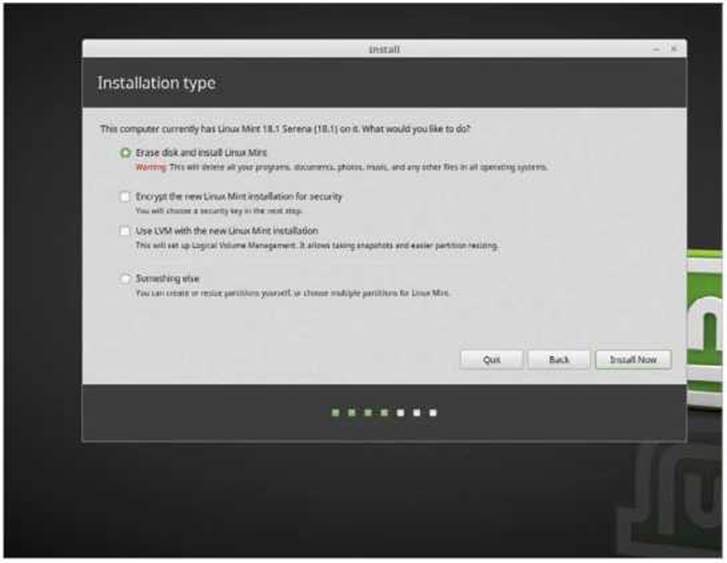
STEP 5
Before the installation process can begin, you’re asked if the choice you made regarding the erasure of the hard drive is correct. This is your last chance to back out. If you’re certain you don’t mind wiping everything and starting again with Linux Mint, click Continue.

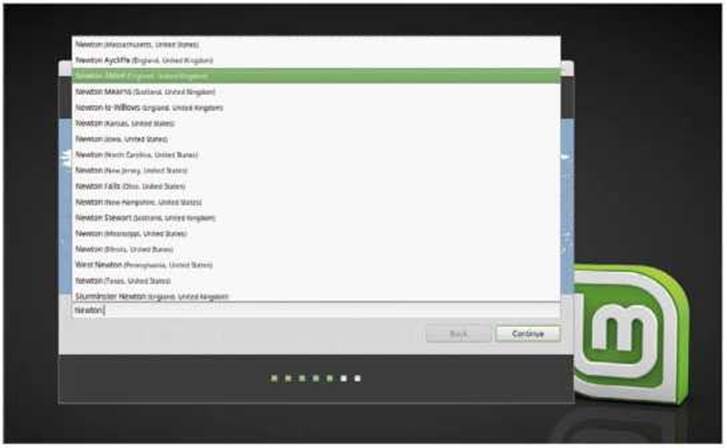
STEP 6
This next stage determines your location. You can enter the nearest major city, or even try your local town and see if it’s in the list of available choices. When you’re ready, click Continue.
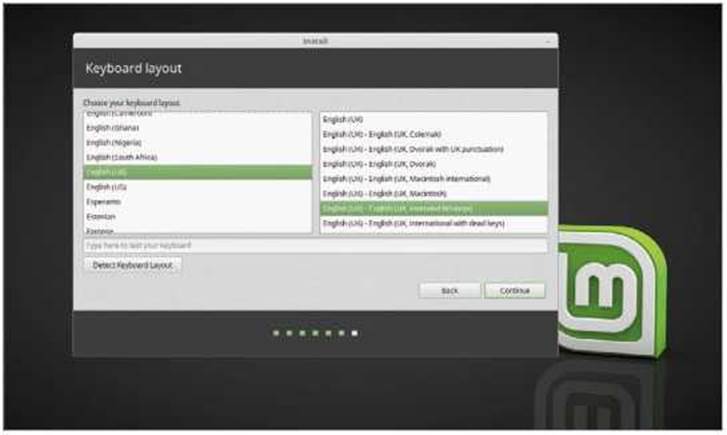
STEP 7
Next up, use the options to pick which keyboard you’re using. In most cases it will be the option with the Extended WinKeys. Use the Type Here… box to test your keyboard setup is correct. Click Continue when you’re ready to move on.
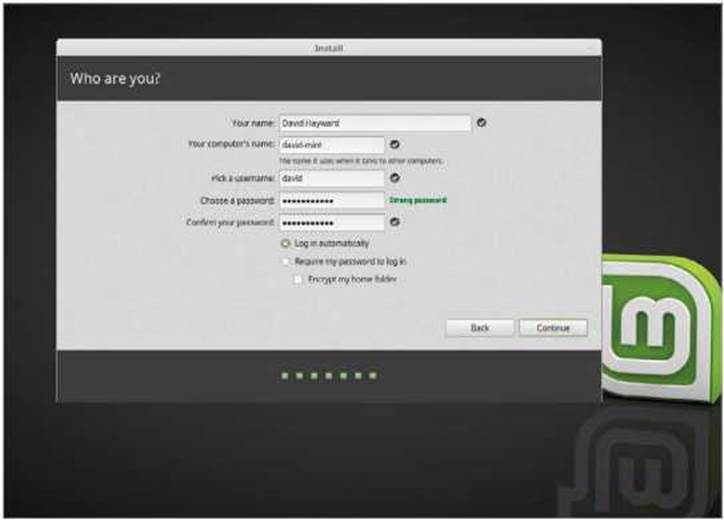
STEP 8
In this stage you need to set up your Mint username and password. Enter your Name to begin with, then Computer Name, which is the name it’s identified on the network as. Next choose a Username, followed by a good Password. You can tick the Login Automatically option but leave the Encrypt Home Folder option for now.
STEP 9
The installation process will now begin and you can see what’s being installed along the bottom of the install window. You can also use the arrows on the screen to browse through some of the features available in Linux Mint.
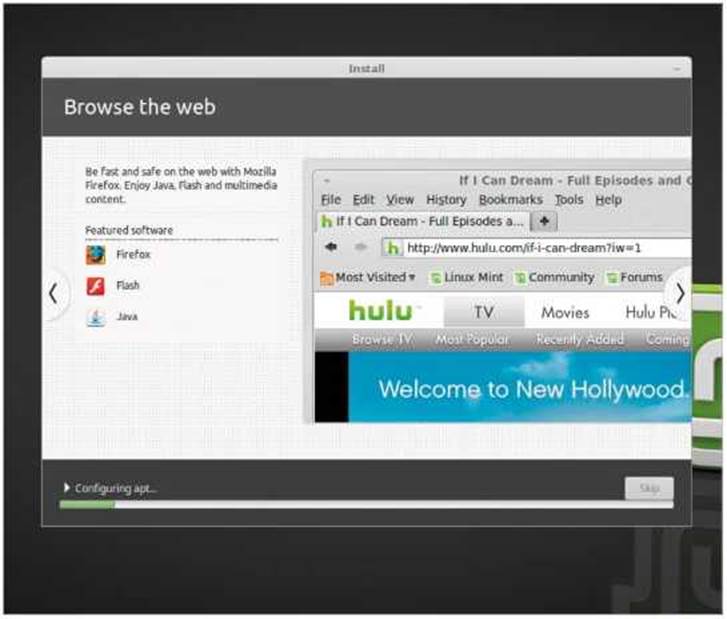
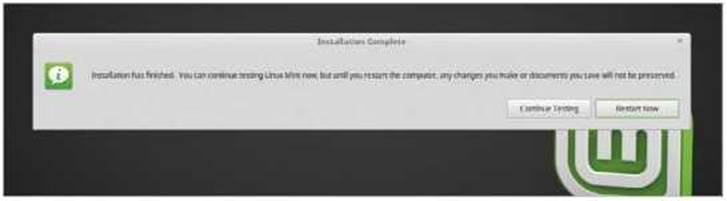
STEP 10
When the installation is complete you are presented with a completion box, asking you if you want to continue with the Live Environment or restart the PC with Linux Mint as the main operating system. Click on the Restart Now button, followed by Enter and remove the Installation Media when asked. Congratulations, Linux Mint is now installed.


Thank you so much for taking the time to write this step-by-step guide! I’ve been wanting to try Linux Mint for a while now, but I was intimidated by the installation process. Your instructions were clear and easy to follow, and I was able to install Linux Mint without any issues. Can’t wait to start exploring the distro and learning more about it!