Use an Android device as a Raspberry Pi screen
Connect to a Pi with your phone or tablet using VNC as a secondary or actual display
There are a few ways to attach a display to a Raspberry Pi. The ones that everyone is most familiar with are the HDMI port, which can go straight into your monitor or TV, or via the GPIO ports with a portable screen. One avenue that is rarely pursued is using VNC software to remotely view the Raspberry Pi desktop using another computer entirely.
It’s actually fairly simple and we are going to concentrate on viewing your Pi screen via Android for maximum portability. With further tweaks you will be able to use this on the go if you find yourself commuting and wanting to catch up on your favourite program, for example.
There are a few things that you should be aware of when doing this project – it can be quite taxing on the Pi and is likely to drain a bit of battery from your phone too. We will talk about some options to help take the strain off the Pi if the connection seems a little laggy and how this method can be used on normal PCs as well, so you can use a range of devices and get the most from your Raspberry Pi.
Before starting, you should absolutely make sure that your Raspberry Pi is up to date. With the limited resources on the Pi, any optimisations can make the experience better. You’ll first want to update the software by opening the terminal and using:$ sudo apt-get update && sudo apt-get upgrade… and then follow it up with a firmware upgrade by running:We’re going to be using TightVNC for our VNC needs here – specifically, the server side of the software. We’ll need to install it first though, so head back to the terminal and type:$ sudo apt-get install tightvncserverYou may have to run through a setting or two a sit installs, hit ‘yes’ (or ‘y’) to them to continue.
Once everything’s installed we can actually start up the VNC server – it’s probably a good idea to do so now and check to make sure it’s all working. We’ll do a test run with the following:$ vncserver :1 -geometry 640×480 -depth 16 -pixelformat rgb565As long as everything is installed correctly, it should start without any problems at all.
The first time you turn it on, you will have to set a password. You’ll need to pick a password you can remember as it will also be used by the client as it connects via VNC. You can only use a maximum of eight characters for the password though, so think carefully about how you want to make it secure.
As TightVNC doesn’t quite work like a normal service, you can’t do a usual service X restart (or equivalent) to turn it off or whatever you wish to do with it. Instead, if you want to restart it, you’ll have to manually turn it off and then restart it with the original command. To kill it, use:… replacing 1 with the display number that you originally create.
We created our test server with are solution of 640×480, just to get it running. However, this is unlikely to be there solution of your phone. Luckily, this resolution is not fixed every time, so the best thing to do is to look up the resolution of your Android device and then modify the line used to start up the server. For example, if you have a 1080p tablet, you would use:$ vncserver :1 -geometry 1920×1080 -depth 16 -pixelformat rgb565On your Android device, go to the Play Store and look for VNC Viewer (you can also install it from the web store via this link: bit.ly/1jCzBRJ). Install it to your device and run it to make sure it works fine. We can now begin to try and connect it to the Raspberry Pi.
We need the IP address of your Raspberry Pi so that we can connect to it. You can get it via two methods – our preferred method is to open the terminal and use ifconfig to list the status of the Pi’s network interfaces; this will include the IP address of whatever is connected. If you’re using wireless to connect, you can also access the wireless config interface (iwconfig) and see what the wireless has been assigned as an IP.
Now that we have the IP address, we can look at connecting to the Raspberry Pi. Open VNC Viewer and click the ‘+’ sign to set up a new connection. Leave the name blank for the moment, enter an IP address and choose ‘Save password’. It will ask for the password when you attempt to connect, after which it will then save it and not require it in the future.
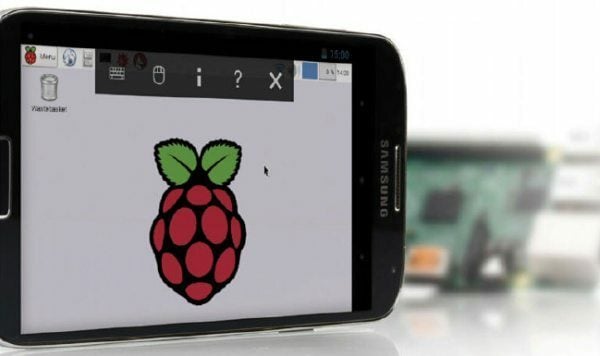
If this is the first time that you are using VNC software, you will notice that there can be a little lag between what you do and what happens on-screen. Luckily, you can use your finger on the screen to move the mouse and tap to click, and the Android keyboard can be used as the keyboard. It can take a bit of getting used to and is not good for anything that you need to do fast, but it’s still very useful.
Killing the VNC server, as we talked about in Step 5, can still be done when connected – your Android device will just disconnect. The same occurs if you just turn off the Pi. If you disconnect the VNC client from the Pi though, the server on the Pi will still be turned on; this means that you can at least reconnect at anytime.
Currently, every time you turn on the Pi you’ll have to turn on the VNC server. There’s no config setting or service setting that we can set to have it turn on by default, so to actually do this we need to write a script. Create a file using nano in the terminal at the following location:$ sudo nano /etc/init.d/vncserverThis script will do everything we need it to do, but be sure to edit the resolution for your specific use case:
# parameters for tightvncserverOPTIONS=“-name ${NAME} -depth ${DEPTH} -geometry ${GEOMETRY} :${DISPLAY}”log_action_begin_msg “Starting vncserver for user ‘${USER}’ on localhost:{$DISPLAY}”su ${USER} -c “/usr/bin/vncserver ${OPTIONS}”log_action_begin_msg “Stopping vncserver for user ‘${USER}’ on localhost:{$DISPLAY}”su ${USER} -c “/usr/bin/vncserver -kill :${DISPLAY}”
We’ve also got this ready for you to download and put right into the /etc/init.d directory. You can download it using:$ wget http://www.linuxuser.co.uk/wp-content/uploads/2015/06/vncserver.zip
Unzip it and move it into the correct folder, then make any modifications that you want before heading to the next step.
Once the script is written, customised to your liking and saved, we now need to make it executable. To do this, use:$ sudo chmod +x /etc/init.d/vncserverAs long as it is in the right place and named properly, this will make it executable. This command is also good to remember in general a sit enables you to make any script executable.
The final step is to update the file rc.d (which handles startup scripts and such) so that it knows our new script is there. Do this with the following:$ sudo update-rc.d vncserver defaults
You can then also test it by using the following to make sure it works and also to turn it on for this session:
$ sudo /etc/init.d/vncserver start
If you find the server is running a bit too slow for your liking, our best tip is to reduce the resolution to something your Pi can more easily create a server for.
If that’s not helping, your network connection may well be the issue.
You can use this setup with other systems as the client – your PC, a laptop, anything that you can put VNC on. It will use the same settings for each device though (such as resolution and colour depth), and you can’t each have a separate screen to work from. This can be a good way to connect to a file server Pi or similar.