Paul O’Brien reveals the joy of live Linux distributions and how they can provide the ability to boot a Linux environment directly from a disc or USB stick for many different uses
A great feature of Linux is the ability to run the operating system without making modifications to the main drive on your machine, courtesy of live-boot distros. For users who are exploring Linux for the first time, this makes the platform incredibly accessible. Being able to write an Ubuntu image, for example, to a USB stick and try the system out on your own hardware is very powerful as it enables a user to both get a feel for the OS and ensure hardware compatibility in advance – you simply can’t do the same with Windows or Mac OS X.
Table of Contents
[sc name=”ad 2″]
Although live distros originated for this purpose, a large number of images are now available that use this functionality for different purposes such as system recovery and maintenance, security testing, privacy protection and much more.
Most Linux distributions (distros) have come on in leaps and bounds in recent years and are generally very stable OSes for general use. In reality, most of us will agree that using a Linux distro as your main platform, while not going overboard on the modifications, will mean you’re no more likely to get into trouble than you are on Windows. Even so. it’s still possible to get into situations where you need to do some repairs and the ability to boot a recovery distro is invaluable, and it’s very useful if you need to fix someone else’s Windows machine. Accidentally deleted files are another great example of the value of the concept. The first rule of file recovery is to not use the disk where the files previously resided, but if the disk in question also contains your OS. this can be a tricky problem and is something that live-boot distros help overcome.
The privacy aspect of live-boot distros is becoming more and more appreciated.
If you are using a machine that isn’t your own. it’s very difficult to ensure that none of your private data is saved locally, even if you only use incognito windows and are very careful – you can never be sure whether a covert keylogger or similar is installed. Carrying around a USB stick with a ready-to-go bootable distro means you can run the system independent of any host OS and be aware of exactly what you are running.
Although live-boot distros don’t save anything to the main drive on the host machine, this doesn’t mean that you have to throw away any data that you’ve created each time you boot. If booting from a USB stick (the preferred method as more new devices ship without DVD drives), a portion of the available space can be partitioned for persistent storage. As with a local drive, this partition can be strongly encrypted such that should your USB stick fall into the wrong hands, the data will be unrecoverable.
One point to note when running a distro in this way is that performance is limited by the speed of your USB port or USB stick. Try to use USB 3.0 compatible ports where possible (the age of the machine permitting) and if buying a drive specifically for this purpose, look for the best price vs speed option.
TOP TIP
Debian-based distro Netrunner has its own backports channels based on Debian’s Tested repositories, allowing you to either stay on the install channels or activate the Cl repos to receive continuously tested updates.
We’U kick off this feature with a selection of some of the best lightweight, general-purpose live-booters.
First, we have Porteus (www.porteus.org) a Slackware-based Linux OS optimized to run from CD, USB flash drive, hard drive or other bootable storage media.
It’s designed to be small and it’s incredibly fast. This is achieved by storing the distro in XZM files, which decompress very quickly. As such it’s under 300MB, allowing you to start up and get online as quickly as possible (typically in under 25 seconds). Porteus comes in both 32- and 64-bit versions and aims to keep on the bleeding edge. It also supports several languages.
Porteus
Porteus started life as a bleeding-edge version of Slax. a small and fast Linux OS based around a modular approach. Slax, and by association Porteus. provides a wide collection of pre-installed software for daily use. Instead of using a package manager, adding new features to Porteus is as simple as clicking on a module, which then injects the required files straight into the filesystem. Double-click the module again to remove it. Both operations take only a few seconds and help avoid having huge numbers of unused files within the distro.
Porteus previously provided a custom ISO online build tool, but this has now been replaced with a standard distribution, offering Cinnamon. KDE4. LXQt. MATE or Xfce desktop environments with saved changes (or use ‘always fresh’ to discard changes on shutdown), simple installers for Linux and Windows if desired, a ‘Porteus Settings Centre’ for central management of updating, installing, managing settings, viewing system information, and much more.
Netrunner
Netrunner (www.netrunner.com) is a Debian-based Linux OS that targets netbooks, desktops and ARM-based microcomputers. It uses the Plasma desktop environment and other KDE software for an ultramodern look and feel and is available in two flavors: the ‘Desktop’ build for netbooks and desktop computers, which ships with a complete set of software installed for daily use: and a ‘Core’ build, which enables you to build up your own system or run it on low-spec hardware.
Netrunner is an open source project that benefits from a commercial backer, sponsoring development of the KDE Plasma core. Plasma features contributed and released early on in Netrunner include: the simplemenu launcher: task manager with expanding icons: desktop workspace (icons on a clean desktop, no overlays); hotspot ‘Show Desktop’ in lower right corner; auto-started Kwallet: simplified system settings: Firefox-ESR and Thunderbird with Plasma Integration and the unified look for KDE and non-KDE-apps via GTK-Configuration.
Netrunner is a good-looking distro. even on less powerful machines, shipping with several window and desktop themes to choose from, so you can start customizing right away. The distro uses the Aurorae 3 engine of KWin. which allows blur and transparency even on low-end hardware.
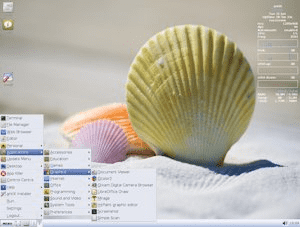
Above Porteus uses the KDE desktop, which gives it a contemporary graphical feel. You’ll also notice that applications are easy to find and use
BunsenLabs
BunsenLabs (http://bunsenlabs.org) is another Debian-based distro offering a lightweight desktop environment, this time based on Openbox. Previously known as CrunchBang Linux, the current release of BunsenLabs is Hydrogenl, based on Debían Jessie.
BunsenLabs stays completely true to a Debian core, such that the distro completely consists of configuration
What are Porteus cheatcodes?
After you’ve created your Porteus disc or USB stick, you’ll find a /boot/docs/cheatcodes.txt file detailing the Porteus ‘cheatcodes’. These are used to affect the booting process of Porteus. You can use them to disable desired kinds of hardware detection, start Porteus from a specific location, load additional modules, and much more.
To use the codes, reboot your computer and wait several seconds until the graphical Porteus logo appears with a boot menu. Choose your desired menu entry and hit Tab. which will allow you to edit the command line. Add your desired boot argument to affect booting the way you like. These cheatcodes can also be added to the APPEND line of your /boot/syslinux/porteus.cfg entries (or other bootloader config files) to apply them automatically on every boot.
For example, the changes=/path/ cheatcode tells Porteus to use a device (or a file or directory) other than your memory for storing changes. You could format your disk partition /dev/sdb2 with some Linux filesystem (eg XFS), then use changes= /dev/sdb2 to store all changes to that partition.
This way you won’t lose your changes after reboot. The changes-ro cheatcode tells Porteus to keep your change area read only – ideal for use after you’ve got your system set up as you like it.
Above Cheatcodes provide great flexibility when booting Porteus – use base_only to load only the base set of modules
How to diagnose boot issues with Porteus
Porteus’s cheatcodes can be used to persist storage and change a number of settings in your installation. This functionality becomes particularly useful if you end up with a non-booting system.
As well as removing the option to use your saved storage, the base_only cheatcode prevents the system from loading any modules at startup other than the ‘base modules included with the default ISO. This is useful in debugging to see if problems you are having are associated with some module you’ve added to the system.
- cliexec=my_script allows you to run a script before the graphical interface is loaded.
- debug will start the shell several times during the boot to perform debugging actions.
- from=/dev/device loads Porteus from the specified device, folder or ISO.
- fsck runs a filesystem check.
and resource packages installed on top of Debian and there are no changes to the way the underlying Debian base system is administered. The system is preconfigured with the Openbox window manager, together with the tint2 panel and conky system monitor. This is complemented by an assortment of harmonizing
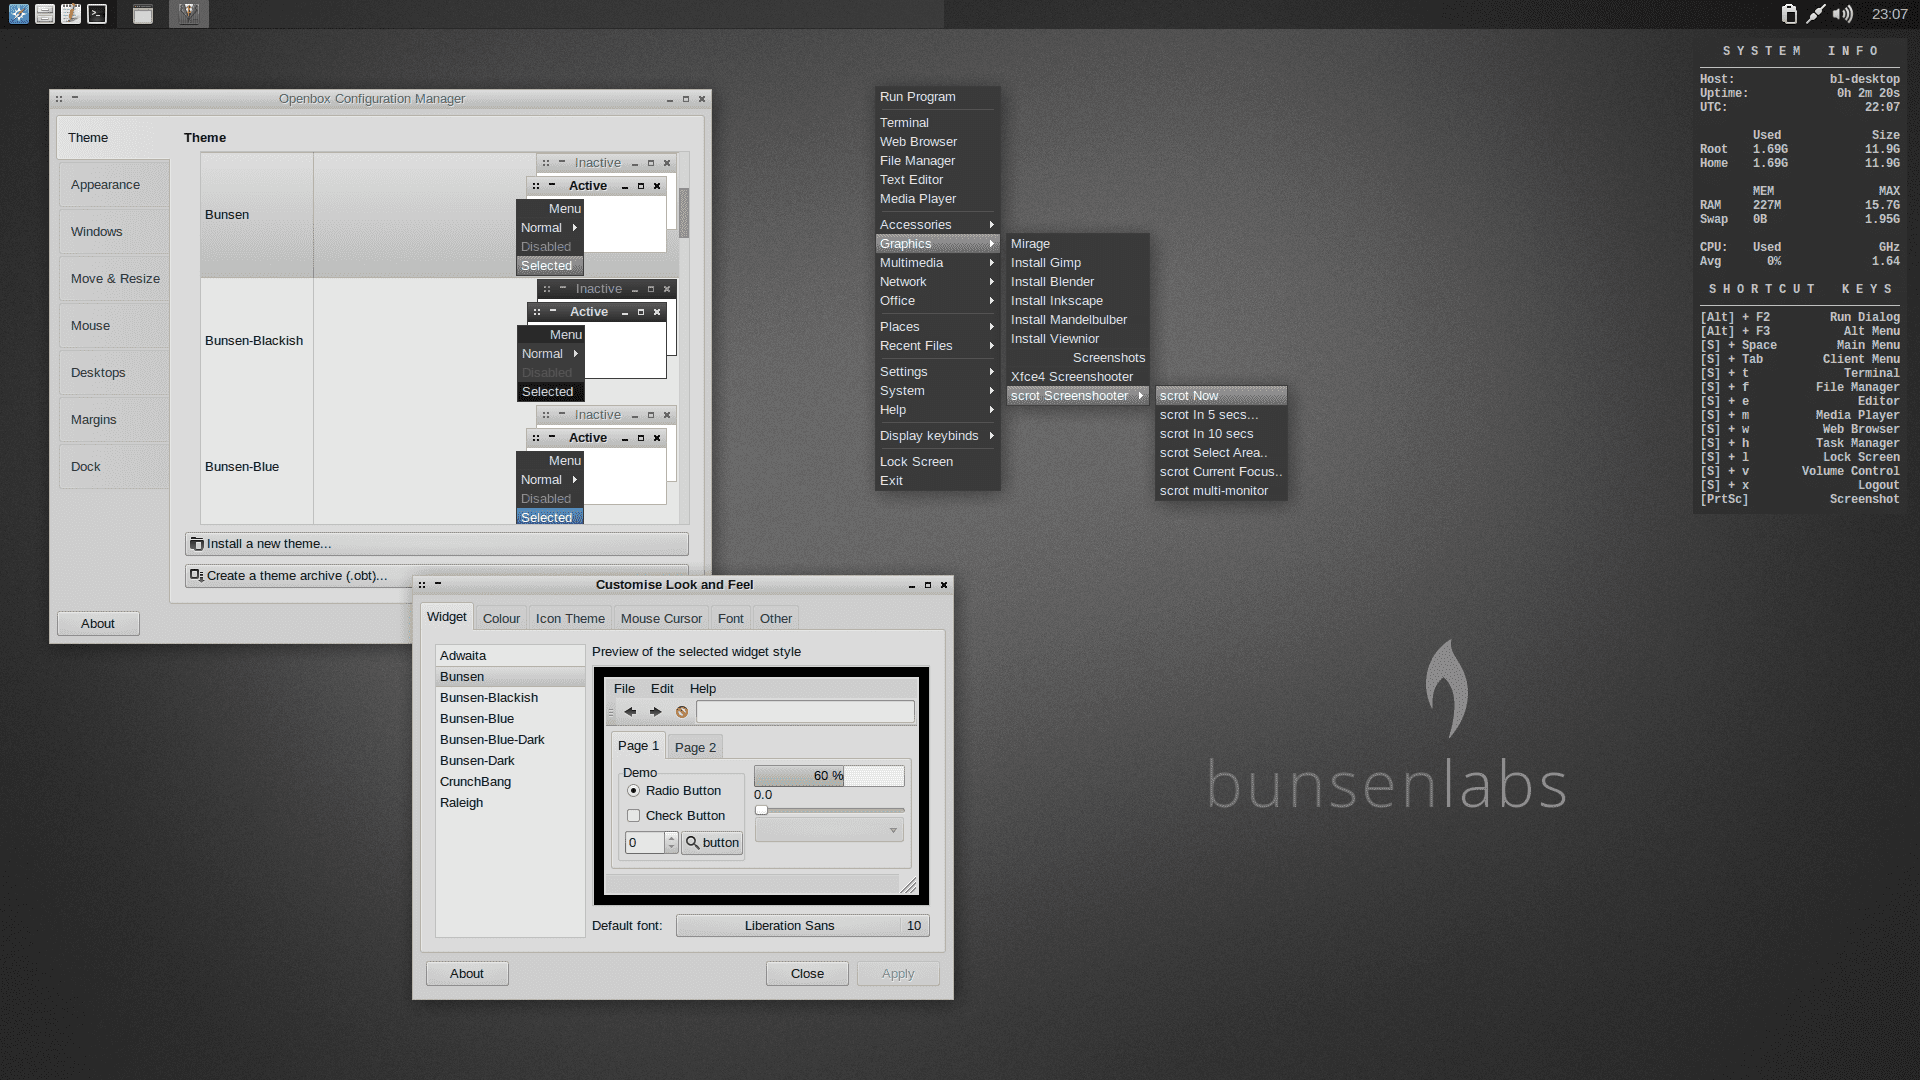
Above BunsenLabs’ dark theme together with Conky’s lightweight system monitor makes the community organised Crunchbang successor feel unique
GTK2/3 themes, wallpapers and conky configurations. Conky is a lightweight system monitor for X that shows any kind of information on your desktop. It can display more than 300 built-in objects, such as a huge variety of OS stats and mail via its built-in P0P3/IMAP support, as either text or graph widgets using Lua-based extensibility features. A large community discussing Conky customization can be found on the BunsenLabs site.
While BunsenLabs uses a lightweight environment, it’s not light on features. As well as custom configuration and application utilities to maintain the system, extra desktop, multimedia and hardware-related packages come preinstalled to offer a fuller ‘out-of-the-box’ experience.
AntiX
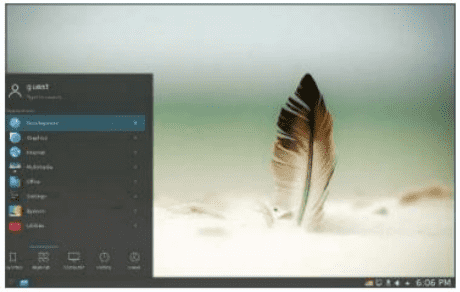
AntiX (http://antix.mepis.org) is a fast, lightweight and easy-to-install systemd-free Linux distro based on Debian Stable. The stated goal of antiX is to provide a light, but fully functional and flexible free OS for both new and experienced users of Linux. AntiX should run on most hardware, with a minimum of 256MB RAM. The installer needs at least 2.7GB of available storage, but antiX can also be used directly without installation as a live distro.
Above AntiX’s iceWM doesn’t quite have the polish of modern window managers, but it does offer great performance
The current release of antiX is ‘Berta Cáceres’ and comes as a 695MB full distro, a 510MB base distro and a 190MB ‘core-libre’ distro. all for both 32-bit and 64-bit computers. If you wish to have total control over the install, use the antiX-core and build up from there. Note however that core-libre doesn’t ship with any window managers at all. nor wireless support of any sort, so you really are starting from scratch!
So what do you get with a full antiX install? You get a 4.4.10 kernel, LibreOffice. Firefox. Claws-mail. spacefm. Wicd for network management and iceWM as the default window manager. IceWM is unique in that it is particularly keyboard friendly and despite being exceptionally light, it still supports multiple workspace and simple themes.
If iceWM isn’t for you. a special edition of antiX is available called ‘the MX edition’ – this uses Xfce for its desktop environment, which is just that little bit more fully featured.
TOP TIP
Looking for a great themed wallpaper for your BunsenLabs install? Head on over to the dedicated BunsenLabs DeviantArt page here: http:// bunsenlabs. deviantart.com
TOP TIP
When trying out security and privacy distributions, consider whether the tools and techniques are also portable for your everyday use.
Above Oubes OS provides an incredible level of security via its use of compartmentalisation, yet it is still accessible and genuinely usable every day
Qubes OS
Looking for a security- and privacy-aligned version of Linux? There are a number of excellent distros to choose from and we’ve included how to get a JonDo/ Tor-Secure-Live-DVD ISO up and running (see. right), but let’s start with the modest Qubes OS. Despite a tag-line of ‘A reasonably secure operating system’, the Qubes OS homepage (https://www.qubes-os.org) proudly includes a tweet from none other than Edward Snowden, stating: “If you’re serious about security, @QubesOS is the best OS available today. It’s what I use. and free.” High praise indeed and it doesn’t stop there – quotes are included from other influential privacy advocates as well as a number of big-name publications such as The Economist. which states: “For those willing to put in the effort, Qubes is more secure than almost any other operating system available today.” So what is it? Well. Qubes takes a different approach to many other Linux distros. by using an technique called ‘security by compartmentalization’. which allows you to arrange the various parts of your digital life into securely isolated compartments called ‘qubes’.
This approach allows you to keep the different things you do on your computer isolated from each other so that one qube getting compromised won’t affect your whole system. You might have one qube for visiting untrusted websites, such as your social media destinations, and a completely different qube for a secure task such as online banking. If your untrusted browsing qube gets compromised by an infected website, your online banking activities won’t be at risk. If you’re concerned about malicious email attachments. Qubes can make it so that every attachment gets opened in its own singleuse disposable qube. In this way, Qubes allows you to do everything on your same physical computer without having to worry about a single compromised activity affecting all of your digital life.
You might expect that compartmentalising in this way would severely compromise the user experience, but happily that is not the case with Qubes OS. Programs are isolated in their own separate qube windows, but they are all displayed in a single, unified desktop environment with unforgeable coloured window borders so that you can easily identify windows with different security levels. Common attack vectors like network cards and USB controllers are isolated in their own hardware qubes while functionality is preserved through secure networking, firewalls and USB device management.
Integrated file and clipboard copy-and-paste operations make it easy to work across various qubes without compromising security. A built-in template system separates software installation from software use. allowing qubes to share a root filesystem without sacrificing security.
Unlike some of the distros we’ve mentioned in this feature. Qubes is not designed for old or low-end hardware. To run Qubes effectively, you’ll need at least 4GB of RAM. preferably with support for VT-x and VT-d. Ideally you should go ‘all in’ with Qubes and not multiboot with another OS. for security reasons.
One thing we haven’t covered is which Linux distro is Qubes based on. That’s because within Qubes’ templating system, you can run a selection, including Fedora.
Debian. Arch Linux. Ubuntu and Whonix (see. left) as well as a number of tailored pen-testing distros.
One of the best aspects of Qubes is its extensive documentation. At the official Qubes website you’ll find extensive FAQs and guides for both users and developers, as well as video tours, screenshots and a great getting started guide.
The Qubes download page lists both full install (recommended) and live USB versions of the OS. The live version is officially out of support (and as such sitting at version 3.1 rather than the latest version 3.2). but it remains useful as a way to sample the OS. even if a full install is recommended for maximum security.
What is Whonix?
Based on Debían. Whonix is an OS designed for advanced security and privacy that runs directly within Qubes. It addresses potential attacks while still maintaining system usability with pre-installed, preconfigured apps. Whonix makes online anonymity possible via fail-safe, automatic and desktop-wide use of the Tor network. The OS provides a TwoVM split security architecture with isolated ‘Whonix-Gateway’ (ProxyVM) for total Tor traffic routing and ‘Whonix-Workstation’ (AppVM) for user desktop apps, which serves as a tailored OS environment for Tor-based privacy/anonymity. Within Qubes. you can even create multiple ProxyVM and AppVM instances to keep your digital work and personal lives separate.
Download, configure and use JonDo/Tor-Secure-Live-DVD
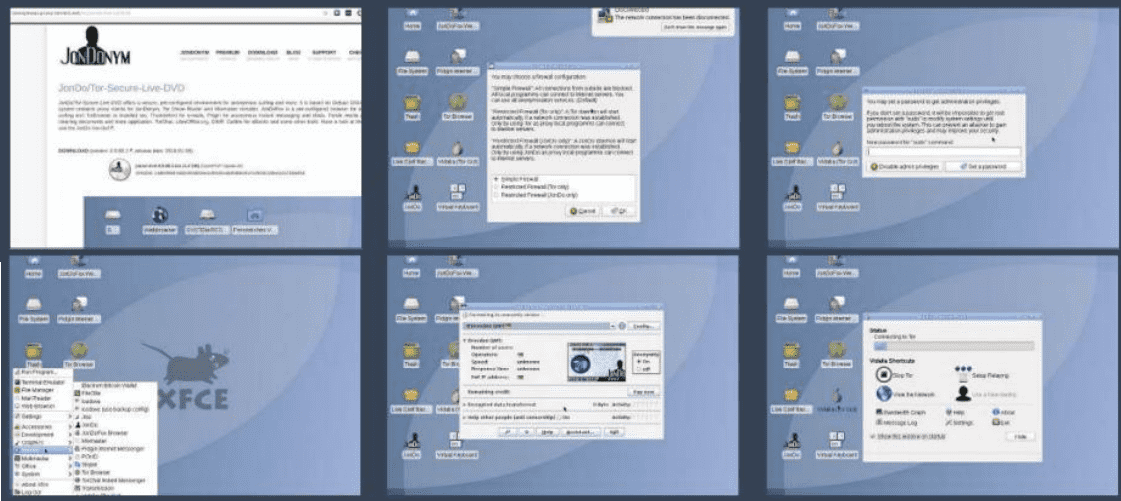
1 Download the ISO
The JonDo/Tor-Secure-Live-DVD ISO can be downloaded from http://bit.ly/JonDo. The release itself is about 1.2GB in size, and includes a SHA256 hash on the site. You should verify this before installing to ensure that the file hasn’t been tampered with (this is good practice, but particularly important with security-related distros!). Doing so is as simple as using the sha256sum command, followed by the filename. If the checksum doesn’t match, don’t use the image! An OpenPGP signature is also available on the page for additional security.
2 Select firewall mode
Upon booting the ISO, you’ll first be asked to select a firewall mode. Three options are available: the ‘Simple Firewall’ blocks all inbound connections but allows all outbound ones. All installed applications will be able to connect to the internet. The second option is for a ‘Restricted Firewall – Tor Only’; in this mode, a Tor daemon is automatically started if a network connection is being attempted. Local apps will only be able to connect if using Tor. The third option uses the same approach, but restricts to JonDo connections.
3 Set a password
As this is your first run, you’ll be prompted to set an administrator password at this time. There are a few things to note here – first is that the password will not persist between sessions. Second is that if you do not choose to set a password, then you won’t be able to use sudo to get administrative access until you reboot. Although this will limit your ability to change system settings, it may also make your system less prone to attack via administrative privileges.
4 Launch applications
The bottom bar is set to auto-hide, so if you’re looking for where to launch additional applications from other than those on the desktop, that’s where you’ll find them. In the Internet section shown here, you’ll find clients for all major services, as well as the Wireshark tool should you wish to sniff your network connection to be absolutely sure what information is going out from your machine. The Settings section contains additional secure configuration options such as DNScrypt and encryption settings.
5 Use JonDo proxy
The main JonDo app on the desktop manages the JAP/JonDo proxy tool on your system. If you have a premium code for the JonDo service, you can enter it here (free premium test codes are also available from the anonymous-proxy-servers site). Using the JonDo proxy provides a significant speed boost over the TOR option. Also on the desktop you’ll find a link to JonDoFox -a profile for the Firefox browser optimized for anonymous, secure web surfing. By default JonDoFox uses restrictive settings.
6 Use Tor instead
If you prefer to use Tor, the Vidalia Tor GUI is pre-installed and on the desktop. Vidalia allows you to start, stop or view the status of your Tor proxy: view, filter or search log messages; monitor bandwidth usage and configure your settings. Should you wish, you can also use Vidalia to contribute to the Tor network by setting up a Tor relay.
A cool feature of Vidalia is its Tor network map which shows the geographic location of relays on the Tor network, as well as where the user’s application traffic is going.
TOP TIP
If you liked what you’ve experienced on JonDoLinux. JonDonym clients are available for other operating systems too. including Windows and Mac OSX.
JonDo
The JonDo/Tor secure live DVD (http://bit.ly/JonDo) offers a secure, preconfigured environment for anonymous web surfing and other online activities based on Debían with Xfce.
The live system contains proxy clients for JonDonym, Tor and the Mixmaster remailer. JonDoFox is preconfigured as the web browser for anonymous surfing, although TorBrowser is also installed. Thunderbird is used for email: Pidgin for anonymous instant messaging and chats. There’s also the Parole media player. MAT for cleaning documents, plusTorChat. LibreOffice, GIMP and a number of other useful tools.
At the heart of the distro (albeit optional) is ‘JonDonym’. JonDonym servers are operated by independent entities committed to protecting your data. Because these operators are independent from each other, no single organisation has complete information about you. Your anonymity is fully protected. When you surf the web. your requests travel across different relay points before serving the webpage. Each of JonDonym’s premium services (there is a cost associated) consists of several servers in several different countries.
Does this sound broadly similar to Tor? It is. However. JonDonym’s premium services are as fast as VPN services and the fastest web proxies, and up to a hundred times faster than comparable services like Tor.
Above Kali Linux has a large number of security tools built in, but they are all neatly organised by category, makings tester’s life easier
The JonDo live DVD is very resource light – minimum specs call for a 486 processor. 1GB RAM. a 1.024×768 screen and the ability to boot from CD/DVD or USB.
After booting the live DVD. choose your preferred firewall configuration and you’re ready to go!
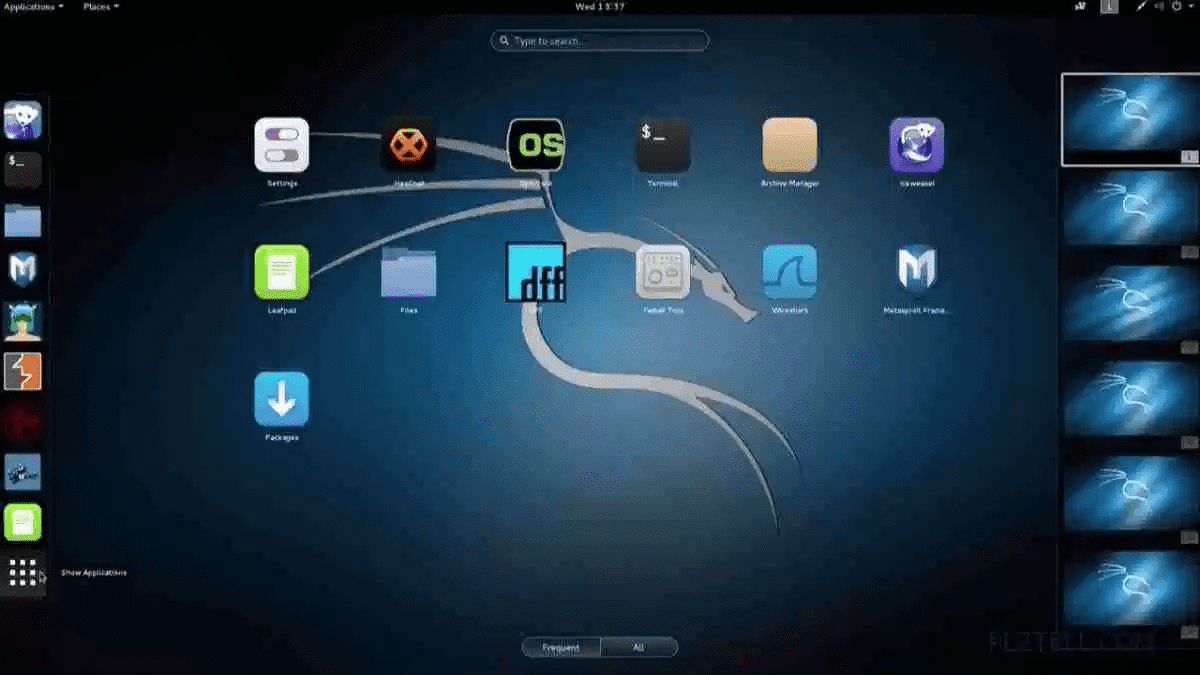
Kali Linux
Kali Linux (www.kali.org) is a live-boot distro funded and maintained by Offensive Security, a provider of information security training and penetration-testing services. The Debian-based distro is designed for digital forensics and penetration testing and supersedes Backtrack, a previous Knoppix-based distro developed
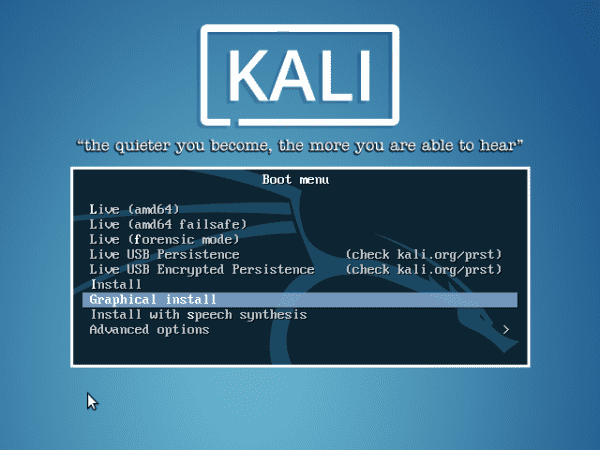
Above The Kali boot menu offers the ability to run in regular modes, forensic modes and with USB persistence
and maintained by the same team. Kali uses the GNOME Window Manager (with alternate Xfce, MATE. LXDE etc versions also offered) and is available in ISO form as 32-and 64-bit images for both x86 and ARM in both weekly and less-regular stable versions.
Kali Linux is pre-installed with over 300 pen-testing programs and is a supported platform of the Metasploit Project’s Metasploit Framework, a tool for developing and executing security exploits. Like its predecessor.
Kali contains a ‘forensic mode’ which ensures the system doesn’t touch the internal hard drive or swap space and auto mounting is disabled. The developers recommend that users test these features extensively before using Kali for real-world forensics, however.
Kali Linux is developed using a secure environment with only a small number of trusted people that are allowed to commit packages, with each package being signed by the developer. Kali also uses a custom-built kernel that is patched for injection. This was primarily added because the development team found they needed to do a lot of wireless assessments.
If you are looking for a distro to use for pen testing. Kali is a logical choice – it’s employed daily by thousands of users for this purpose and is also backed up by extensive
Creative booters
As well as live-boot distros to cover operations such as system rescue, privacy and security, other distros are available to serve more creative purposes. An example of this is AV Linux, a Debian-based disto that includes a large collection of audio and video production software. It also includes a custom kernel with IRQ threading enabled for low-latency audio performance and the JACK audio connection kit. The hardware-efficient Xfce4 desktop is in place to save your machine’s processing power for the tasks at hand. AV Linux’s goal is to bring together the raft of high-quality, open source products in the media space to showcase exactly what’s available.
The GParted interface

1 Hard disk partitions
This area shows a proportional graphical representation of your disk. You can see partition sizes here and partition types in the area below.
2 Right-click menu
Right-clicking in either window opens a menu from where you can add. delete or resize/move partitions.
3 Choice of filesystems
Partitions can be formatted also – note that GParted supports a huge number of different filesystems, including Windows NTFS.
4 Made a mistake?
The Undo button lets you undo the last step or all steps note that changes are not applied immediately in GParted.
5 Apply changes
When you are confident you are happy with your partition layout, you can hit the Apply button. After doing so. don’t interrupt operations!
6 Change disk
Use the indicator panel on the right-hand side of the panel to work with a different disk. The list can be reloaded from the GParted menu.
documentation on the Kali site as well as training courses from the developers. The team are currently in the process of implementing ‘Recipes’, which will allow you to construct ISOs refined to serve a specific purpose.
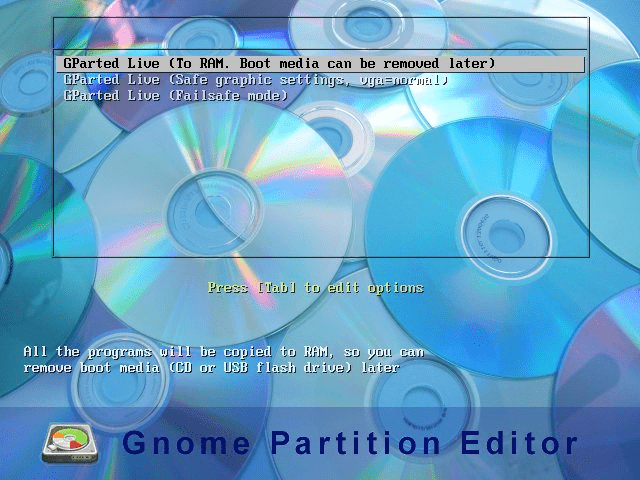
We couldn’t cover live-booting distros without highlighting a selection of the superb number of back up, diagnostic, partitioning, rescue and repair tools that use live-booting technology. One of the most regularly used live-boot distros is the GParted (http://gparted. org/livecd.php) live CD. GParted is particularly popular because it’s not just valuable to Linux users, but also a must-have for anyone who has to work with Windows machines, where partition management is traditionally very difficult.
GParted Live
Released on average bi-monthly, GParted Live is small at around 275MB. so will fit on any USB stick. With a Ul that’s reminiscent of the Partition Magic application of old. GParted is powerful yet incredibly easy to use. It uses a model where you prepare all the operations on your disk, but they are only carried out when you hit the ‘Apply’ button; so you get an ‘Undo’ option – invaluable when working with such a system-critical thing as disc
TOP TIP
Many live-boot distros include a mechanism to enable you to build custom ISO images including and excluding features as they are needed.
TOP TIP
If you have an Ubuntu install disk, this can also function as a rescue disc, as the GParted utility comes pre-installed.
partitioning. GParted supports hard disk and flash memory devices, as well as hardware and software RAID.
GParted live is based on Debían live, which means of course that as well as having the GParted application, you have a proper Linux distro (with terminal access via LXTerminal) allowing you to drop to the command line if needed to get serious with the system!
On the GUI side, GParted Live includes the pcmanfm file manager. Leaf pad text editor. NetSurf for basic web browsing. GSmartControl for hard disk/SSD diagnosis, and the Calcoo scientific calculator (for working out those drive sizes and boundaries!). If you drop to the command line, you’ll find a host of utilities that allow
Above GParted runs with a graphical interface, but the advanced options will support even the oldest machines.
you to achieve everything you can in the GUI; highlights include GRUB for repairing broken boot settings, nano and vi for text editing, me for file management, and the TestDisk data recovery tool.
It goes without saying that GParted should be used with care – there is a lot of scope for completely breaking your system and once you hit that ‘Apply’ button, there’s no going back!
Clonezilla Live
Clonezilla Live (http://clonezilla.org/clonezilla-live.php) is a small bootable Linux distro for x86-based computers, also coming in at just over 275MB. The distro is derived from Clonezilla SE (Server Edition), which debuted in 2004 and focused primarily on deploying multiple machines simultaneously using a centralised server and a PXE network boot system.
In order to provide a more general-purpose tool. Clonezilla combined with Debían Live to form Clonezilla Live, a live-boot distro that can be used to easily image and clone individual machines without the need for the centralised server. Clonezilla Live can be used to image or clone computers using a CD/DVD or USB flash drive. Images can be created directly to or restored from attached physical media (e.g. a hard disk or USB stick) or alternatively via the network by using a network filesystem such as SSHFS or Samba.
A key point to note about Clonezilla Live is that it doesn’t provide a rich GUI in the same way that GParted does – when you boot Clonezilla Live, you’ll notice that everything runs in text mode. This does mean that system compatibility is very extensive and the user interface itself is very intuitive.
Fundamentally, Clonezilla runs in two modes -‘device-image’, which allows you to work with disks or partitions using images; or ‘device-device’, which is
Use SystemRescueCD…
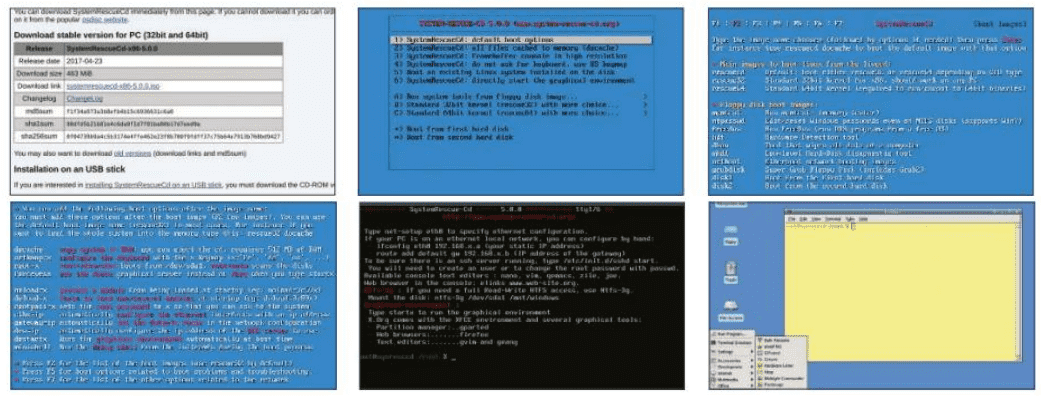
1 Download and burn ISO
w I To get started with SystemRescueCD. download the ISO file for your architecture. Generally speaking, you’ll need the x86 edition that supports both 32- and 64-bit processors. Once the image is downloaded, check the checksum using the md5 command. Next, either burn the image to a CD or use isohybrid to convert to a bootable image and use dd to copy to the appropriate device using dd if=/path/filename of=/ dev/sdx. where sdx is the USB stick.
2 Boot it up
With the image ready to go. insert the SystemRescueCd disk or USB stick and boot your system. Press F2/F3/F4/F5/F6 and read the advanced boot instructions or press Enter at the prompt to boot with the default options. There are two parts in the boot command – the boot-image and the boot-options. For example, you may want to boot with rescue64 as boot-image and docache setkmap=uk as boot-options. Remember to use spaces between the options.
3 Select boot image
There are four main boot images with SystemRescue Cd: rescue32 is for 32-bit systems, which is the default choice if your processor doesn’t support 64-bit instructions. If you have a 64-bit capable processor, use rescue64. There’s also an alternative kernel. altker32. for 32-bit systems; use this if you have problems with rescue32 or need a more recent kernel. Finally. altker64 is an alternative kernel for 64-bit systems.
4 Choose boot options
The docache boot option copies the files to RAMfs and permits the disc to be ejected. setkmap=xx sets the keyboard map keyboard, eg uk for British. root=/dev/idxn boots an existing Linux system. You can use ide=nodma or all-generic-ide if the kernel boot process hangs on a driver-related to storage. Use doxdetect or forcevesa if you can’t get the graphical interface to work, acpi-off. noapic and irqpool are useful if you have a problem when the kernel boots.
5 Mount partitions
From the console mode, you can mount partitions to troubleshoot an installed Linux or Windows system. You can mount Linux filesystems (ext3. ext4, XFS. Btrfs. ReiserFS. ReiserA. JFS) and Windows FAT and NTFS. You can back up/restore data or OS files. Midnight Commander (me) can copy/move/delete/edit files and directories. The System RescueCD has a list of the main system tools with documentation. Six virtual consoles are available: press Alt+F1 to F6.
6 Start graphical interface
If you want to use graphical tools, you can start the graphical environment by typing startx. The graphical environment allows you to work with the GParted partition manager and use graphical editors including Geany or gVim, or to browse the web and use terminals such as xfce-terminal. From both console and GUI modes, you can set up your network connection manually or by using the automated wizard (net-setup in console mode).
Above Clonezilla’s network support means images can be read from and saved to a huge variety of locations
for working directly from a disk or partition to another disk or partition. The former is more commonly used for backup and restore purposes, while the latter is ideal for scenarios such as replacing faulty hard disks or migrating from a hard disk to a larger disk or SSD.
If selecting to work in ‘device-image’ mode. Clonezilla will provide the choice of using local storage or SSH/ Samba/NFS shares for image storage. If needed, you can also drop to the command line and perform manual operations – the advantage of having Debían Live underpinning the tool!
The latest version of Clonezilla adds WebDAV support for network image storage retrieval as well as encryption support – vital if you want your images to be secure.
SystemRescueCd
SystemRescueCd (www.system-rescue-cd.org) is a Gentoo Linux-based system rescue disk available as a live-boot distro for administrating or repairing your system and data after a crash. It aims to provide an easy way to carry out admin tasks on your computer and. as such, comes with a lot of Linux system utilities such as GParted. FSArchiver. filesystem tools and basic tools (editors. Midnight Commander, network tools).
As with GParted Live, it can be used (and is useful!) for both Linux and Windows computers, on desktops as well as servers. SystemRescueCD is particularly well suited to Windows emergencies, as it includes ntfs-3g (third-generation NTFS driver) needed to support Windows partitions.
Although the rescue system requires no installation, it can be installed on the hard disk if you wish (and it can be kept there, effectively dormant, ready for use later). The kernel version used in the distro supports all important file systems (ext3/ext4, XFS, Btrfs. ReiserFS. JFS, VFAT. NTFS) as well as network filesystems such as Samba and NFS.
The Xfce desktop environment is included along with a basic web browser and a number of other tools. While this might seem strange on a rescue distro. the thinking behind it actually makes sense – while you’re recovering a broken system, there’s a pretty good chance you’ll need to refer to the internet for documentation or assistance, and providing network access and a browser makes this possible. That’s helpful!
Although the most common use of SystemRescueCD is on a desktop in interactive mode, like Clonezilla, it can be started across a network using PXE. This is invaluable if you happen to manage a server that is in a remote data center and something has gone horribly wrong. There’s no need to be sitting in front of the physical machine: you can use a network boot server to get System RescueCD up and running on your instance. You can even generate a custom distro image to perform specific functions at startup.
Knoppix
The grand-daddy of live-booting distros. Knoppix (http://bit.ly/KnoppixLive) is an OS designed to be run directly from a CD/DVD or a USB flash drive. There are two main Knoppix editions: the traditional CD edition that comes in at around 700MB, and the DVD ‘Maxi’ edition which is just under 4.7GB. Each main edition has two language-specific editions – English and German. Knoppix is based on Debian and uses the LXDE Window Manager. More than 1.000 software packages are included on the CD edition and more than 2.600 on the DVD edition, with highlights being OpenOffice, Chrome and Firefox, GIMP, Wine (for integration of Windows-based programs) and a wide range of other packages from the Debian repositories. Up to 10GB can be stored on the DVD in compressed form.
Knoppix can. of course, be installed locally, but it also enables storage persistent storage via a filesystem union model, previously UnionFS but now Aufs. The union mount allows virtual updates to the data on the read-only CD/DVD media (or USB stick partition) by storing changes on separate writable media (or a separate partition) and then representing the combination of the two as single storage device.
A special version of Knoppix is available known as ADRIANE (Audio Desktop Reference Implementation And Networking Environment). This includes a talking menu system, so it can be used entirely without a monitor, making it ideal for blind or partially sighted users.
The latest versions of Knoppix include a tiny ‘boot only’ CD image inside the ‘Knoppix’ directory for computers that can only boot from CD. but not from DVD or USB flash drive. The images initiate the boot process, which then proceeds with an attached USB stick or USB hard disk.
Above Knoppix is one of the oldest live-boot distros in town, but is still relevant, useful and effective today
Grml
Long overdue an update but still frequently used. Grml (https://grml.org) is a Debian-based OS designed to run mainly from a live CD. but can be made to run from a USB flash drive. Grml is designed to be well suited for sysadmins and other users of text tools, but does include X Window and a few minimalist window managers, such as wmii, Fluxbox, and Openbox to use the graphical programs such as Firefox included in the distro.
Grml provides several utilities to make life easier:
• grml-x is a wrapper for configuring and using the X window system. grml2usb is a tool for installing a Grml ISO on a USB device for booting.
• grml-crypt provides an easy wrapper around cryptsetup. mkfs. losetup and mount.
• grml-live is a build framework based on FAI (Fully Automatic Installation) for generating a Grml and Debian-based Linux live system (CD/ISO).
• grml-tips provides useful tips and tricks for daily life on the command line!
Is Grml dead? The project team insist not. While the last general release was 2014.11. up-to-date versions are available via a daily automated build system. The big holdup for a new release has been systemd integration, but it’s now progressing. Updates are few and far between, but the team have posted in 2017… so fingers crossed!
Zsh on GRML

1 Use Z shell
W I One of the key features of Grml is Zsh (Z shell), the default interactive shell when using the distribution. If you are a seasoned Bash user, don’t be concerned -99% of what you know about Bash works the same way in Zsh. There are some great additional features, though. How about Tab completion on cd? What a time-saver!
2 Type partial commands
You probably already use Ctrl+R to do a recursive search of your history in Bash This is a great way to reuse commands, but Zsh is even smarter. You can type part of a command, then press the up arrow to find the last command that started with the character you typed, also continuing back in the history with further presses if required.
3 Use its killer features
If you’ve used the kill command, you’ll know that generally speaking you’ll use ps to find the right item first. Once again the Tab key makes this much smarter when using Zsh – type kill followed by a letter to search for and you’ll see a navigable list of processes! These are just a few of the powerful Zsh features.