GO FASTER for free

When it comes to outright speed, your PC never seems to have enough of it. Or to put it another way, it doesn’t matter how smoothly it’s running, your PC could always do with being that bit faster. Armed with the right know-how, you can fine-tune your PC to squeeze more performance from it, but the effort involved can be more than it’s worth.
Which is where we come in. In this feature we’ve dug out 20 of the finest free tools we know that can help speed up your PC. We’ll open by revealing lightweight alternatives to the bloated apps you’ve been using, and then we’ll move on to reveal our favorite tools for fine-tuning your system. Your hardware could use some optimization too, so we’ve collected the best overclocking and tuning apps for pushing it beyond its limits. And finally, when you next bite the bullet and reinstall Windows, we reveal five tools that can help safeguard and speed up the process before running you through the steps you need to take to restore Windows to its pristine, like-new form, unencumbered by bloated apps and collected detritus.
Your computer is ready to take its performance to the next level with the help of our essential apps. Turn the page to get started with giving it a much-needed boost of speed.
Lightweight apps
Free up RAM and other system resources to help keep your PC running smoothly with these five alternatives
In this first section, we’ve identified five key apps that can bring Windows to its knees and dug out lightweight alternatives. Throw away Office, Photoshop and your bloated security tool and try these alternatives instead. They all make fewer demands on your PC’s RAM and are engineered to work efficiently and smoothly, even on older and lower-powered machines.
That’s fine if you’ve just bought a shiny new PC, but most of us like to keep our machines running for several years. Or perhaps you bought an entry level laptop or 2-in-1 device only to find 1GB RAM doesn’t go half as far as it used to. Before you know it, opening Office or running your image editor seems to sap your PC of its strength, leaving it sluggish and barely responsive.
One of the downsides of the rapidly evolving computer market is that specifications have improved so fast that application makers have rarely felt the need to streamline their programs. Why spend time cutting back the fat when next year’s PC will likely be twice as fast anyway?
WPS Office Free
Available from www.wps.com/office-free, this productivity suite is the perfect lightweight alternative to Microsoft Office. The free version replaces Word, Excel and PowerPoint and in addition to preserving the Office ribbon has some neat tricks of its own, such as multiple document tabs, enabling you to easily switch between two or more documents. There’s seven-day version history for all the files that you create with it, enabling you to roll back easily. Plus there’s a drag-and-drop tool for adjusting the layout of individual paragraphs in your documents.
Crucially WPS Office Free has a small footprint too, consuming noticeably less memory than Microsoft Office, and there’s even a PDF to Word tool that can convert documents of up to five pages. The free version is ad-supported, but they’re not too intrusive.
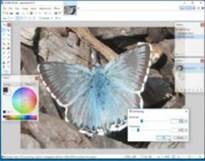
Paint.NET (www.getpaint.net) sits beautifully in the middle between Photoshop (too powerful and bloated) and Paint (too basic), offering the best features of the former without bringing your PC grinding to a halt.
In addition to the standard editing, compositing and colour-correction tools you’d expect, Paint.net also includes some powerful and useful options too.
For more fantastic – and free – Photoshop alternatives, turn to page 88 of this issue.
Powerful filters
Want to do something artistic with your photos? Paint.NET has built-in filters that offer a range of artistic effects, including rendering your photos in pencil, ink or oil paints. Other filters produce blurs, sharpen and distortion effects just like Photoshop.
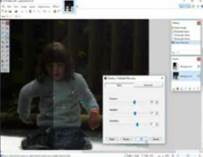
Multiple layers
Multi-layered images enable you to lay parts of one image on top of another for all kinds of creative effects. Paint.NET has full support for layers, with a transparency slider and choice of methods for blending one layer into another for the perfect image.

Plug-in support
Paint.NET also includes support for hundreds of specially designed plugins – visit www.getpaint.net/doc/ latest/InstallPlugins.html for details. These add extra filters and tools, such as Photoshop file support and a Shadow/ Highlights recovery tool.
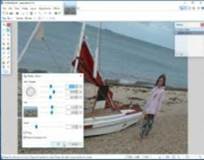
3D Rotate/Zoom
Want to recompose your image? Select Layers > ‘Rotate/Zoom…’. You’ll find sliders for zooming, panning and rotating your picture in both 2D and pseudo 3D. Tick ‘Preserve background’ to try and fill in the backdrop when ‘rolling’ in 3D.
SumatraPDF
Looking for the lightest, fastest way to view PDF files outside your web browser? Sumatra PDF (www.sumatrapdfreader.org) takes up just 5MB of RAM and can read several eBook formats – including ePUB and the Kindle-friendly MOBI – too.
It’s lacking in features – you can’t create PDFs from other files, for example – but because it’s available in portable form, it’s worth adding to your toolkit so when you want to read, search or print a PDF or other eBook file, you can save time and use this. Should you need more features, install Foxit Reader (www.foxitsoftware.com/ pdf-reader/) – in fact, why not run both side-by-side with SumatraPDF your default reader, using Foxit only when you need features such as creating PDFs from other documents?
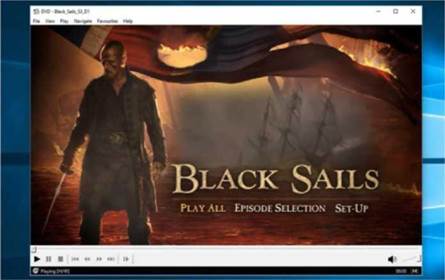
One area where your computer can be brought grinding to a halt is when you fire up your media player. MPC-HC (https://mpc-hc.org/) isn’t just a lightweight media player capable of playing a wide range of video formats, it can play DVDs and some Blu-rays too. It’s not short on features either: a Favorites menu enables you to create shortcuts to frequently watched films; you can apply various filters to improve playback quality; and it supports subtitles. It even supports video capture devices, so you can stream digital TV from a compatible tuner.
While you can play music through MPC-HC, we recommend the similarly lightweight and easy-to-use MusicBee (https://getmusicbee.com/).
Bitdefender Antivirus
If your PC is creaking under the demands of your bloated security package, or you’re looking to protect a low-powered device like your Windows- powered 2-in-1 tablet, then Bitdefender Antivirus (www.bitdefender.co.uk/solutions/free.html) has your back. Better still, its lightweight interface and minimal demands don’t come at the expense of protection – it regularly scores highly at AV-TEST.
Tune up your system
Discover how to streamline your PC for an extra burst of speed with the help of these powerful – and free – apps
Windows has been designed for maximum compatibility, which means that while it’ll run on a wide range of PCs, it’s not been particularly optimized for any of them. This is where the selection of apps in this part of the feature come into play. They give you the tools required to speed up your PC in several different ways. As is usually the case with apps, less is more – there’s no point recommending 100 apps whose combined demands outweigh the benefits of using them in the first place, which is why we’ve pared this down to five apps.
You’ll find our favorite tool for managing startup, enabling you to both monitor and improve the way Windows loads. If you’re frequently blighted by lockups, then Process Lasso will keep those runaway programs in check. There’s also a safe tool for tweaking low-level Services to free up more system resources, JetBoost for temporarily halting unnecessary processes when running games or other demanding applications, and a handy defrag tool to build on Windows’ own.
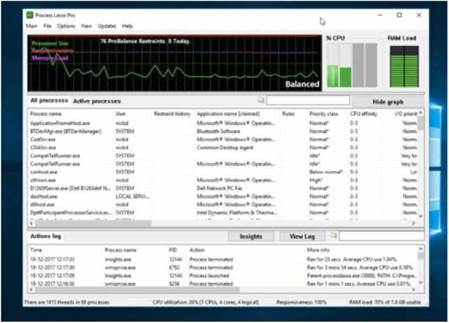
Process Lasso
If your machine frequently appears to stop responding or grinds to a halt momentarily, then the culprit is usually a program or system process that’s making excessive demands on your system to the detriment of the dozens of other running programs and processes, including Windows itself.
This problem is particularly acute on older or lower-powered PCs with 2GB of RAM or less where there’s less memory to go around. Process Lasso (https://bitsum.com/) is designed to monitor your PC’s processes – when it detects one making runaway demands, it reins it in by temporarily lowering its priority to ensure your PC keeps running smoothly. The free version includes all the core functionality, or upgrade for more features: a lifetime single user licence for the Pro version costs Home Pro covers every PC in your home.
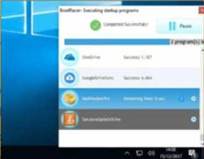
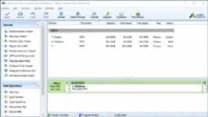
Bootracer (www.greatis.com/bootracer/) has become our go-to app for managing startup. Not only does it enable you to see which programs are launching with Windows, it times everything too, enabling you to keep an eye on the boot process and giving you a heads up should some resource sapping program suddenly insert itself into the startup process. Here’s a quick rundown of its key features.
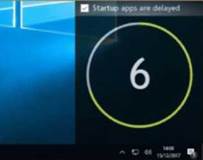
Delayed start
BootRacer also inserts a delay of ten seconds to the start-up process to give Windows a chance to finishing loading before any startup programs are launched. This helps stop your PC from being overwhelmed by demands for system resources.
Time your start
The first thing BootRacer does is measure your start time from the moment your PC is switched on until your startup apps finish loading. This helps you identify bottlenecks at different points of the process, so you can target your troubleshooting.

Staggered loading
Furthermore, BootRacer also loads programs in sequence, one after the other – again to balance the demands on your PC. Click the three-line ‘hamburger’ button to reveal a list of all the programs that are loading, along with their respective start-up times.
Monitor and manage apps
Click ‘Startup Control’ from the main program to manage startup programs. You can disable or delete them from here, and rearrange their running order – for example, to get fast-loading programs launched first.
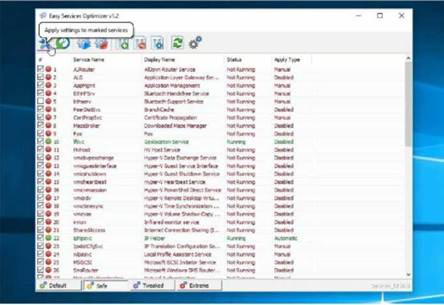
Easy Service Optimizer
Services are special low-level programs that run in the background performing numerous functions. Each one uses its share of system resources and – armed with the right know-how – you can selectively disable them to free up memory and processor time. But why do it by hand when Easy Service Optimizer (www.sordum.org/8637/) can do the hard work for you?
The program provides three presets: Safe, Tweaked and Extreme. For most people, Safe is best – it’s a ‘no-risk’ option and you can easily revert to Default if things stop working as they should. Advanced users can go further, and the app enables you to manually tweak individual Services too.
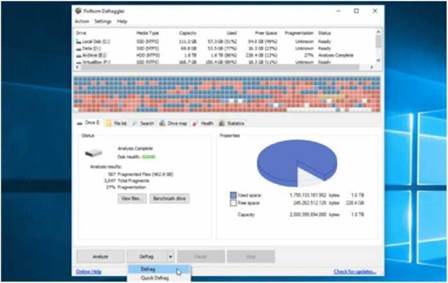
Defraggler
If you’re still running Windows off a traditional platter-based hard drive, then keeping it defragged is a must. Windows’ own Disk Defragmenter does a good enough job, particularly in Windows 10, but if you want to squeeze even more performance out of your drive, then Defraggler (www.piriform.com) is the tool to turn to. Not only can you opt to move large files to the end of the drive to help speed up performance, Defraggler enables you to defrag individual files and folders too – perfect for quickly defragging a single file without tying up your PC for hours. Defraggler also offers an Optimise option for SSDs, which manually wipes space marked for deletion to boost drive performance.
JetBoost
JetBoost (www.bluesprig.com/jetboost.html) is a tool that quickly shuts down unnecessary services and programs on a temporary basis only. For example, if you play demanding games or encode HD video, JetBoost can deliver a speed boost for the duration, then restore everything for normal operation after – all via its one-click button. Also handy for silencing intrusive apps and notifications while you work.
Overclock your PC
Push your PC’s components to their limits and deliver noticeable speed improvements with these hardware-tuning apps
While there’s no substitute for hardware upgrades to deliver the ultimate performance fillip, the fact remains it’s likely that various components in your PC aren’t being pushed to their absolute limits. By default, many components are configured in a conservative fashion, but armed with the right tools you can start squeezing them that little bit further.
It’s worth noting that overclocking – the process for speeding up your processor, RAM and graphics – will ultimately shorten the lifespan of these components, particularly if their core temperature rises. Thankfully, our recommended tools have built-in fail-safes and monitoring mechanisms so you can check that your tweaks aren’t going to bring your PC to its knees.
You’ll also find out how to speed up other hardware areas too – this time without introducing undue stress.
Expect to deliver minor speed bumps to your solid-state drives (SSDs) and Internet connection – also make sure you update your drivers to ensure the latest, fastest ones are in place.
Internet Accelerator 2
This free tool, which you can download from www.pointstone.com/products/InternetAccelerator, will work best on older machines running Windows 7 or earlier. It’s designed to make it easy to tweak various Windows settings relating to your network connection, which can have a positive effect on various Internet-related activities.
Internet Accelerator 2 won’t physically increase the speed of your connection, but it will optimize your settings to make full use of the available bandwidth. It ensures your downloads, web browsing and so on are going as fast as they’re able to.
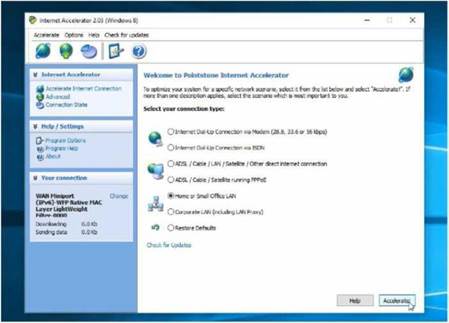
To use it, select your setup type (home or small office LAN for most), then click ‘Accelerate!’ to see if you can speed things up.
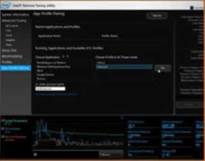
One way you can speed things up is by overclocking your processor so both it and your RAM run faster than they were designed to. There are dangers with this approach – overheating can shorten your components’ lives – but official tools help to minimize the danger. AMD users should install AMD Overdrive (www.amd.com/overdrive); Intel users should download and install the Extreme Tuning Utility (http://bit.ly/extrtunutil).
Overclocking made easy
Your overclocking options with Intel’s utility vary according to the processor you have – some will be incredibly limited, others will offer more scope. If supported, the utility will also enable you to overclock the onboard graphics.
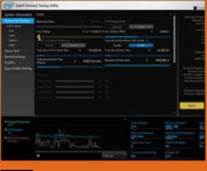
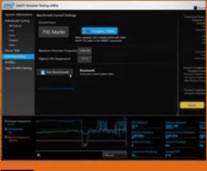
Test your overclock
After tweaking your settings (visit http://bit.ly/pcgoclock for a detailed guide courtesy of PC Gamer), select Stress Test to perform a five- minute stress test across processor, memory and/or graphics depending on what you overclock.
App-Profile Pairing
Click ‘Save’ under Advanced Tuning to create a profile of your overclocked settings. Pair this profile with a specific app under App-Profile Pairing, so your PC is only overclocked when needed – for example, when playing games or HD video editing.
Benchmark it
Select ‘Benchmarking’ to run a quick series of benchmarks to see the effects of your overclocking – benchmark before you start, and perform three benchmarks at a time, taking an average to give you a more accurate result.
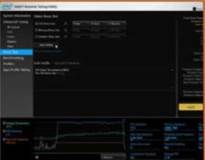
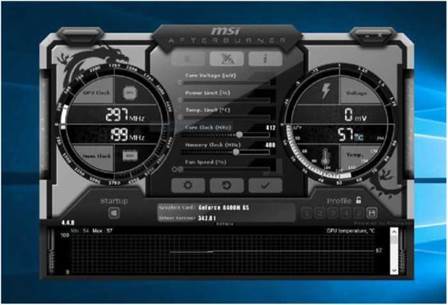
MSI Afterburner
Overclocking your graphics card won’t turn it into the latest model, but it can improve performance to make barely playable games run that bit more smoothly. If your PC comes with an AMD or NVIDIA graphics chip, then MSI Afterburner (www.msi.com/page/afterburner) has your back.
It works by enabling you to tweak your chip’s clock frequency and voltage while also giving you control over any onboard fans to help to try and minimize the temperature increase. Better still, there are real-time monitors to show you the effects of your overclock too. Remember – you risk damaging your graphics card by overclocking, so use with care (if at all).
Solid-state drive (SSD) utilities
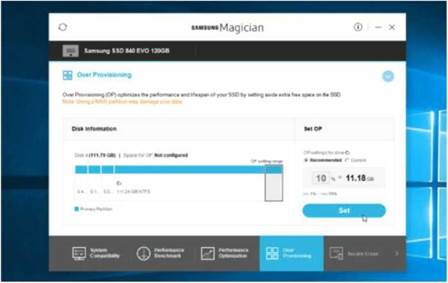
Is your SSD drive running to its maximum? Make sure to visit your drive manufacturer to download and install any software tools. These alert you to health issues, provide firmware updates, and may offer settings to tweak performance. For example, Samsung Magician (http://www.samsung.com/semiconductor/minisite/ssd/product/consumer/magician/) offers a Rapid Mode switch as well as Over Provisioning, which reserves free space on your SSD to further aid performance and lengthen its lifespan.
Similar tools can be found for OCZ (http://bit.ly/2DnDgU4), SanDisk (http://bit.ly/2CT9Fk3) and Crucial (http://bit.ly/2CQDlym) among others.
Motherboard tools
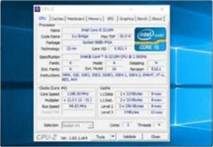
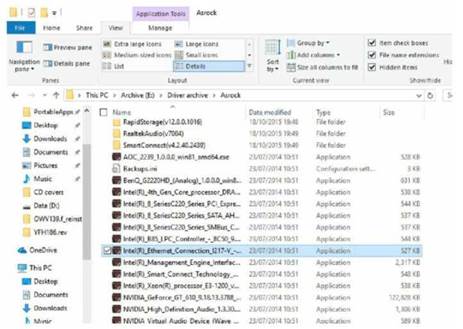
If you self-built your PC, or know its motherboard make and model (find it with CPU-Z at www.cpuid.com), visit the manufacturer’s website where you may find alternative tools for tuning or overclocking your system. Examples include A-Tuning (ASRock), AI Suite 3 (Asus) and OC Genie (MSI). You’ll also find the latest drivers here too, some of which may also help to improve your PC’s performance.
Reinstall tools
Ensure your next Windows reinstall goes without a hitch with the help of these essential tools and utilities
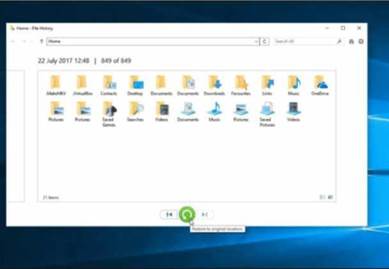
When you next come to reinstall Windows, it pays to take precautions before you begin in the form of various backups – File History is essential for your personal data, but what about your program settings and how about a fail-safe backup in the event of a botched reinstall or forgotten file?
The reinstall process is also a good excuse to make changes to the way you organise data on your PC’s main internal and external drives, while you’ll also want to make sure that you have the latest versions of the Windows installation files to save you a lengthy post-install update process.
All these potential problems are covered by our favorite reinstall tools.
You’ll find the best drive backup tool in the business rubs shoulders with our favourite free partition editor and the Windows Media Creation Tool, which ensures you have the latest version of Windows 8.1 or 10 on your PC.
Throw in a couple of other handy applications and your next Windows reinstall just got a whole lot simpler (never mind safer).
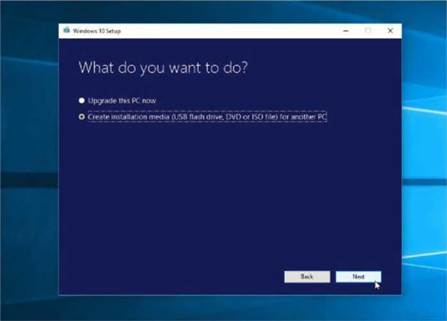
Windows Media Creation Tool
The days of relying on an increasingly out-of-date installation disc are long gone. Simply download the Windows Media Creation Tool for Windows 8.1 (www.microsoft.com/software-download/windows8) or Windows 10 (www.microsoft.com/software-download/windows10) and it will walk you through the process of creating your reinstall media, either on DVD or a USB flash drive.
Better still, the Windows Media Creation Tool will also download the latest installation files first – which means if you reinstall Windows 10, for example, you’ll get it with the Fall Creators Update already applied.
Always create fresh media prior to reinstalling Windows to ensure you have the latest version.
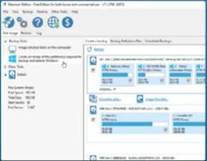
Reinstalling Windows from scratch is a one-way process. Once you’ve formatted the drive and reinstalled Windows everything you once had is gone. What happens if you forget a key file or setting, or the reinstall process goes wrong and you want to roll things back? Don’t worry, Macrium Reflect Free (www. macrium.com/reflectfree.aspx) is just the tool for you – here’s how you can use it to protect yourself and your PC files.
Backup partitions
Once done, click the ‘Create an image of the partition(s) required to backup and restore Windows’ button – Macrium will automatically select your Windows partition along with any boot partitions required to boot your PC.
Sort rescue media
Launch Macrium Reflect Free and choose Other Tasks > Create Rescue Media to create a bootable DVD or USB flash drive you can use to recover your Windows installation should something go catastrophically wrong with your PC.
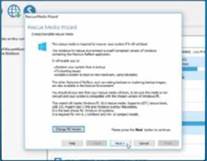
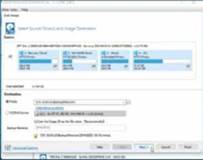
Choose a location
Click the ellipsis (…) next to Folder under Destination to select a suitable folder on your backup drive. Click ‘Advanced Options’ and tick ‘Verify image…’ under Auto Verify Image, before clicking OK followed by Next.
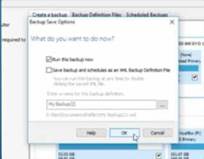
Check and backup
Ignore the Schedules screen – this is a one-time fail-safe backup prior to installation. Click ‘Next’, review the backup settings and click Finish. Untick ‘Save backup.’ and click OK for Macrium to backup and verify the image.
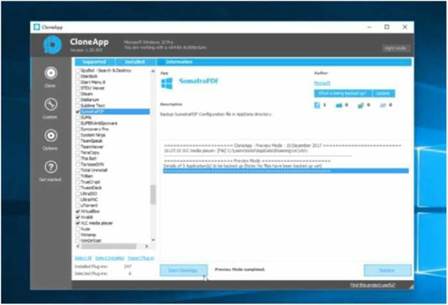
CloneApp
One of the most time-consuming tasks after reinstalling Windows is restoring program settings. CloneApp (www. mirinsoft.com) allows you to selectively backup key directories and Registry settings where apps store their preferences. Nearly 250 program and Windows settings are plugged into the program – just locate your app, tick the box and it’ll back everything up, but you can also add your own custom files and Registry entries too.
Once Windows and your apps have been reinstalled, just launch CloneApp and click Restore to put everything back again. To selectively restore program settings, open the CloneApp Backup directory and remove any settings you want to exclude before running CloneApp.
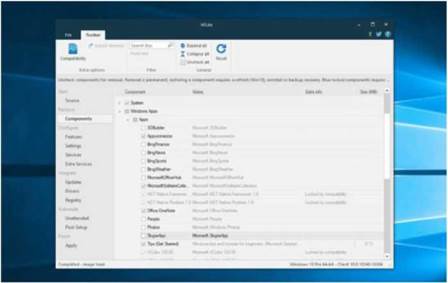
NTLite
Advanced users may feel frustrated at constantly having to tweak Windows after installation. NTLite makes it possible to build customized Windows 7, 8.1 or 10 installation media that not only has all the latest updates included (a boon for Windows 7 users), but which is tailored to your needs: you can integrate specific driver packages, remove unwanted Windows components (with built-in safety mechanisms to protect you from inadvertently removing stuff you might need) and perform various tweaks.
Certain features are restricted in the free edition – purchase the full version for €40 and you can even perform these tweaks to your current Windows installation, for example.
Partition Assistant
AOMEI’s Partition Assistant Standard (www.aomeitech.com/aomei-partition-assistant.html) enables you to divide up your PC’s storage drive into two or more partitions. Why partition your drive? Doing so enables you to separate your personal data – documents, photos and so on – from Windows and your apps. When you next come to reinstall Windows, your files are already safely stored on another drive.
A full, destructive reinstall
If you’re looking to wipe the slate clean, or need to recover from major issues, the nuclear option is always the best one
Reinstalling Windows from scratch – namely, wiping your system drive completely clean to install a brand, spanking new (and fresh) version of Windows on to it – is the ultimate choice for anyone looking to revive a slow-running PC or resolve a major, non-hardware issue, such as those caused by malware or a clogged up computer, In this final section we’ll step you through the entire process.
Ideally you should have a recent and full backup of your PC, created using either File History or the Windows Backup and Restore tool before you begin, that way you’ll lose the minimum of content. A full reinstall really is destructive – nothing left on your C drive will exist once you’ve finished. You should ensure you have the latest installation media for your target version of Windows – see our section on the Windows Media Creation Tool on page 18 for tips on how to do this. This will ensure a cleaner, more up-to-date installation from the off, thus saving you time bringing it fully up to date once the installation has completed.
It’s also worth sourcing networking and graphics drivers now rather than relying on Windows to provide them for you – in most cases, they should be built in, but not always. Consult your PC or motherboard manufacturer’s website for these, or visit your Wi-Fi adaptor or graphics card manufacturer’s site – download them to your backup drive.
Other things to consider: uninstall any products that require activation now – this should deactivate the licences and enable you to use them with your new install without any issues. Also, be sure to have product keys and program installers to hand.
Windows 10 users can launch a repair install directly from the Media Creation Tool.
STARTING THE REINSTALL PROCESS
A full destructive reinstall should always be started by booting from your installation media, be it a DVD or USB flash drive. The actual reinstall process doesn’t differ much across Windows 7, 8.1 or 10. You’ll be asked to verify your language, location and keyboard are set Windows 7 and 8.1 users will find a large number of updates waiting to be installed after reinstalling.
Once Windows has been reinstalled, open Windows Update to bring Windows fully up to date – don’t be surprised if there are hundreds of updates still to apply in the case of Windows 7 and 8.1. Once it’s fully up to date, consider reinstalling Macrium Reflect Free (see page 18) and taking your first drive image – a vanilla backup you can restore in future instead of reinstalling Windows itself.
If you followed the advice on page 19, you should now be able to reinstall your core apps using CloneApp from your PC’s data drive. If you click the Restore button, every single program setting you backed up will be restored – if there are any backup settings you don’t want to restore, select Options to locate the backup folder, then open it and move any program folders you want to ignore out of the folder temporarily before clicking the Restore button. Once that’s done, take your second Macrium Reflect Free backup.
Finally, open File History or the Windows Backup and Restore tool and take steps to restore any data you backed up, then make sure that either tool is configured to carry on backing up all your precious files going forward.
Start the install process

Reboot for media
If you’re running Windows 7, or have Fast Boot disabled, insert your boot media and start your PC. Look for a ‘Press any key to boot from CD or DVD’ option – even if you have booted from a USB flash drive. Press any key on your keyboard and you should find that the Windows install process starts.
Tweak boot options
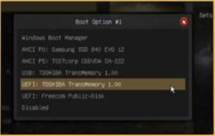
If you boot back into Windows, restart your PC again, but this time press a key, such as [F11], when prompted to open a boot menu. Once you have done so, select your boot media – choosing UEFI if that option appears – to boot; otherwise, enter setup so that you can change the boot device order.
Windows 8.1/10
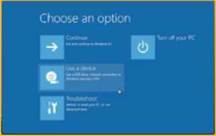
If Fast Boot is enabled on your computer, open Settings in Windows and then navigate to ‘Update & recovery’ > Recovery, then click ‘Restart now’ under ‘Advanced startup’. When the boot options appear, choose ‘Use a device’ to select the USB flash drive or DVD you created from the list that appears.
correctly, then it’s a case of clicking Install Now. If prompted, enter your product key or click Skip if you’re running Windows 10 on a PC you upgraded during the free period. When asked what type of installation you wish to perform, choose the Custom option.
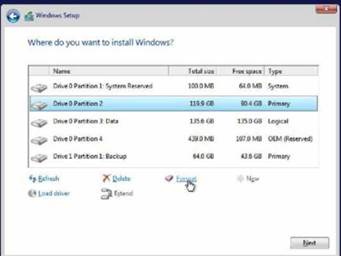
Next comes potentially the trickiest part of the process. A list of drives and partitions will appear – you need to select the one Windows is currently installed on. By default, it should be detected and selected, but verify it’s correct before clicking Format (click the advanced Drive Options button if it’s not visible). Click ‘OK’, then once formatted, verify the drive is still selected and click Next.
That’s the technical stuff pretty much done. You’ll see a checklist of tasks to be performed – just sit back and wait. One thing to note: when Windows reboots, you may see the ‘press any key’ prompt again to boot from CD or DVD. Don’t press anything if that happens, just let the installer continue.
Make sure you’ve got network and graphics drivers sourced.
Next comes potentially the trickiest part of the process. A list of drives and partitions will appear – you need to select the one Windows is currently installed on
SET UP POST-INSTALL
The post-setup prompt begins with Windows 7 users being prompted for their product key, then it’s a case of setting up a user account and you’re off and running. Windows 8.1 users will get an Express Settings prompt – be sure to click the option to customise these and go through them carefully.
Post-Creators Update, Windows 10 no longer gives you an Express Settings option. For now, confirm your location and keyboard, set up your network if required and choose ‘personal use’ when prompted. You can either sign in with your Microsoft account or click ‘Offline account’ > ‘Maybe later’ if you plan to stick with the old-style Windows 7 local user account.
If you opt for the Microsoft account option now is a good time to set up a PIN to speed up future logins (note: the PIN is tied, specifically, to this PC, and you can always bypass it using your regular account password should you forget it at any point).
You’ll then be asked to set up Cortana – this is where Windows 10’s notorious privacy settings come into play, so review all of the options carefully, flicking the slider to Off for any you don’t need or use.
That’s the end of the setup process – Windows will now configure itself based on each of your choices and you’ll see a series of messages appear on-screen. Eventually, when all is ready, you’ll find yourself back at the familiar Windows desktop screen.


