PDFgear Review: Master your PDFs for free!

Sign your document
If you already have a copy of your signature saved on your PC (the simplest way to produce one is to sign a slip of paper, take a photo of it with your phone, and transfer it), click ‘Add picture’, navigate to the photo, then click Open followed by OK. Alternatively, click Write, choose from 1 to 4pt thickness, and use your mouse and the on-screen pen to sign inside the box. Finally, click OK.
The signature will now be attached to your cursor, so scroll to the signature box in the document and click to drop it on the page. Use the handles on the sides and corners of its frame to resize it to fit.
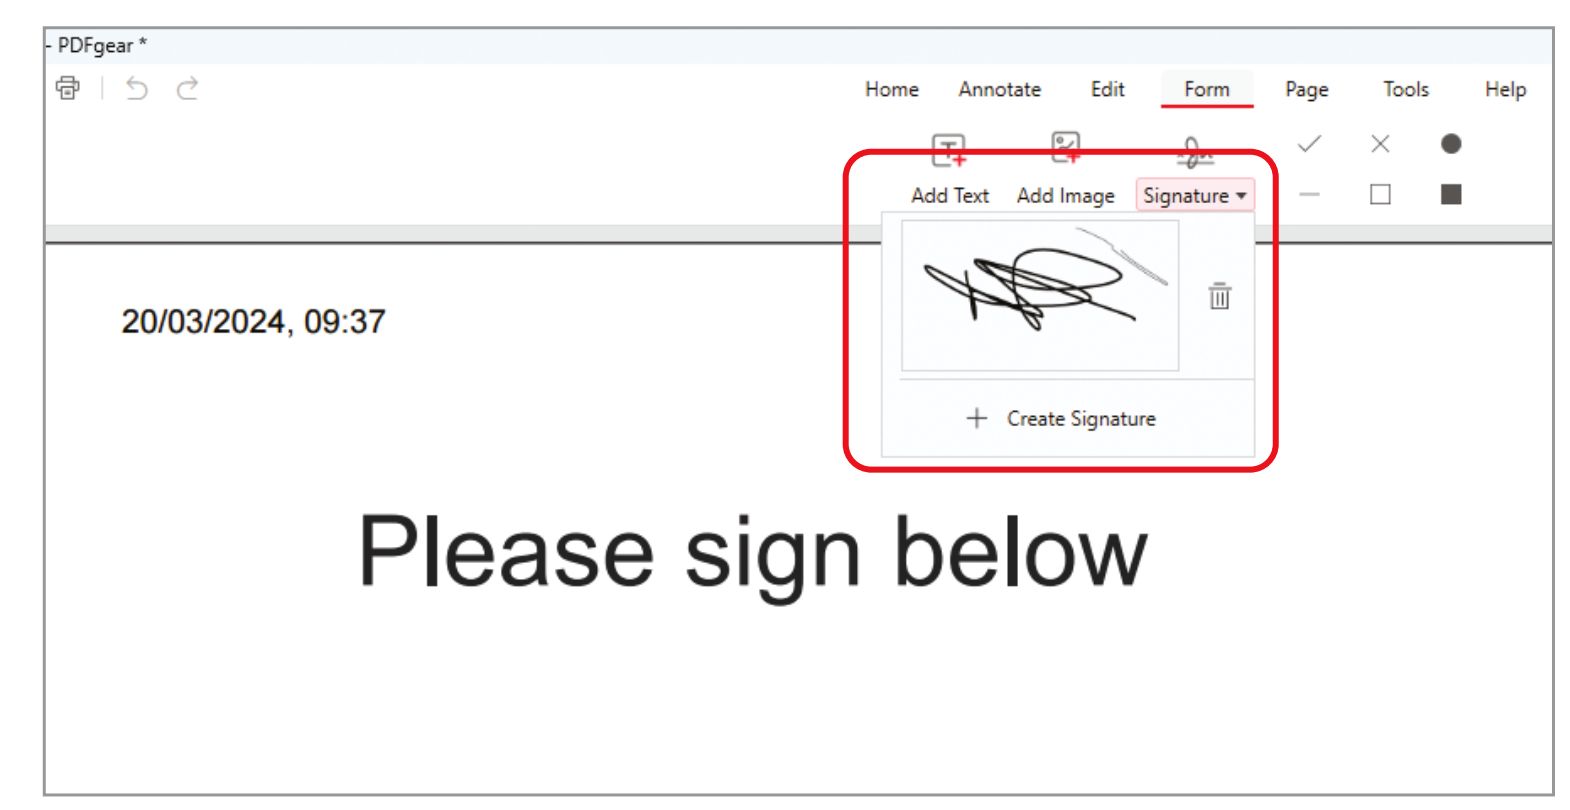
When you open a PDF form in PDFgear, you can fill it in as easily as you would a form online – and add your signature. Click ‘Form’ at the top followed by the Signature dropdown menu. You’ll see that PDFgear has remembered all images or scribbles you’ve added previously (see screenshot above). Simply click the one you want to drop it on to the page. Make sure you save your file after filling in the form by clicking the disk icon at the top left.
Add pages to existing PDFs If you’re compiling financial records to send to your accountant, a collection of instruction manuals, or a record of your favourite recipes, it makes sense to have them all in a single PDF rather than scattered across your hard drive. This helps you build a master file of important documents.
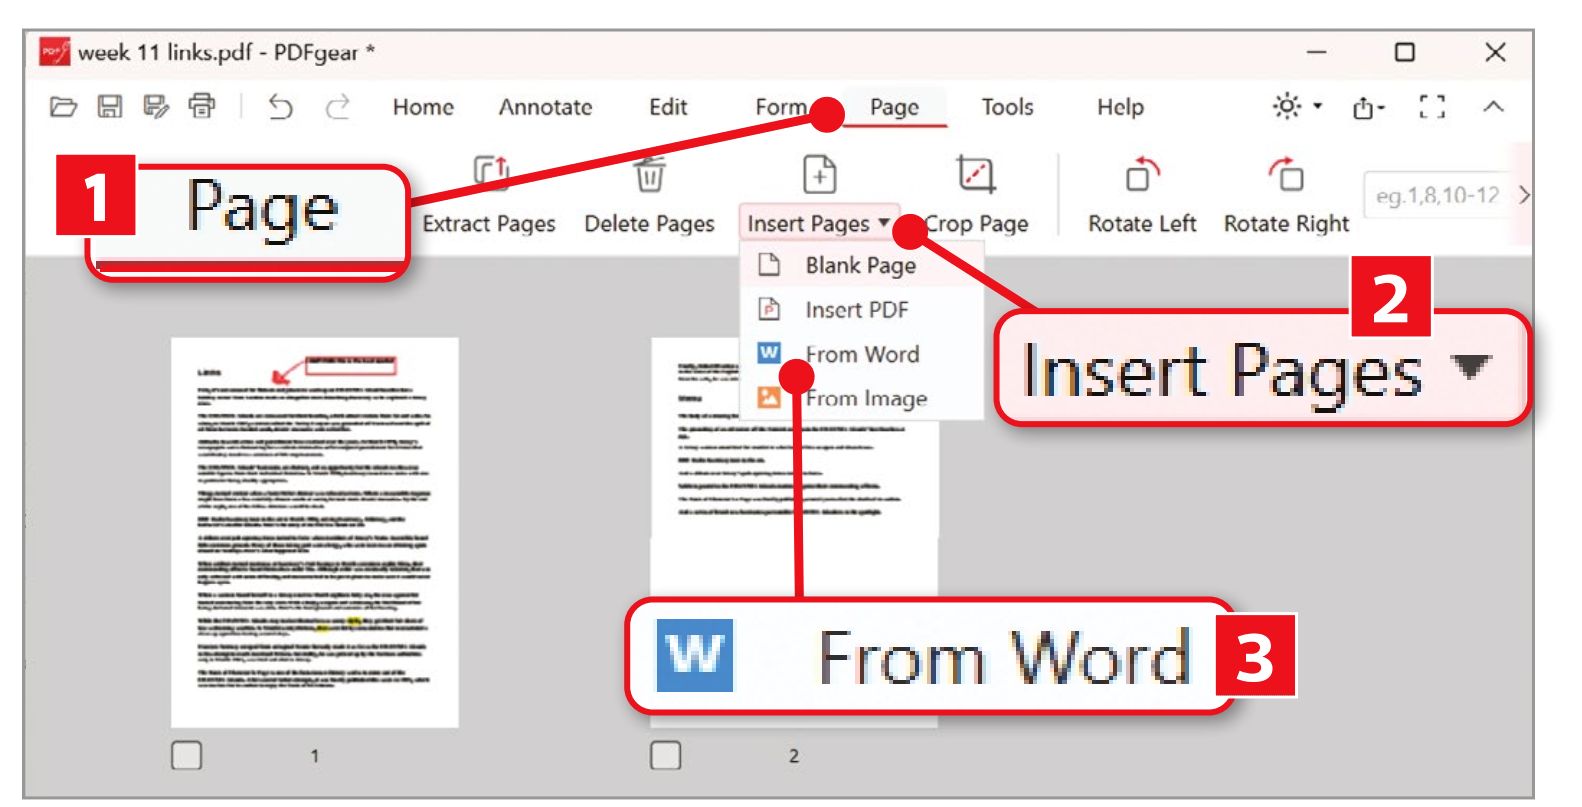
Once you’ve created the first page of your PDF, navigate to it in File Explorer and give it a name – for example, ‘tax documents 2024.pdf’. When you need to add pages to this, open it in PDFgear and click the Page tab ([1] in our screenshot below), followed by Insert Pages [2]. You can add another PDF at this point, but you can also embed a blank page, image or Word file [3]. Having added the pages you want, reorder them by clicking and dragging them in the main part of the window.
Remove pages from your PDF There will be times when you need to remove certain pages from a PDF before editing or sharing it. To do this, click PDFgear’s Page tab, then tick the boxes below the pages you want to exclude. Now click Extract Pages and use the box that appears to select whether you want to compile each of your selected pages into a single PDF, or create an individual PDF for each page. Click OK.
Now navigate to the folder where you’d like to save the new PDF, give your PDF a name, then click Save. You can now send it by email or share it online.
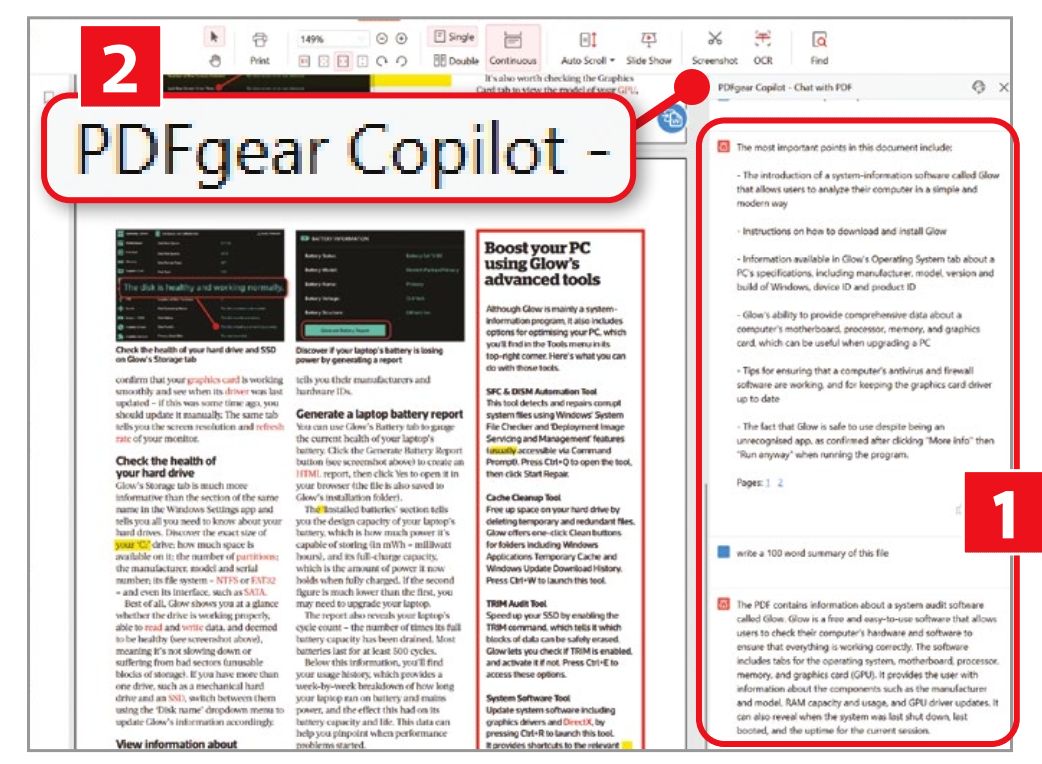
Use Al to summarise your PDF PDFgear integrates ChatGPT’s AI technology to let you summarise your PDF’s content. To do this, click the circular, red robot button at the bottom-right of the PDF, followed by Chat Now in the panel that opens. Next, type your prompt at the bottom of the sidebar and click Send. For example, if you don’t have time to read through everything, type what are the most important points in this document?, or write a 100 word summary of this file.
We typed both prompts for a PDF of our feature on the system-audit software Glow and it delivered impressive results within seconds ([1] in our screenshot below). Note that PDFgear calls this summarising feature Copilot [1], but it actually uses ChatGPT’s AI technology, and as far as we can see it has nothing to do with Microsoft’s tool of the same name.
We don’t know who used the name first, but we wouldn’t be surprised if PDFgear is forced to change this.
PDFgear is free – but what’s the catch?
There isn’t one. PDFgear is free to download and use, and doesn’t impose any hidden restrictions. You don’t need to upgrade to get its most powerful features, your pages aren’t watermarked and your PDFs can be as long as you want.
That said, PDFgear’s developers, who are based in Singapore, say that “charging for premium features at an affordable price is our future monetization plan, but the principle to keep it costless for average users stays the same forever” (see under the Mission heading at PDFgear’s about page). So perhaps it will make some tools paid-for eventually, but that won’t lock you out of your files. Any PDFs you create using it will still be readable via your web browser if all else fails and, if you switch to an alternative PDF-editing tool, they should also be compatible with that.