Veneta Viewer Review
Veneta Viewer Review – Image viewers like XnView and Irfan View are great, but they can feel old fashioned. If you’re after a tool with a more modern feel to browse photos, then brand-new Veneta Viewer might be the ticket. It supports a range of formats, including RAW and APNG files, and is hardware-accelerated, so it loads quickly, and flipping through high-resolution images is fast.
https://sourceforge.net/projects/veneta-viewer
What you need: Windows 7, 8/8.1 or 10
Veneta’s interface is basic but uncluttered. Photos take centre stage, with a strip of useful info along the bottom of the program window. Navigation controls and icons for customising how you view images are along the top of the preview area. You can enable or disable colour channels here using the red, green and blue icons.
The program offers simple editing, such as altering exposure and brightness levels. But editing isn’t this program’s focus. For cropping, resizing or converting to other formats, you’re best off using a dedicated image editor.
Veneta Viewer is a portable program, but it comes zipped (compressed) in a 7z file, so you’ll need a tool to unzip it. Our favourite is Peazip (www.peazip.org), which is also available as a portable tool. Extract the contents of the 7z file to a folder. Double-click the Veneta.exe file in the x64 folder to run the tool, or right-click it and select ‘Send to’, then ‘Desktop (create shortcut)’ to add a program shortcut to your desktop.
Veneta Viewer is a 64bit only program. This means it won’t run on older 32bit PCs (check under Settings, System, About, ‘System type’).
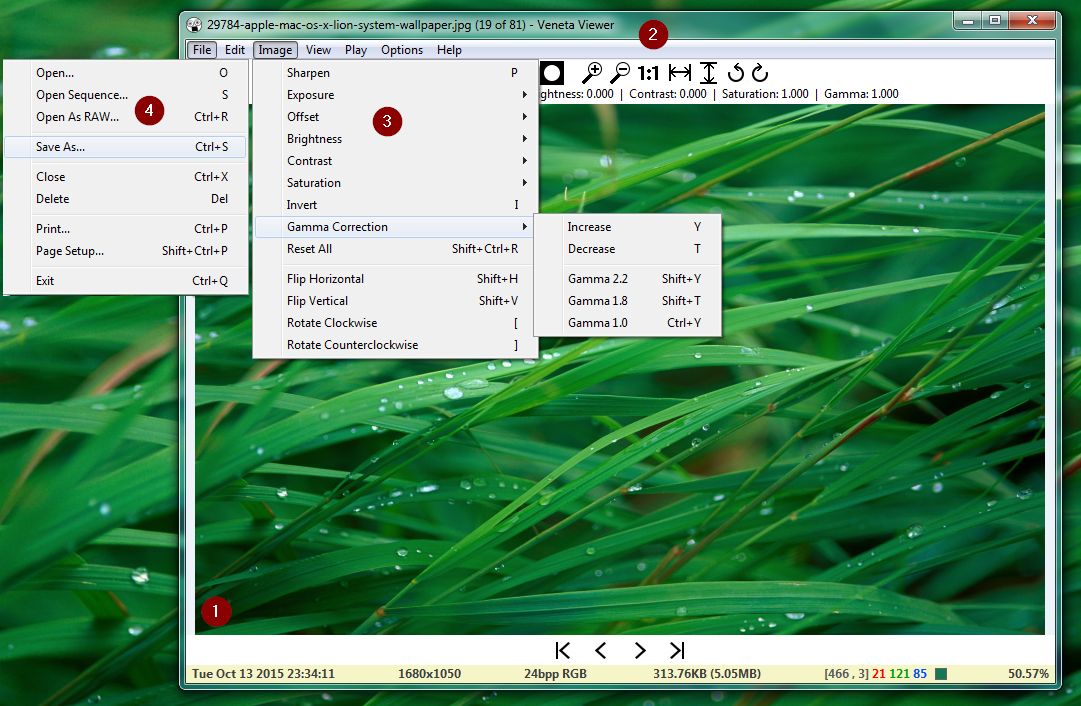
1 The Status Bar displays information, including the time/date your photo was taken, its resolution, colour depth and RGB channel data for any area of the image you point your mouse cursor to.
2 Above the image is a selection of tools for controlling your view of the image. You can zoom in/out, view full size, fill horizontally or vertically, rotate left or right, and so on.
3 Editing tools are all kept in the Image menu. You can sharpen your photo, adjust exposure, correct brightness, contrast, saturation and gamma levels, and more. You can flip or rotate images here.
4 If you edit photos, Veneta won’t save your changes automatically. You’ll need to click File, then ‘Save as’ – this is done on purpose to prompt you to create a new file and preserve the original.


