
Ubuntu ‘Bionic Beaver’ 18.04 represents the first long term support release of a new generation of the leading Linux distribution, with over 30 exciting changes

When major changes happen in a distribution that’s as widely used as the Canonical-supported Ubuntu, the Linux universe takes notice.
Table of Contents
- At a glance
- Ubuntu Desktop
- Quick guide
- Other changes
- Ubuntu Server
- quick guide
- When should I upgrade?
- quick guide
- Ubuntu Cloud
- quick guide
- i) quick tip
- quick guide
- Ubuntu to a cloud provider
- Containers
- Docker Engine on Ubuntu
- i) quick tip
- quick guide
- Ubuntu Core, IoT & robotics
- (i) EXPERT OPINION
- Build a new Ubuntu Core image for a Raspberry Pi 3
[sc name=”ad 2″]
At a glance
- Desktop
Ubuntu 18.04 ditches the Unity desktop and brings GNOME on X.Org to LTS for the first time in a long time.
- Server
The Server release of Bionic Beaver sports a much-improved installer and a new, smaller ISO file for a minimal install option.
- Cloud
The latest Ubuntu release offers tighter integration with Canonical’s cloud offerings and a simplified deployment process.
- Containers
As well as a new release of LXD, Ubuntu continues to offer support for Kubernetes and Docker on public, private, hybrid or bare-metal clouds.
- Core/IoT/Robotics
Ubuntu is experiencing huge growth in the areas of loT players and robotics, making use of Canonical’s investment in the snap ecosystem.
Ubuntu’s release schedule is such that seismic shifts typically take place outside long term support (LTS) releases, before then being included later in an LTS version. Ubuntu’s regular releases are supported for nine months, but for LTS releases it’s five years, which means that a great deal of care and preparation takes place to ensure that what goes into a LTS is as stable as possible. The most recent big change in Ubuntu came with 17.10 Artful Aardvark, which was released in October 2017. This
Ubuntu continues to be a distribution that targets a broad range of users: basic web or office users, developers, sysadmins, robotics engineers
has provided a short but valuable window for developers to shake down the changes before deciding on exactly what makes the cut for the LTS version; as you’ll see, not everything made it in, but 18.04 is groundbreaking nonetheless.
Ubuntu 18.04 ‘Bionic Beaver’ represents a shift not only in technology, but also marks a change in perspective for Canonical, the company that supports Ubuntu’s development, as it adjusts the focus of its business. A year ago, founder Mark Shuttleworth announced that the company would no longer focus on convergence as its priority, and would instead look to invest in areas that provided growing revenue opportunities – specifically in the server and VM, cloud infrastructure, cloud operations and loT/Ubuntu Core markets.
While this broadening of focus might at first appear as a cause for concern for desktop users, the reality is quite different. Ubuntu 17.10 demonstrated that a significant change to Ubuntu could be delivered without disruption, and the company has also demonstrated a keen interest in taking on board user feedback to help shape 18.04.
A survey distributed to help choose the Ubuntu default applications elicited tens of thousands of responses and was used to refine the release. Ubuntu continues to be a distribution that targets a broad range of users; basic web or office users, developers, sysadmins, robotics engineers – they are all catered for. Of course, if the default Ubuntu isn’t quite to your taste, a wide range of alternative flavors continue to be available for a variety of use cases, hardware configurations or personal preference.
Why is this release called ‘Bionic Beaver’? Well, Mark Shuttleworth described the beaver as having an “energetic attitude, industrious nature and engineering prowess”, which he then likened to Ubuntu contributors. Meanwhile, the ‘Bionic’ part is a hat-tip to the growing number of robots running Ubuntu Core. Nice!

Ubuntu Desktop
The new GNOME on Ubuntu era makes its way to LTS
Should you be upgrading to Ubuntu 18.04 (named after the fourth month of 2018) from 17.10, the latest version will feel like a regular incremental upgrade, with the major changes having happened in the last release. If you’re upgrading from the last LTS version, you’re in for more of a surprise.
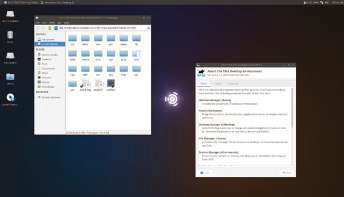
The biggest visual change is the shift from Unity to GNOME. Bionic ships with GNOME version 3.28, running the ‘Ambiance’ theme as always, and is tweaked to provide as painless a transition as possible for existing users. This also extends to running Nautilus 3.26 rather than the latest 3.28, as the latest release removes the ability to put shortcuts on the desktop. You do get a nice new Bionic Beaver-themed desktop background of course, with support for up to 8K displays! The original expectation was that this release would ship with an all-new theme developed by the community, but unfortunately despite work on the theme kicking off last November, it wasn’t ready in time for the 18.04 user-interface freeze due to a number of outstanding bugs and overall lack of broader testing. That’s disappointing for sure, but given the nature of a LTS release, stability is always the primary concern. With that said, for those who want to install the new theme – called Communitheme – the expectation is that it will be made available in the future via an official snap package. The intention is that the theme will appear as a separate session on the login screen, making it straightforward to test and be reverted if needed, rather than having to use the GNOME Tweak Tool. One other side-effect of the switch to GNOME is that the login screen is now powered by GDM rather than lightdm.

Above Ubuntu now includes GNOME 3.28, with tweaks and customisations designed to improve familiarity for migrating Unity users, together with an updated Nautilus look and feel
Quick guide
Ubuntu flavours
kubuntu
Kubuntu brings KDE Plasma to Ubuntu, providing an alternative high-end desktop environment
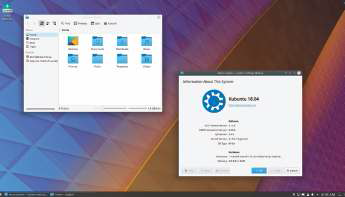
If you’re switching to Ubuntu 18.04 from the last LTS release, you’re going to change your desktop environment anyway, so what about trying KDE? The Qt-based desktop is fast, beautiful and quite a different option!
lubuntu
Lubuntu is a more lightweight version of Ubuntu, running the LXDE desktop environment
If you’re running Ubuntu on lower-spec hardware – perhaps even a Raspberry Pi – the light but fully featured Lubuntu may be worth a look. Unlike the main flavour, 32-bit images are still available.
xubuntu
Xubuntu provides another lightweight alternative, using the Xfce desktop environment
Like Lubuntu, Xubuntu focuses on running well on modest hardware, but has all the applications pre-installed to get you up and running right out of the box. Beautiful design also features extensively.
ubuntu budgie
Users migrating from another OS might find the Budgie desktop a more familiar experience
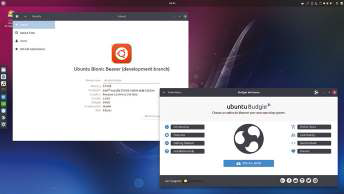
Ubuntu Budgie uses the simplicity and elegance of the Budgie interface to produce a traditional desktop-orientated distro with a modern paradigm. It’s focused on offering a clean and yet powerful desktop.
ubuntu mate
The MATE desktop uses a traditional desktop metaphor and runs well on hardware like the Pi
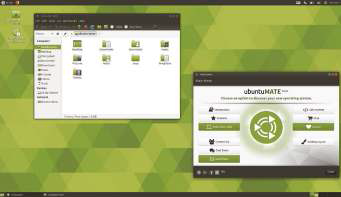
The Ubuntu MATE project is effectively the continuation of the GNOME 2 project. Its tried-and-tested desktop metaphor is easy to use, and prebuilt images are provided for numerous Raspberry Pi devices.
ubuntu studio
Multimedia content creation is the focus of Ubuntu Studio, which uses the same GNOME desktop
Ubuntu Studio focuses on taking the base desktop image and configuring it to provide best performance for creative pros. It also includes a default software set suited to audio, graphics, video and publishing use.
In addition to Communitheme, another feature that didn’t make the cut for Bionic, and in fact has been restored from the previous release, is the switch from X.Org to Wayland as the default display server. Once again the focus on stability and some outstanding issues meant that it just wasn’t felt ready for prime-time.
Snaps, the universal Linux packaging format, is a growing focus with each Ubuntu
One other side- effect of the switch to GNOME is that the login screen is now powered by GDM
release and comes to the fore in 18.04 with increased prominence in the Software Centre and a standard set installed including calculator, characters, logs and a system monitor. Snaps are designed to bundle all the dependencies an application needs, therefore reducing common issues with missing libraries and the need to repack an app as multiple versions for several different distributions.
Ubuntu 18.04 – which is the first LTS release to come with ISOs for 64-bit machines only – ships with version 4.15 of the Linux kernel. This version includes Meltdown and Spectre patches as well as secure, encrypted virtualisation and better graphics support for AMD processors, a whole host of new drivers, and a huge number of minor fixes since version 4.13 and particularly since version 4.10 in the last LTS point release.
Other changes
If you’re installing the new release from scratch, you may spot several minor changes. While the Ubiquity installer is still used, there are some additional options to be aware of. The first is the ‘minimal’ option which installs Ubuntu without most of the pre-installed software. This saves around 500MB, but the resulting install itself is not particularly lightweight, particularly when compared to some alternative flavours.
When partitioning, you will no longer be prompted to create a swap partition.
This is because file-based swap is now used. Finally, Ubuntu 18.04 will collect data about your Ubuntu flavour, location, hardware, location and so on by default, with the ability to opt-out if desired. The data collected by this method will be anonymous, which has mostly alleviated privacy concerns from the community. After installation, you’ll notice significant boot- speed improvements in the new release.
Among the raft of software updates, there are some that are particularly worthy of note, such as the addition of colour emoji support (via Noto Color Emoji), GNOME To-Do and the upgrading of LibreOffice to version 6. The Linux office suite continues to go from strength to strength, with the latest release further developing the Notebookbar, adding even better forms support, providing enhanced mail merging, including initial OpenPGP support and boasting even better interoperability with other (Microsoft) office suites.
For web developers working on Ubuntu, it should be noted that ahead of Python 2’s upstream end of life in 2020, it has been removed from the main repositories and Python 3 is now installed by default.
You will need to enable the ‘universe’ repository to install the older version in this release. Users of the GNOME Boxes app will be pleased to learn that ‘spice- vdagent’ is now pre-installed, providing better performance for Spice clients. This is an open source project to provide remote access to virtual machines in a seamless way, so you can play videos, record audio, share USB devices and share folders without complications.

Above The Subiquity installer brings much-needed improvements to the ease and speed of server installs
Ubuntu Server
Server installs are hugely important to Ubuntu
While desktop users may be keen to update to the ‘latest and greatest’, that doesn’t apply to Ubuntu Server users. Stability is vital in the server environment and as such it makes sense to stay on LTS versions, upgrading only to point releases and only then upgrading systems with caution after a new version.
The first change for server users comes early, with a long-overdue installer update. Ubuntu Server now uses Subiquity (aka ‘Ubiquity for servers’), which finally brings to servers the live-session support and fast installation using Curtin (and boy, is it fast!) that has long been present on the desktop. The installer is still text-based as you’d expect, but is far more pleasant to use. The installer does a great job of replicating the
Above You’ll need to use the -d switch to perform an upgrade before the first LTS point release flow of the desktop setup but is tailored to a server environment.
As well as the underlying updates in the desktop release there are several server- specific improvements in Bionic Beaver. LXD, the pure container hypervisor, has been updated to version 3.0. This release, which itself is a LTS version with support
The first change for Server users comes with a long-overdue installer update
until June 2023, adds native clustering right out of the box, physical-to-container migration via lxd-p2c, support for Nvidia runtime passthrough and a host of other fixes and improvements. QEMU, the open source machine emulator and virtualiser, is updated to version 2.11.1. Meltdown and Spectre mitigations are included in the new release, although using the mitigations requires more than just the QEMU version upgrade – the process is detailed in a post on the project’s blog. RDMA support is now enabled, improving network latency and throughput. Libvirt, the virtualization API, has been updated to version 4, bringing the latest improvements to this software designed for automated management of virtualization hosts.
If you deal with cloud images, you’ll be pleased to hear that cloud-init – a set of Python scripts and utilities for working with said images – gets a bump to the very latest 18.2 version, with support for additional clouds, additional Ubuntu modules, Puppet 4 and speed improvements when working with Azure. Ubuntu 18.04 also updates DPDK (a set of data plane libraries and
quick guide
Install a 32-bit version
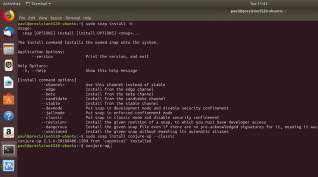
Ubuntu 18.04 is the first release to offer only a 64-bit full install ISO for download. If you do need to run on 32-bit hardware (or other alternative architectures such as ARM), you have a couple of options. First, you can simply install the previous LTS release (16.04.3) and upgrade to the latest version. Alternatively, you can use the netboot image. This tiny image – available in ISO and USB stick versions together with the files needed to carry out a PXE network boot – includes just enough of the distribution to be able to boot from a network to download the rest of the required files. When launched, the installer prompts for basic network configuration including an optional HTTP proxy, language and keyboard preferences, mirror selection and user details, before installing the distribution as normal by downloading the required packages on the fly. Another option is to make your own custom ISO; Cubic, available via sudo apt-add- repository ppa:cubic-wizard/ release && sudo apt install cubic provides a GUI for this.

—-
network interface controller drivers for fast packet processing) to the latest stable release branch, 17.11.x. The intention is that future stable updates to this branch will be made available to the Ubuntu LTS release by a SRU (StableReleaseUpdates) model, which is new to DPDK.
Open vSwitch, the multilayer virtual switch designed to enable massive network automation through programmatic extension, still supports standard management interfaces and protocols such as NetFlow, sFlow, IPFIX, RSPAN, CLI, LACP and 802.1ag.
It has been updated to version 2.9, which includes support for the latest DPDK and the latest Linux kernel.
Ntpd, for a long time the staple for NTP time management, is replaced by Chrony in Ubuntu 18.04. The change was made to allow the system clock to synchronise more quickly and accurately, particularly in situations when internet access is brief or congested, although some legacy NTP modes like broadcast clients or multicast server/clients are no longer included.
Ntpd is still available from the universe
Ntpd, for a long time the staple for NTP time management, is replaced by Chrony
repository, but as it is subject to only ‘best endeavours’ security updates, its use is not generally recommended. Note that systemd- timesyncd is installed by default and Chrony only needs to be used should you wish to take advantage of its enhanced features.
Bionic marks the end of the LTS road for ifupdown and /etc/network/interfaces. Network devices are now configured using netplan and YAML files stored in /etc/netplan on all new Ubuntu installs. Administrators can use netplan ifupdown- migrate to perform simple migrations on existing installs. The change to netplan is focused on making it more straightforward to describe complex network configs, as well as providing a more consistent experience when dealing with multiple systems via MAAS or when using cloud provisioning via cloud-init.
When should I upgrade?
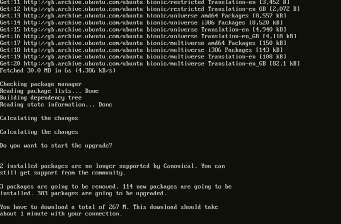
If you’ve read through the release notes for Bionic and you’re happy with what’s included, the upgrade process itself is straightforward: simply update your existing install and run sudo do-release-upgrade. Follow through the on-screen instructions and the updated packages will be downloaded and installed, with a final reboot required for the changes to take effect. Note, however, that the above process will only work LTS when the first point release drops (that is, 18.04.1). To update before this time, you effectively need to pass the developer switch: sudo do- release-upgrade -d. This is an abundance of caution on Canonical’s part, but it is prudent not to upgrade your fleet of servers the minute the ISO is available!
A sensible approach when performing a major upgrade, whether on a server or a desktop, is to run as full a test cycle as possible before making changes on a system that is effectively in a production state. This can be easily achieved using a tool like Clonezilla (https://clonezilla.org) if that’s feasible, although there are several alternative approaches if you need to keep your system running during the process.
Note that while it is technically possible to revert from an upgrade, it’s not a particularly straightforward process and is therefore not particularly recommended.
—
i) quick tip
No-reboot required for updates with Livepatch
The Canonical Livepatch service enables critical kernel security fixes to be provided without rebooting. It’s free for a small number of devices and is enhanced in Bionic with dynamic MOTD status updates.
—
quick guide
Using the new Subiquity
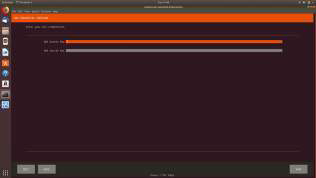
The ncurses-based Subiquity installer is a huge improvement over previous versions of Ubuntu and makes installing the Server distribution a breeze. It should be noted, though, that the feature set is a little limited for some use cases, with no support yet for LVM, RAID or multipath, although these are expected in a future release. After booting the ISO, Subiquity prompts for language and keyboard settings (with automatic keyboard identification offered) before providing the options to install the main OS, a MAAS Region Controller or a MAAS Rack Controller. Network interfaces can be configured with DHCP or static addresses(both IPv4 and IPv6) and as on the desktop, automatic (full disk) or manual partitioning can be used.

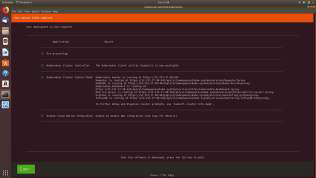
At this point, installation starts in the background and progress is shown at the bottom of the screen while user details are entered (including the ability to import SSH identities). A log summary is displayed on screen and a full log can be viewed at completion, before selecting the reboot option.
Ubuntu Cloud
The Ubuntu push to the cloud gathers pace, with a broad product offering
Canonical has already highlighted the importance of Ubuntu Cloud to its revised strategy as a rapidly growing revenue stream. Ubuntu is well on the way to becoming the standard OS for cloud computing, with 70 per cent of public cloud workloads and 54 per cent of OpenStack clouds using the OS.
Canonical has supported OpenStack on Ubuntu since early 2011, but what exactly is it? OpenStack is a “cloud operating system that controls large pools of compute, storage, and networking resources throughout a data centre, all managed through a dashboard that gives administrators control while empowering their users to provision resources through a web interface”.
Getting started with OpenStack for your own use is straightforward, thanks to a tool called conjure-up. This is ideal if you want to quickly build an OpenStack cloud on a single machine in minutes; in addition, the same utility can also deploy to public clouds or to a group of four or more physical servers using MAAS (Metal As A Service – cloud-style provisioning for physical server hardware, particularly targeting big data, private cloud, PAAS and HPC). For local use, conjure-up can use LXD containers against version 3.0 of LXD included in Bionic Beaver. The LXD hypervisor runs unmodified Linux guest operating systems with VM-style operations at uncompromised speed. LXD containers provide the experience of virtual machines with the security of a hypervisor, but running much, much faster. On bare-metal, LXD

Above The ‘conjure-up’ tool includes several pre-packed ‘spells’ for cloud and container deployments
containers are as fast as the native OS which means that in the cloud, you get subdivided machines without reduced performance.
Conjure-up itself is installed as a snap package, as is LXD, which will increasingly become the Ubuntu way from 18.04 onwards.
Snap packages will increasingly become the Ubuntu way from 18.04 onwards
First install LXD using sudo snap install lxd followed by lxd init and newgrp lxd. Next, use sudo snap install conjure- up -classic and conjure-up to launch the tool itself. The text-based utility – it’s built for servers, after all – provides a list of recommended ‘spells’. Spells are descriptions of how software should be deployed and are made up of YAML files, charms and deployment scripts. The main conjure-up spells are stored in a GitHub registry at https://github.com/conjure- up/spells; however, spells can be hosted anywhere – a GitHub repo location can be passed directly to the tool, from which spells will be loaded. ‘OpenStack with NovaLXD’
quick guide
Use Juju to deploy a service
Juju ‘charms’ provide the easiest way to simplify deployment and management of specific services. Found at https://jujucharms.com/. com, charms cover many different scenarios including ops, analytics, Apache, databases, network, monitoring, security, OpenStack and more. Using the ElasticSearch charm as an example, using it is as simple as entering juju deploy
cs:elasticsearch. When the command completes, ElasticSearch is up! By default, the application port (9200) is only available from the instance itself, but changing this is as simple as using the command juju expose elasticsearch. Use juju status to confirm which ports are open. To open all ports, use the command juju set elasticsearch firewall_enabled=false.
—–
is the best spell to start with – you’ll note spells are also provided for big data analysis using Apache Hadoop and Spark, as well as for Kubernetes.
After selecting the spell, you’ll be prompted to choose a setup location (localhost), configure network and storage, then provide a public key to enable you to access the newly deployed instance. Accept the default application configuration and hit ‘Deploy’. Juju Controller – part of Juju, an open source application and service modelling tool – will then deploy your configuration. After setup completes, you’ll be able to open the OpenStack Dashboard at http://<openstack ip>/horizon and login with the default admin/openstack username and password to see what has
Foundation Cloud Build is well suited to redeploying or cloning existing cloud architecture
been created. Use the lxc list command to validate that the system you’ve conjured up is running.
Canonical also offers BootStack, which is an ongoing, fully managed private OpenStack cloud. This is ideal for on-premise deployments and is supplemented by a lighter-touch service, Foundation Cloud Build for Ubuntu OpenStack, where a Canonical team will build a highly available production cloud, implemented on-site in the shortest possible time. Foundation Cloud Build is well suited to redeploying or cloning existing cloud architecture.
Should you want to manage your own deployment to public clouds, certified images are available for AWS, Azure, Google Cloud Platform, Rackspace and many other such services.
i) quick tip
Set up Landscape
Add the PPA: sudo add-apt- repository ppa:landscape/17.03 and update your package list (sudo apt update). Install: sudo apt install landscape-server-quickstart.
The charms of Juju
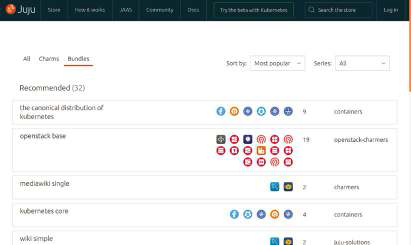
While conjure-up uses Juju internally, it can also be used directly to model, configure and manage services for deployment to all major public and private clouds with only a few commands. Over 300 preconfigured services are available in the Juju store (known as ‘charms’), which are effectively scripts that simplify the deployment and management tasks of specific services.
Of course, Juju is free and open source.
One further piece of the Ubuntu cloud puzzle is Canonical’s ‘Cloud Native Platform’, which is a pure Kubernetes play. Cloud Native Platform is provided in partnership with Rancher Labs and delivers a turnkey application-delivery platform, built on Ubuntu, Kubernetes and Rancher, a Kubernetes management suite.
After you’ve deployed to the cloud, a common challenge is exactly how you manage the servers in your infrastructure. Canonical has a tool to help with this in the form of ‘Landscape’, to deploy, monitor and manage Ubuntu servers.
Landscape monitors systems using a management agent installed on each machine, which in turn communicates with a centralised server to send back health metrics, update information and other data for up to 40,000 machines. Landscape is a paid service starting at 1 euro per machine per hour when used as a SaaS product; however it can be deployed for on-premise use on up to 10 machines for free.
Although many of the pieces of the cloud software stack are updated independently of the main OS, inclusion of these latest technologies in the LTS release drives forward the possibilities of what can be achieved using the cloud with Ubuntu.
quick guide
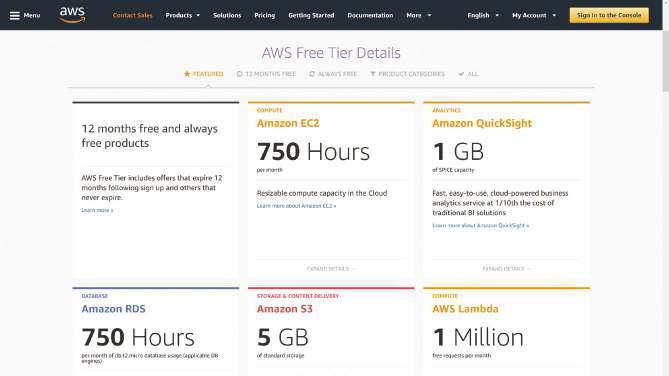
Try Ubuntu in the cloud for free
Ubuntu offers exciting opportunities for deploying to the cloud, but due to the pricing models, costs can rack up quickly! Thankfully, if you want to try out some cloud deployments without spending any money, a number of providers have free offerings available. Amazon’s AWS has the best deal, with a free tier that providers a server running 24 hours a day for a whole year, plus a host of add-on services. Its ‘Lightsail’ offering also offers a free one-month trial of the basic instance. Google Cloud Platform offers $300 credit valid for 12 months, plus, like Amazon, a free product tier to get you started. DigitalOcean offers $100 to get started with its services and is a great alternative to the bigger players. You may not expect it, but Microsoft’s Azure also has useful Linux options with £150 credit valid for 30 days and, once again, its own free low-usage tier. All these services are easy to set up and come with Ubuntu Server and container images.
Ubuntu to a cloud provider
1 Install conjure-up
Conjure-up itself is installed from a snap package using the command sudo snap install conjure- up -classic. After installation, use conjure-up to launch the tool. If you’re using a pre-snap release, install snapd first with sudo apt install snapd.
2 Select a Kubernetes spell and choose a cloud
After launching conjure-up and selecting the ‘The Canonical Distribution of Kubernetes’ as your spell, you’ll be prompted to choose a cloud provider. Choose ‘new self-hosted controller’ and accept the listed default apps to begin the deployment.
3 Connect to and manage your Kubernetes container
After the deployment completes, kubectl (for management) and kubefed (for federation) tools will be installed on your local machine. Use kubectl cluster-info to show the cluster status and confirm all is good.
Containers
Containers underpin the Ubuntu cloud

Above Conjure-up can be used to deploy The Canonical Distribution of Kubernetes either locally or to a supported cloud provider, including all the major players
here’s no doubt that containers are driving innovation in the cloud as a logical progression from VMs.
Canonical’s strategy has changed as technology has matured, but essentially it is supporting a wide range of technologies rather than backing a specific approach.
LXD is important to Ubuntu (Canonical founded and currently leads the project), with the latest release of the next-generation system container manager included in Ubuntu 18.04. LXD is particularly popular because it offers a user experience that is similar to that of virtual machines while using Linux containers instead. At its heart LXD is a privileged daemon which exposes a REST API. Clients, such as the command -line tool provided with LXD itself, then do everything through that REST API. This means that whether you’re talking to your local host or a remote server, everything works the same way. LXD is secure by design thanks in part to unprivileged containers and resource restrictions, is scalable for use on your own laptop or with thousands of nodes, is intuitive and image-based, provides an easy way to transfer images from system to system and provides advanced control and passthrough for hardware resources, including network and storage.
Of course, LXD is well integrated with OpenStack and, as a snap package, is easy to deploy not just on Ubuntu but other Linux distributions too. Canonical claims LXD’s containers are 25 percent faster and offer
Stable, maintained releases of Docker are published and updated by Docker Inc. as snap packages
10 times the density of traditional VMware ESX or Linux KVM installs, which could translate to a significant cost saving.
Docker Engine on Ubuntu
Canonical’s container offering wouldn’t be complete without the two current heavyweights – Docker and Kubernetes. Docker Engine is a lightweight container runtime with a fully featured toolset that builds and runs your container. Over 65 per cent of all Docker-based scale-out operations run on Ubuntu.
Stable, maintained releases of Docker are published and updated by Docker Inc as snap packages on Ubuntu, enabling direct access to the official Docker Engine for all Ubuntu users. Canonical also ensures global availability of secure Ubuntu images on Docker Hub, plus it provides Level 1 and Level 2 technical support for Docker Enterprise Edition and is backed by the Docker Inc. company itself for Level 3 support.
If you’re at the point where you’re choosing which container technology to try, it might not be easy to decide between the above options. Fundamentally, LXD provides a classic virtual machine-like experience with all your usual administrative processes running, so it feels just like a normal Ubuntu system. Docker instances, meanwhile, typically contain only a single process or application per container.
LXD is often used to make ‘Infrastructure as a Service’ OS-instance deployments much faster, whereas Docker is more often used by developers to make ‘Platform as a Service’ application instances more portable. Bear in mind that the options are not mutually exclusive – you can run Docker on LXD with no performance impact.
As with Docker, Kubernetes is well supported on Ubuntu. As well as the Cloud Native Platform Kubernetes delivered with Rancher, Canonical has a pure Kubernetes offering, known by the rather catchy name of The Canonical Distribution of Kubernetes. This is pure Kubernetes, tested across the widest range of clouds and private infrastructure with modern metrics and monitoring, developed in partnership with Google to ensure smooth operation between Google’s Container Engine (GKE) service with Ubuntu worker nodes and Canonical’s Distribution of Kubernetes. The stack is platform-neutral for use on everything from Azure to bare metal, upgrades are frequent and security updates are automatically applied, a range of enterprise support options are available, the system is easily extensible, and Canonical even offers a
i) quick tip
Kubernetes with JuJu
Juju can be used to quickly deploy Kubernetes Core (a pure Kubernetes/ etcd cluster with no additional services) or The Canonical Distribution of Kubernetes. Use juju deploy cs:bundle/kubernetes-core-292 or juju deploy cs:bundle/canonical- kubernetes-179 respectively.
——
fully managed service. Mostly important, Canonical Kubernetes leads in standards compliance against the reference implementation.
Kubernetes uses the same process we covered earlier for OpenStack courtesy of conjure-up, only this time you select ‘The Canonical Distribution of Kubernetes’ in the options. It’s worth getting a free account at somewhere like AWS or Azure to provide a standalone cloud test environment.
Deploying containers can be time- and storage-consuming, but one change in Ubuntu 18.04 helps ease the pain. The Bionic Beaver minimal install images have been reduced by over 53 per cent in size compared to 14.04, aided by the removal of over 100 packages and thousands of files. Of course, minimal images are just that – only what you need to get a basic install running and download additional packages – but at only 31 MB compressed and 81MB uncompressed, the images sure are small.
In short, snap packages are easing the process of installing much of the container toolset, a bang up-to-date LTS distro improves the experience after deploying a container, and Ubuntu’s own ecosystem additions help with use of major platforms.
Above If deploying using conjure-up, several cloud providers are supported including AWS (pictured), Azure, CloudSigma, Google, Joyent, Oracle and Rackspace
quick guide
Migrate to containers
Ubuntu 18.04 includes LXD 3.0, which has a new tool called lxd-p2c. This makes it possible to import a system’s filesystem into a LXD container using the LXD API. After installation, the resulting binary can be transferred to any system that you want to turn into a container. Point it to a remote LXD server and the entire system’s filesystem will be transferred using the LXD migration API and a new container created. This tool can be used not just on physical machines, but from within VMs like VirtualBox or VMware.
Another alternative migration path is from a physical machine or VM to OpenStack. This is possible, but slightly more involved. First, selinux needs to be disabled by editing the /etc/selinux/config file. Next you need to ensure that eth0 is configured for DHCP.
Finally, to allow OpenStack to inject the SSH key you must ensure that cloud- init and curl are installed. With that done, simply create a raw disk image (use VBoxManage clonehd -raw if migrating from VirtualBox) and test your image using the kvm command. You then just need to upload your image to OpenStack, register the image and you should be able to start a new instance.
Ubuntu Core, IoT & robotics
Ubuntu is spreading its influence, driven by the Ubuntu Core distribution
Ubuntu Core is a tiny, transactional version of Ubuntu designed for IoT devices, robotics and large container deployments. It’s based on the super-secure, remotely upgradeable Linux app packages known as snaps – and it’s used by a raft of leading IoT players, from chipset vendors to device makers and system integrators.
Core uses the same kernel, libraries and system software as classic Ubuntu. Snaps for use with Core can be developed on an Ubuntu PC just like any other application. The difference with Core is that it’s been built with the Internet of Things in mind. That means it’s secure by default – automatic updates ensure that any critical security issues are addressed even if the device is out in the field. Of course, Ubuntu Core is free; it can be distributed at no cost with a custom kernel, BSP and your own suite of apps. It has unrivalled reliability, with transactional over-the-air updates including full rollback features to cut the costs of managing devices in the field.
Everything in Ubuntu Core is based around digitally signed snaps. The kernel driver and device drivers are packaged as a snap. The minimal OS itself is also a snap. Finally, all apps themselves are also snaps, ensuring all dependencies are tightly managed. The whole distribution comes in at just 350MB, which is smaller than many
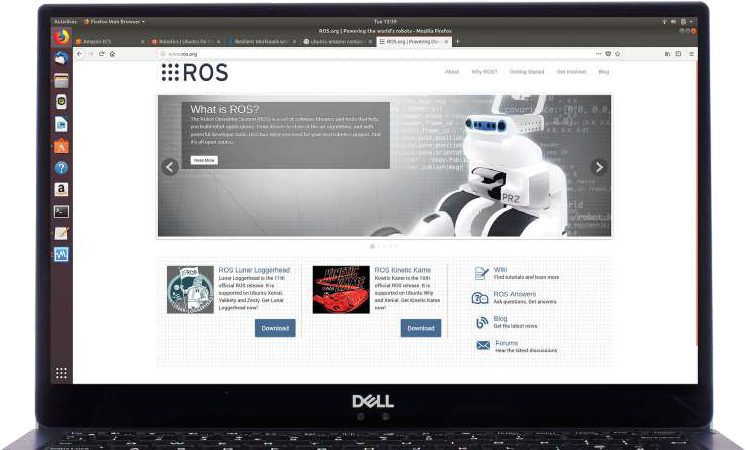
The current release of ROS, ideal for use on Ubuntu Core, is the 11th version: ‘Lunar Loggerhead’
(i) EXPERT OPINION
Joshua Elsdon, maker behind the Micro Robots project
“The primary benefit of ROS for me is that it allows for easy communication between different software modules, even over a network. Further, it allows the community of robotics designers a core framework on which they can open source their contributions.”
Build a new Ubuntu Core image for a Raspberry Pi 3
1 Create a key to sign uploads
Before starting to build the image, you need to create a key to sign future store uploads. Generate a key that will be linked to your Ubuntu Store account with snapcraft create-key. Confirm the key with snapcraft list-keys.
2 Register with Ubuntu Store
Next, you have to register your key with the Ubuntu Store, linking it to your account. You will be asked to login with your store account credentials – use the command snapcraft register-key to start the process.
3 Create a model assertion
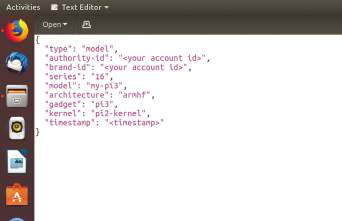
To build an image, you need to create a model assertion. This is a JSON file which contains a description of your device with fields such as model, architecture, kernel and so on. Base this on an existing device and tweak as needed.
4 Sign the model assertion
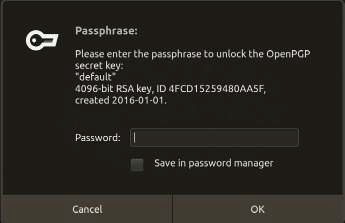
Now you need to sign the model assertion with a key. This outputs a model file, the actual assertion document you will use to build your image. Use the command cat pi3-model.json | snap sign -k default &> pi3. model.
5 Build your image
Create your image with the ubuntu-image tool. The tool is installed as a snap via snap install–beta classic ubuntu-image. Then
use: sudo ubuntu-image -c beta -0 pi3- test pi3.model.
6 Flash and test your creation
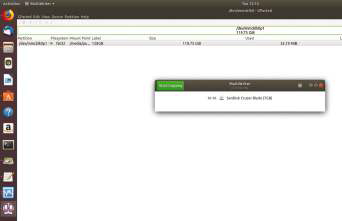
You’re now ready to flash and test your image! Use a tool such as ‘dd’ or GNOME Multi Writer to write the image to a SD card or USB stick and boot it in your device. You’ll be prompted for a store account which downloads the SSH key.
—-
rival platforms despite its rich feature set. Most importantly, Ubuntu Core supports a huge range of devices, from the 32-bit ARM Raspberry Pi 1 and 2 and the 64-bit Qualcomm ARM DragonBoard 410c to Intel’s latest range of loT SoCs.
The process of building a custom Ubuntu Core image is straightforward. For new boards, it’s necessary to create a kernel snap, gadget snap and a model assertion. Otherwise, the process involves registering
The kernel driver and device drivers in Ubuntu Core are packaged as snaps
with Snapcraft (https://snapcraft.io),
creating a signed model-assertion JSON document with information about your hardware which is then signed, and finally running a single command to build the image itself (see below).
Ubuntu Core adoption is growing rapidly within the robotics and drone space, thanks to ROS (Robot Operating System, www.ros.org) running on Ubuntu Core. ROS is a flexible framework for writing robot software that includes tools and libraries for creating complex yet robust applications. The ROS Wiki includes detailed instructions on packaging your ROS project as a snap and,
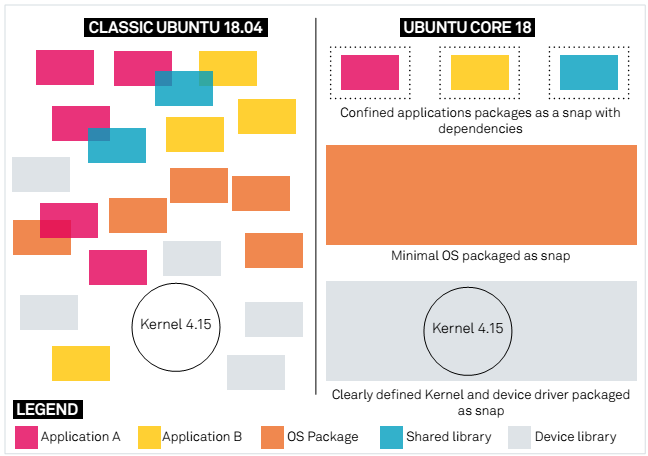
Above Admittedly there will be more snaps in 18.04, but Ubuntu Core 18’s OS and kernel are snaps
as the project then effectively becomes secure and isolated from the OS underneath, it’s perfect for this kind of application. The process of installing updates is also much smoother than alternative approaches, with updates applied automatically and transactionally, ensuring the robot is never broken. This all happens via the free Ubuntu store, so there’s no need to host your own infrastructure. Finally, sharing your ROS application with the world becomes far easier via Snapcraft – not just as a distribution method, but because you know it will work on a wide range of platforms.
Ubuntu Core version 18 is currently in development, integrating the latest changes and improvements from Bionic Beaver.
As well as using version 4.15 of the Linux Kernel, the new release takes advantage of improvements in the snap system that underpins Core to include snapshot support, so that a snap can save data and state at any time. Delta downloads reduce the size of snap updates, which can be scheduled.


I’m sorry, but 18.04 is just garbage. Once again, everything has changed, and not for the better. It is almost impossible to adjust anything (we don’t want to confuse you!), and their choices of bugs – ahh features – is disgusting. If you like your old system, stick with it.
For once, the expletive-spitting curmudgeon seems to express a degree of consensus among the cognoscenti. Thus, in one Linux-oriented print magazine, its own reviewer advises users not to deploy the attached 18.04 DVD, and several of its contributors say they see no need to adopt the new distro. Is this progress or Progress?
I had Ubuntu 14 on an old Compaq Presario laptop. It worked smoothly. I kept ignoring the 16 upgrade offer until recently. THEN THE NIGHTMARES BEGAN. U16 gave me a flickering screen as soon as a web page with a video opened. Then, the flickering got from bad to worse. So, I tried to go back to 14, and got screwed. The flickering was still there. I searched the web for help and found 100+ suggestions. I tried 50+ and gave up. I reformatted the drive and installed Ubuntu 18. SCREWED AGAIN with flickering upon flickering. I did a Nvidia SUDO command, per some sites that said it fixed their flicker. NOW, I CANNOT login. After entering my password, the screen goes blank, the Nvidia logo pops up, and loops back to the login (enter password and repeat, over and over).
I even tried reformatting and going back to 14, but the flicker is still there, like a cancer. UGH. I hate it with passion.