How to install ubuntu on an old Windows laptop

What you need: Ubuntu; minimum 8GB USB stick Time required: Two hours. Read our How to install ubuntu on an old Windows laptop.
by Nik Rawlinson
No developer can afford to continue supporting its software forever – not even one with pockets as deep as Microsoft’s. That’s why, over time, they reduce and then end support for old products – usually after several years of encouraging users to upgrade.
This year, Windows 8.1 reached that milestone. Having launched in October 2013, it enjoyed mainstream support for almost five years, then another five of extended support, which came to an end in January.
If you’re still running Windows 8.1 (or Windows 7, for which extended support ended in 2020), nothing much has changed. It won’t refuse to boot and features won’t disappear, but you will become more vulnerable as time goes on. Without regular security updates, operating systems (OS) are less able to defend themselves against interference from hackers or infection by malware.
That’s why, even if you’re comfortable running an old operating system, you must consider your next move when it’s no longer supported. You owe it not only to yourself, but your friends and family whose data rests on your machine in the shape of incoming emails, contact details, shared photos and instant messages.
Things get more complicated – and more expensive – when it’s not only your operating system but your computer that’s long in the tooth. Newer operating systems are often more efficient because they rely on modern technologies that your older PC might not support. In extreme cases, this can prevent you from upgrading to the next version of your current OS.
Buying a new computer is one solution, but another is downloading Linux on your old machine. Linux typically supports a wider range of old hardware, including specifications no longer compatible with Windows 11.
And, where Linux was once a fairly challenging system to run, requiring knowledge of typed commands and manual configuration, it’s now no more difficult to set up and use than Windows or macOS.
Here, we’ll show you how to upgrade an outdated PC running Windows 7, 8, or 8.1 to a user-friendly version of Linux called Ubuntu. When installed, it will include all the software you need to work with documents, spreadsheets and presentations; edit your photos; send and receive emails; and browse the web.
Start by making a complete backup of your system from which you can reinstall everything if things go wrong – and, to make doubly sure, drag and drop a second copy of your documents, photos and other data on to an external drive, because replacing your OS in this way will completely wipe your internal drive.
1 Download Ubuntu
Ubuntu maintains two versions of its operating system. At the time of writing, the latest edition is Ubuntu 23.04 (also called Lunar Lobster: www.snipca.com/45722), but you can also download Ubuntu 22.04.2 LTS (also known as Jammy Jellyfish). The numbers relate to when they were released, so 23.04 arrived in April 2023, while 22.04 was released in April 2022.
The LTS at the end of Ubuntu 22.04.2 stands for Long Term Support, which guarantees support for five years. Versions without long-term support, such as 23.04, receive updates for only nine months, by which time it will be replaced by the next annual version. First-time users should therefore download the 22.04.02 LTS version because it provides peace of mind until April 2027.
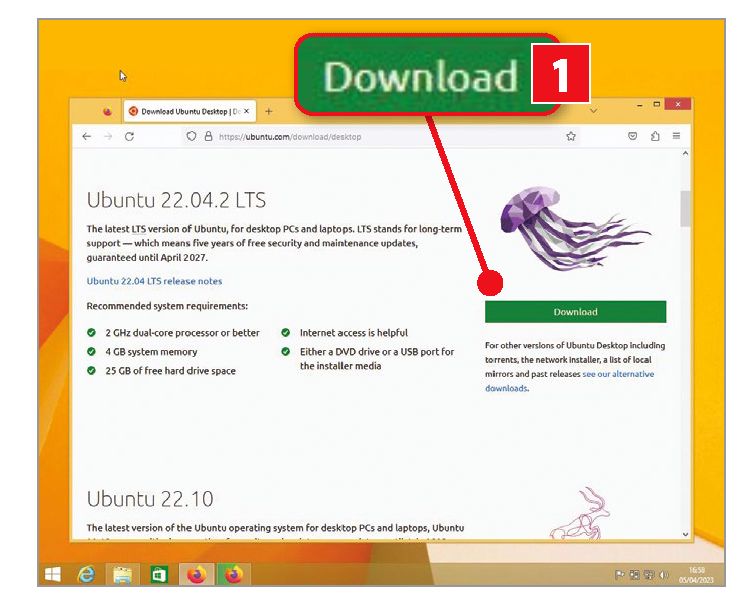
Click the green Download button to get the latest long-term support version of Ubuntu
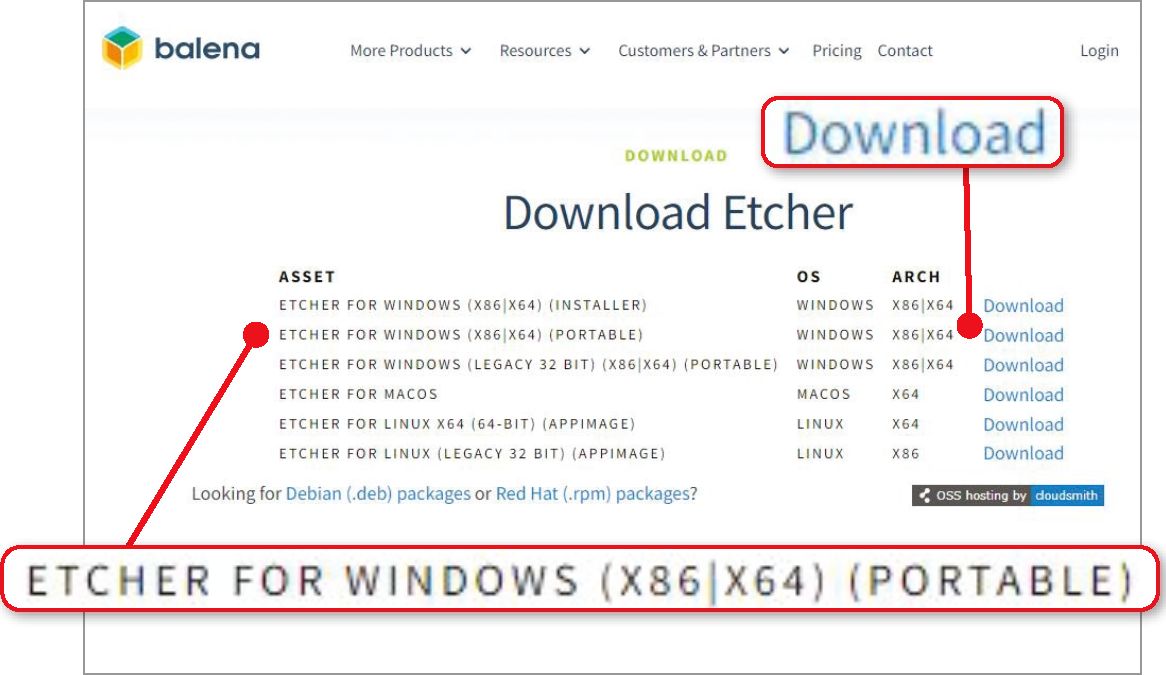
To do so, visit www.snipca.com/45625 and click the green Download button under the jellyfish image (see screenshot above). Save the ISO file this links to in your Downloads folder.
While it’s downloading, visit www. snipca.com/45627 and click Download Etcher. This automatically scrolls the page to the download section. Click ‘Download’ to the right of ‘Etcher for Windows (X86|X64) (Portable)’ – see screenshot below – and save the file to your Downloads folder. When both Etcher and the Ubuntu ISO file have finished downloading, plug in your USB stick (it needs to be at least 8GB) and back up any of its content that you want to keep (because you’ll be wiping it).
Now launch Etcher, click ‘Select image’, then select the Ubuntu ISO file you just downloaded. Now click ‘Select target’ (see screenshot above right) and select your USB stick drive. Finally, click Flash.
Etcher will extract the contents of the ISO file to your USB stick, and make the drive bootable so you can use it to restart your computer. When it has finished, quit Etcher and restart your PC, leaving the USB stick plugged in.
Click this link to download the portable version of Etcher
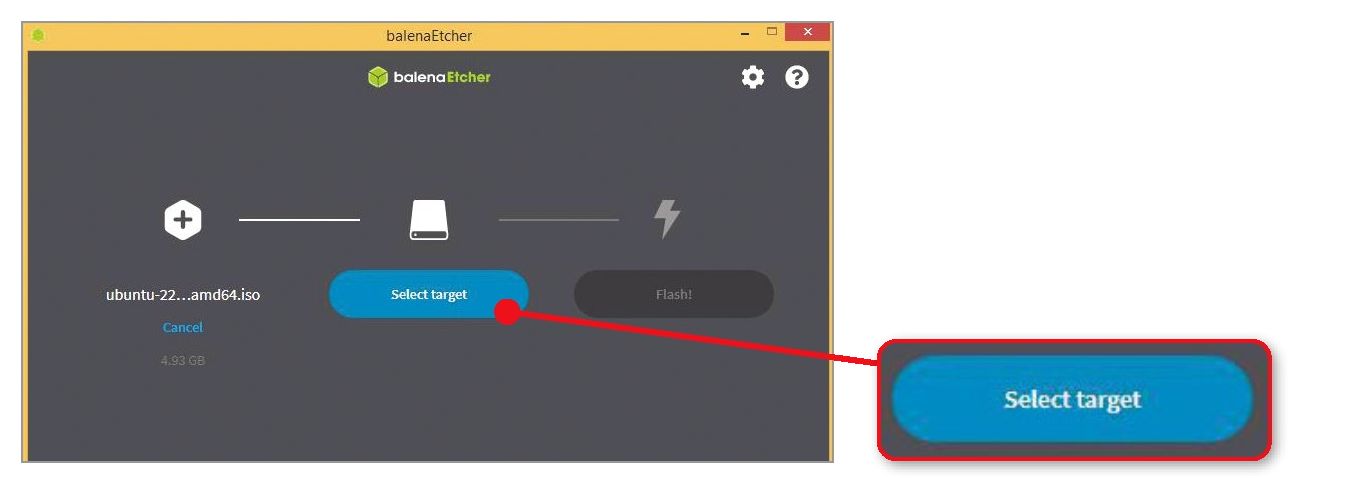
Click ‘Select target’ and Etcher will copy the ISO file to your USB stick so you can restart your PC with it
2 Boot from your USB stick
In most cases, your PC will want to boot from its built-in hard drive. You need to interrupt this so that it instead boots from your USB stick. You do this by pressing a key on your keyboard as your PC boots in order to open the BIOS or UEFI. The key varies from one manufacturer to another, but is usually displayed briefly on screen while starting. If it isn’t, check any instructions that came with your PC. It’s likely that the key you need to press is F1, F2, F10 or F12.
When you’ve gained access to BIOS or UEFI, you need to look for the screen that lets you set the boot device, boot priority, or similar setting. Again, the terminology used and the location of this setting varies.
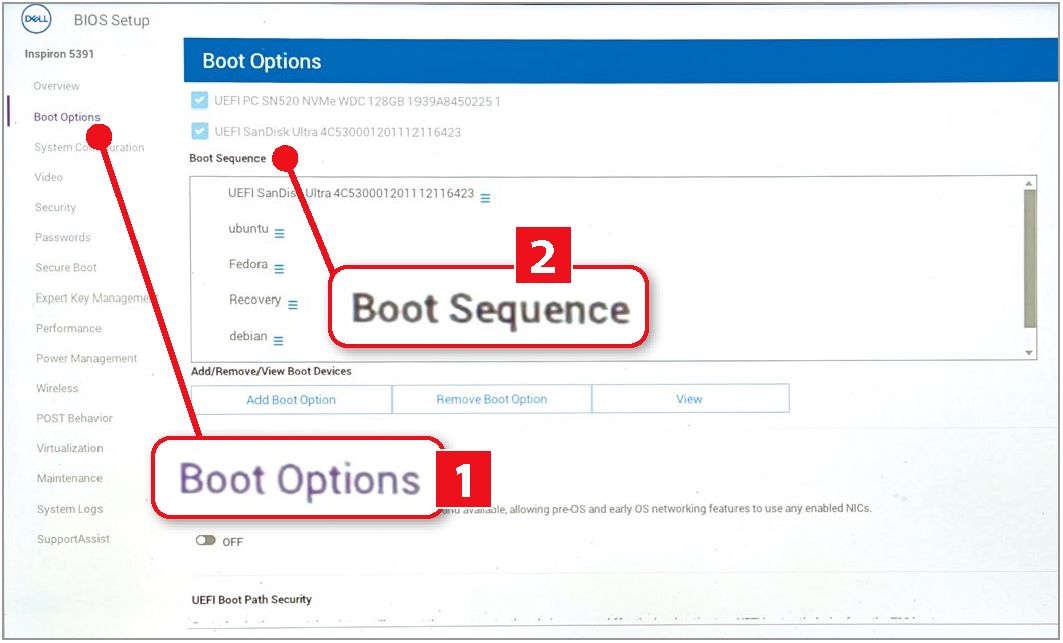
On our Dell laptop clicking Boot Options allows us to change where the device boots from
On our Asus Vivobook laptop, for example, we use the right cursor key to move along the text-based interface to the Boot tab. We then press the down key to navigate to Boot Option Priorities and set the USB stick as the first device to boot from. Once you’ve finished making these changes, press F10 for ‘Save and Exit’, then press Enter to select Yes when prompted to save the configuration. At this point our laptop successfully boots from the stick.
Our Dell Inspiron laptop, however, has a graphical interface. In this case, we click Boot Options on the left (1 in our screenshot below), then locate our USB stick in the Boot Sequence list 2. Here, we drag it to the top of the list of bootable drives so it’s where the laptop boots from. When we’ve finished, we click Apply Changes to save our settings, then we click Exit to quit the settings and reboot our computer.
How I use Ubuntu
I have two computers running Windows, which are useful for testing software and general tasks, but I also use Ubuntu for keeping in touch with friends and editing photos. I run the 22.04.2 LTS version, which means I’m guaranteed support for another four years.
Nik Rawlinson
Select ‘Normal installation’ so you get a browser, LibreOffice and media players included with Ubuntu
3 Install Ubuntu
The Ubuntu installer guides you through each of the options you need to deal with to set up your new operating system – none of the prompts are particularly complicated.
First, click Install Ubuntu, then select your keyboard layout. By default, this will be set to ‘English (US)’, so click ‘English (UK)’ in the left panel then click Continue.
The installer will search for available networks and list all the options within range. Click the name of your network, followed by Connect. Now type your Wi-Fi password into the Password box, before clicking Connect again. Ubuntu will now connect to the internet so it can download more features if required.
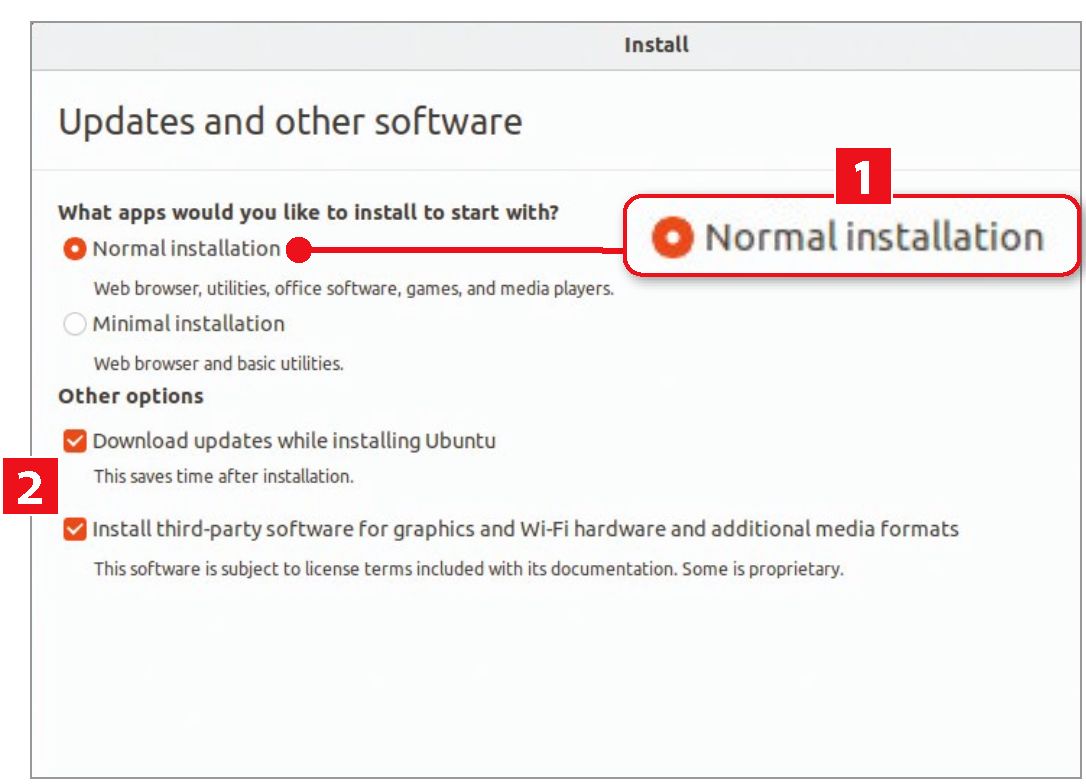
Next, you need to decide whether you want a ‘Minimal’ or ‘Normal’ installation. The latter includes a web browser, the LibreOffice suite, media players, a selection of useful tools, and more; while the Minimal installation is just Ubuntu. We recommend leaving ‘Normal installation’ selected (1 in our screenshot above). Also make sure that the two options for downloading updates during the installation and installing third-party graphics and Wi-Fi drivers are ticked 2.
Now click Continue and tell the installer what it should do with your hard drive. The default option is to ‘Erase disk and install Ubuntu’ (1 in our screenshot above right). Again, we recommend sticking with this option as it wipes your hard drive entirely so you can use its full capacity for your new operating system. Just make sure you have that backup of all your important data that we recommended making earlier.
If you want to explore other options, such as specifying how much of the drive should be allocated to Ubuntu, click the button beside ‘Something else’. Otherwise, click Install Now 2, then click Continue to confirm you want your changes written to the drive.
You’ve almost finished the setup process: you just need to complete a few personal settings. The first is to specify where in the world you are. Click the UK on the map (assuming that’s where you are) and it will highlight your timezone. Click again if you didn’t get it right the first time, then click Continue.
Now create a user account for yourself. This is the account you will use to log in and will keep your personal data separate from that of anyone else who uses the same computer. At the very least, supply your name, a username, and a password. You can also change the computer name that Ubuntu suggests if you wish.
Click ‘Continue’ when you’ve finished entering these details and Ubuntu will begin installing. At this point, it will be too late to stop it wiping your drive, so make sure you’re committed to switching from Windows before you get this far. How long it takes to install depends on the speed of your computer.
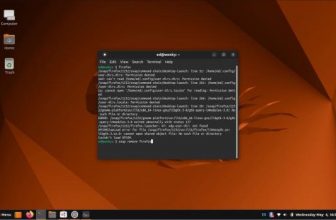
Ubuntu has a taskbar running vertically on the left, not along the bottom like Windows
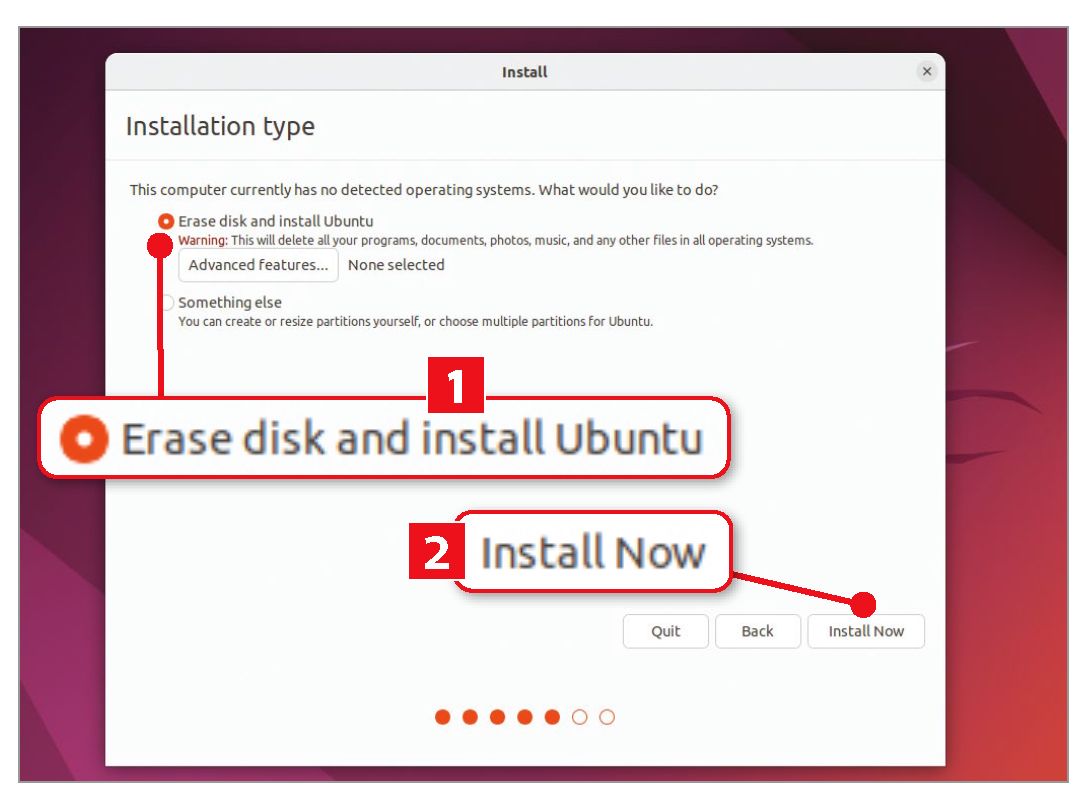
Keep ‘Erase disk and install Ubuntu’ selected so your hard drive can use its full capacity for Ubuntu
Log into Ubuntu
When the installation process has completed, click the Restart Now button and, when prompted, remove your USB stick and press Enter. This will launch Ubuntu. At this point, you’ll only have one user account set up on your laptop, so click your name and enter the password that you specified when setting up your account.
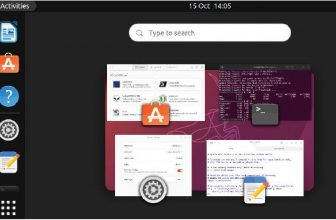
When Ubuntu starts, you’ll see a subtly different interface to what you might be used to. Where Windows has a taskbar at the bottom of the screen, Ubuntu places one vertically on the left. However, most features work in a very similar way. Press the Windows key on your keyboard to open the Ubuntu programs menu where, for example, you’ll find LibreOffice, Thunderbird and Firefox, each of which you might already know if you use their Windows versions.