bit.ly/syncbf478
Min requirements: Windows 7/8.1/10 File size: 27.6MB
Everyone knows it’s important to back up your personal files regularly in case disaster should strike, but a surprising number of people don’t have any kind of backup plan in place, even though there are plenty of free tools that can be used for just such a purpose. If you’re not currently backing up your PC, give SyncBackFree a try.
This free version of a commercial backup product lets you back up your data to a local drive, across your home network or to a remote server, and also sync and mirror content. You can schedule or back up data on demand, and compress and encrypt files. The program lets you create multiple profiles, so you can back up different
types of files whenever you require – for example, photos and videos once a week, and documents daily. It also lets you simulate each new backup, so you can check to see what will be copied before backing it up for real.
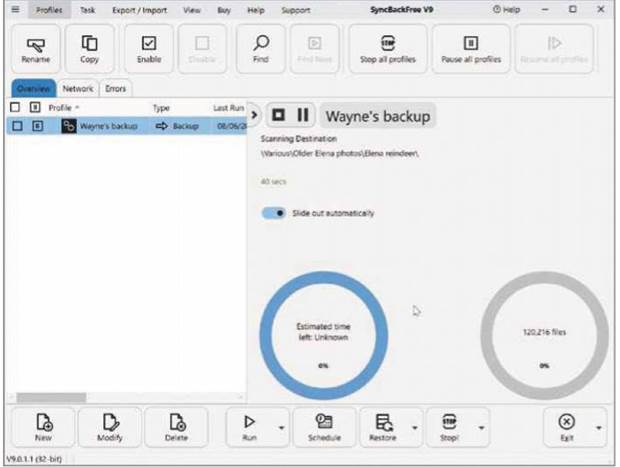
Version 9 of SyncBackFree sports a brand new look, with an optional dark mode, that displays better on high-DPI screens (there’s per-monitor DPI scaling, too). The software is much faster, the
restore wizard has been simplified and the log file has been modernised and improved to make it clearer.
If you require additional features – such as the ability to back up and sync files to the cloud – you can upgrade to SyncBack’s paid-for SE version (for Home users) for £39.95, or the Pro edition for £53.95. For most users, however, the free version will provide everything you need.
MINI WORKSHOP | Create a new backup with SyncBackFree
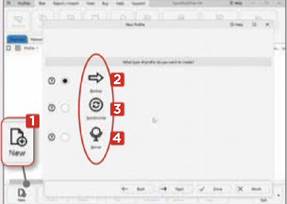
1 The first thing you need to do with SyncBackFree is create a new profile. This stores the details of the items you’ll be backing up or synchronising. Click the New button 1 and give your profile a descriptive name. Click Next. Now choose whether you want to create a Backup, 2 Synchronise 3 or Mirror 4 profile.
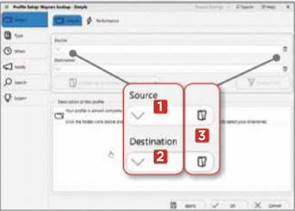
For our purposes, we’ll create a backup. Click Next and you’ll be able to choose the source drive or folder to back up and the destination. Click the down arrow for either one if you wish to switch to FTP. Click Done, then select the Source 1 and Destination 2 locations by clicking the folder icon to the right. 3
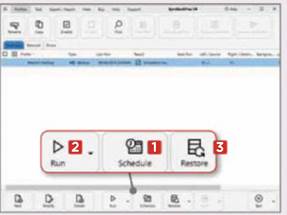
3 You can choose sub-directories and files for the source and destination, and clicking Change Filter will let you specify file types to include or exclude. Click OK and perform a simulated run for the profile. You can then create a schedule 1 or run the backup. 2 Previous backups can be restored from here. 3


