Sweet Home 3D 6 Review
INTERIOR DESIGN SOFTWARE
Min requirements: Windows 7/8.1/10, Mac OS or Linux File size: 49.4MB
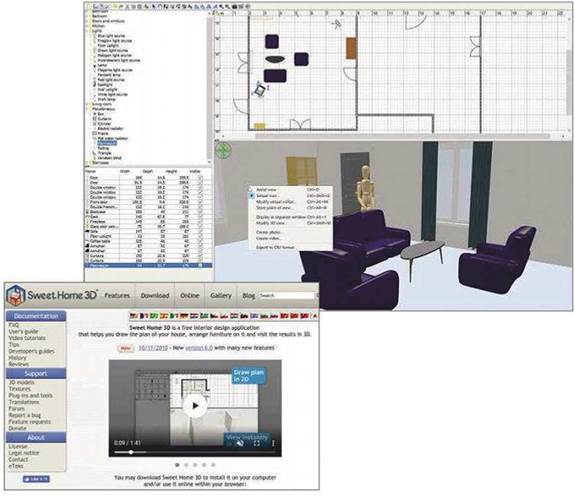
If you’ve just moved into a new house, are thinking of rearranging your furniture or want to make significant changes to the layout of your current home, Sweet Home 3D could be just what you need. This sophisticated free interior-design software lets you create a two-dimensional floor plan, add furniture and then view the results in 3D.
Created your floor plan, then use the sidebar to populate it with furniture and other items. The objects are arranged into straightforward categories, such as Bathroom, Bedroom, Kitchen, Living Room, Lights, Staircases and ‘Doors and windows’.
Additional objects, including items created by other users, are available from the Sweet Home 3D website.
You can add text anywhere to label or highlight specific items, and the software lets you move through your 3D world, take photos or record a video to watch later. To help you achieve the best results, the program lets you adjust the resolution, aspect ratio and frame rate of the movie, as well as the quality.
The latest version of Sweet Home 3D introduces a wealth of new features, such as texture shifting, multiple lines of text and the ability to rotate and slide openings and light spots. It also provides new ways of manipulating items, an updated furniture catalogue and even an ‘articulated mannequin’ that you can colour and pose to give you an idea of how people will fit in each room.
When installing the program, you can decide whether you want the sogtware to run in 32-bit or 64-bit mode, which can help with compatibility. Support for high-resolution screens has improved, too.
MINI WORKSHOP | Redesign your rooms using Sweet Home 3D
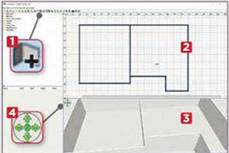
1 The first step is to draw your floor plan in two dimensions. Click the Create Walls button in the menu bar, 1 then draw the walls in the top half of the main window. 2 A 3D representation of your building appears in the bottom half. 3 Use the direction button 4 to rotate and tilt the 3D view.
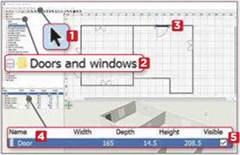
To create openings in the walls, click the Select Objects button in the menu bar, 1 then expand the ‘Doors and windows’ section on the left. 2 Drag any items you want into your plan. 3 Information about the objects you’ve added appears in the bottom-left panel, 4 and you can temporarily hide any. 5
Continue to work through the different categories, adding objects and furniture to your plan.
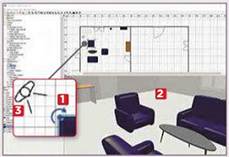
You can use an item’s corner handle 1 to rotate it. Click 3D view 2 in the menu and select Virtual Visit to explore your creation in 3D. The ‘point- of-view’ icon in the 2D plan 3 lets you change your viewpoint in the 3D room.


