Install Chrome OS on any PC hardware
Chrome OS is based on the open source Chromium OS and over the years there have been various attempts to make Chrome OS builds available to any users who wish to install it on their personal devices. Around five years ago this author was attempting to use builds by ‘ArnoldTheBat’ on old eeePCs. While FydeOS is another Chromium OS build, which is targeted at the Chinese market.
Table of Contents
This leads us nicely onto Neverware, which has been producing its own OS, called CloudReady, for around five years now. Neverware has a series of supported devices, which the OS has been tested on. Lots of other devices are compatible with the download as well, but haven’t been tested.
Neverware’s CloudReady has proven to be popular in the education environment because it can be installed on older (64-bit only) equipment and perform smoothly than when running better-known operating systems. Other benefits include being able to enrol CloudReady devices into the Google Workspace Admin console by purchasing a paid-for upgrade. With these enterprise-specific features, it’s no surprise that Google acquired Neverware at the end of 2020.
With that background out of the way, it’s time for us to discuss the Home edition, which can be downloaded and installed at no cost. At its heart Chrome OS is a heavily customised Linux distribution, with a very lightweight shell. In this article, we’ll download and install the Home edition of CloudReady and then walk through the initial setup process, first login and familiarisation process.


Installing the OS
Neverware’s CloudReady can be installed as a virtual machine or on bare metal. If running as a VM, only some of VMWare’s products are supported. Running as a VM is outside the scope of this article, but further details can be found at https://bit.ly/lxf283cloudvm. Unfortunately Oracle’s Virtualbox isn’t supported due to incompatibilities with the graphics stack.
To install the OS on bare metal a USB stick needs to be prepared. This is a simple process and can be carried out using either the USB Maker tool, if running Windows or by following the steps below on Linux. By using the following link select the relevant option for your platform (Linux instructions will be discussed shortly): www.neverware.com/freedownload#home-edition-install.
Once the previous link has been visited, scroll to around half-way down the page and on the right-hand side, select the “Download 64-bit Image” button. While the image is downloading, scroll down the page and visit the link “Get Linux Instructions”.
First we’ll determine which device represents the memory stick plugged in. Open a terminal, plug in the memory stick (a minimum size of 8GB is required) and then run the following command:
dmesg
From this command there’ll be a large amount of output, but should show references towards the bottom of the output related to a memory stick, matching the size plugged in. This will also reference the partition if it’s automatically mounted. For this article, an assumption is made that the memory stick is /dev/sdd, but this does need to be altered to fit your situation. This can be double-checked by running the command
sudo fdisk -l
The output from this should match the findings from the previous command. Once downloaded, extract the. bin file from the downloaded. zip. When the memory stick has been correctly determined and the file has been extracted, the following can be run. As a further note of caution, this command can wipe the operating system drive, so use it with care:

Once the file has been written, ensure that everything has been written to the memory stuck with
sudo sync
Installing CloudReady
Now that the memory stick has been prepared, the OS can be installed on your device. First, plug the memory stick into your computer and press whichever keyboard combination is required to enter the Settings screen. From experience, this could be F1, F2, Esc or Del. Some devices also have a physical button that can be pressed as the device turns on and this forces it to enter the Settings screen. From the Settings screen ensure that Secure Boot and Fast Boot are both switched off and that the boot mode is UEFI rather than BIOS. Once this has been done the boot order can be set to USB device first, or to boot from USB as a one-off override.
As the device boots, you will see a white screen with the logo and name of CloudReady in the middle of the screen. Depending on the speed of the device and USB stick being used, this may take a minute or two to boot.
Once booted, a plain login screen can be seen. Logging in doesn’t need to take place yet because CloudReady can be installed from this point. Clicking in the bottom right corner will open a menu and one of the options is to Install OS. Select this option, read the warnings and agree to wipe the disk of the device being used. While being installed a progress bar will constantly whizz across the screen from left to right and a message will show stating that the installation should take no longer than 20 minutes. When the installation has completed, the device will automatically switch off.
Once installed, remove the USB stick (otherwise the PC or laptop may boot from there again) and switch the device on. If all has gone well then the device will boot with a white screen containing the CloudReady icon. A welcome wizard will then launch.
Follow the wizard to set the language and Wi-Fi details, and then you’ll be asked to agree to the terms of service and asked to opt-in to providing diagnostic and usage data to Google. This last request is optional, so do what feels most comfortable. The final step of the process is for the device to search for updates. When this has completed a login screen will, again, appear. Congratulations – at the stage CloudReady is installed, connected to the network and ready to be logged into!
Log on with your Google account
Now, to use our new operating system. The first thing to do is to login with a Google account. Two-step verification options are supported on CloudReady and a phone will receive the push notification if this is configured. During first login follow the wizard and enable whichever syncing features are preferable. On first login a helpful welcome message will be displayed – spend some time learning about this latest release before closing the wizard.
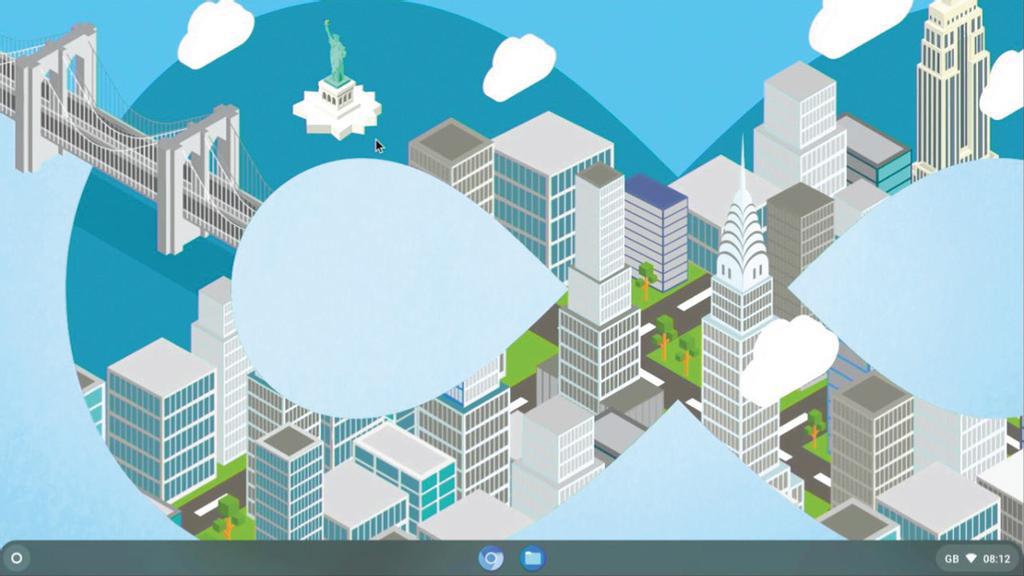
Access the launcher from the circular icon in the bottom left-hand corner. This will open a screen with a search box (who’d have thought Google would provide a search facility?) where various programs can be searched for. The grey bar at the bottom of the screen is called the shelf and this is, in effect, the same as a dock in Linux distributions. Once applications have been opened they can be pinned to the shelf by right-clicking their icon and selecting the Pin option.
Clicking the bottom right corner will open the basic Options panel. From here the main Settings cog icon can be accessed as well as performing basic tasks such as switching Wi-Fi and Bluetooth on and off, pairing Bluetooth devices and casting the screen to any local Chromecast devices.
Much like Windows enabling seamless access to documents stored on OneDrive and Linux allowing access to files in certain cloud providers, CloudReady also gives you access to files in Google Drive. To open these files, open the File Explorer from the shelf, or search for Files in the launcher. You’ll see that you can access files on the local device as well as files within Google Drive. If these files are native Google Docs then they’ll open in the browser. So if, for example, these files are images then they’ll open in the image viewer.
Applications are installed in a similar way to most OSs in recent years – from the launcher, search for Web Store. This will open a browser window and enable you to search for programs and install them. For example, an SSH application can be installed by searching for Secure Shell App. Once installed, this will then be accessed using the Launcher and can be pinned to the shelf. Some programs will open as separate windows and some will open as tabs in the browser.
Where’s the Linux?
At its heart CloudReady is a Linux distribution with many of the same components in usage as other distributions. As we’ve already discovered the graphical environment is different from KDE, Gnome, Mate or any of the others we all know and use. A number of years ago work began to lay the foundations for Chromium OS (and therefore Chrome OS and CloudReady) to run containers and virtualisation. This project is called Crostini and further information can be found at https://bit.ly/lxf283crostini.

The interesting part of this hard work is that, from within the CloudReady environment a Linux distribution can be installed, which gives you access to the device’s file system and microphone, and for command-line and graphical tools to be installed and used. USB device support within the Linux environment is currently limited unfortunately, but can be worked around (to a point) by sharing a file location from CloudReady to the Linux environment. All that said, let’s get our Linux environment installed, share a folder with it and install both a command line and graphical application.
Completing the installation is simple. First, select the clock in the bottom-right corner of the screen and then select the Settings cog. On the left-hand side of the window which opens, select Developer. Then, in the main part of the settings screen click the Turn On button, which is next to the title of “Linux development environment (Beta)”.
When switched on a wizard will appear, which will carry out the setup. Follow through the wizard selecting a username and the amount of disk space, which will be allocated to the Linux environment. It’s important to select the correct size during installation, but not critical. This size can’t be directly changed, but it’s possible to export from one Linux environment and import into another, which would enable the size to be changed. The wizard will then carry out the installation and a new terminal application will be installed. A terminal will open when the installation has been completed. The environment will be called penguin and the username will be the one that was chosen at setup.
What you’re now accessing, via the terminal, is a Debian environment and this means that a large number of Debian packages can be installed. First, make sure the environment is up to date, which can be done by running the following commands:


When completed, we can start installing applications. For this article, a command line and two GUI applications will be installed and these are called NCDU, Remmina and Audacity. Remmina enables connection to other devices using the RDP, SSH, VNC and SPICE protocols. Audacity is an audio recording and editing tool. Finally, NCDU is a tool that makes it possible to view disk space on a per directory basis. To install these run the following command:
sudo apt install remmina ncdu audacity
As previously mentioned it’s possible to export settings from the Linux environment and this can be used either for back-up purposes, or to import into a new and larger environment. To carry this out, select the clock in the bottom-right corner and click the cog. Select the Developer section again and then open the Linux settings. From here you’ll be able to export settings using the Backup & Restore section and then they can be saved to the device. If completing an import into a larger environment, follow the installation steps again and then use the Backup & Restore options from the Linux Settings screen.
While the Linux Settings screen is open, it’s a good time to explore the other options. From this screen shared folders can be viewed and deleted. To share the folder in the first place, one must first open the File Explorer, navigate to the correct location, right-click and select the Share with Linux option. Some USB devices can also be shared, but this is limited to certain devices.
To share a device, plug it in, open the USB sharing options and if available select the toggle to share with Linux. The Port forwarding option can be used to allow ports to be forwarded between the physical device’s IP address and the Linux environment. In this way a web server could be set up, for example, and web content could be shared for testing purposes. The final option to mention is that of microphone support. When selecting this option the microphone will then be allowed within the Linux environment. This could be useful if running Audacity for audio recording and editing purposes, say.
When logging into CloudReady, Linux can be launched by opening the Launcher and searching for Linux or Terminal. This can also be pinned to the shelf. To open command line applications, the name can be entered within the Terminal application. To view disk utilisation with NCDU, simply type ncdu / and press Enter. This will then display a simple bar graph of folder utilisation by file size. Note that this will display the utilisation of files within the container, rather than the disk usage of CloudReady itself.

Graphical applications are well integrated into the system and will appear in the launcher. To access them, open the launcher and search for the name. Once Remmina has been opened its usage is identical to that on other Linux distributions and connections can be added to devices via RDP, VNC or other protocols. The final application to use is Audacity, which was installed earlier on in the article. Open this in the same way as Remmina and don’t forget to enable access to the microphone if using it for recording audio. By selecting the Record button, the default settings should be correct and will allow audio to be recorded. When saving files from applications within the Linux ecosystem, these can be accessed from the File Explorer under the Linux files section on the left-hand side.
For the more adventurous out there the Debian base environment can be swapped out for Arch. While it looks like both containers can exist side by side, it’s probably safer to assume that, if completing these instructions, the Debian environment will be removed and any installed applications will be lost. The instructions and explanations of each command are taken from the excellent Arch wiki and can be found at https://wiki.archlinux.org/title/Chrome_OS_devices/Crostini.
The aim of this article has been to introduce a lightweight and very usable operating system, and explain how some of the more advanced features can be used. With that said – enjoy!

MAKE USE OF ACCESSIBILITY FEATURES
Accessibility features are built into CloudReady and are simple to access. By selecting the clock in the bottom-right corner of the screen a settings “cog” can then be selected.
Under Advanced and Accessibility lots of tools can be switched on or off. These tools cover areas such as offering a screen reader or select to speak, where the OS will read whatever’s been selected and various display options, such as high contrast mode, screen resolution changes and screen magnifiers. Other options available are keyboard options such as sticky keys and an on-screen keyboard. There are also options to make a mouse or touchpad easier to use if this would assist the user.
Another powerful tool to use is speech to text. This has been designed in such a way that dictation can be used in any field which supports text input. To switch this on, the option can be found in the same place as the already described Accessibility features and is called “Enable dictation (speak to type)”. Once switched on, select where you want to enter text and select the icon of the microphone, which can be found in the Options area in the bottom right-hand corner. Keyboard shortcuts can also be used, but these will likely differ on the hardware being used.
CHROME OS VS CLOUDREADY
While Chrome OS is known for being a particularly lightweight operating system, in recent years some pretty advanced capabilities have been added. Within Chrome OS it’s straightforward to install the Play store and then install any compatible Android apps. From experience this works fairly well, although not all GUIs designed for touchscreen devices work quite so well with a keyboard and mouse/touchpad. Unfortunately, this feature is not available within Neverware’s CloudReady.
Chrome OS has the ability to link to an Android device via a Google account. This enables the sharing of notifications. Unfortunately, this is also not compatible with CloudReady. While not so well integrated, it is possible to use web-based versions of WhatsApp and Telegram to allow some notifications to be shared as well as messages to be sent from the device running CloudReady.
Neverware have also been known to deviate from the base Chromium OS project by offering experimental features, such as being able to use Oracle’s Virtualbox and also install Flatpaks. These features have now been removed, due to the support being added for running a Linux distribution, which supports console-based and graphical applications.
QUICK TIP
Supported devices have been heavily tested by Neverware and can be seen at the link below. Other devices are likely to work as well, but won’t have been tested and may have some hardware that doesn’t work as expected. https://guide.neverware.com/supported-devices.
QUICK TIP
With experience of both Chromebooks and CloudReady in education, it was no surprise at the end of 2020 that Neverware was acquired by Google: https://cloudreadykb.neverware.com/s/article/Neverware-is-now-part-of-Google-FAQ.
QUICK TIP
The Neverware CloudReady knowledgebase offers a wealth of information about the OS, covering topics from running as a VMWare VM to how the release numbering works. See https://cloudreadykb.neverware.com/s/.


