The complete guide to editing PDF files
OUR EXPERT
Nick Peers loves the PDF format. How else do you explain the thousands of PDF documents scattered across his hard drives?
Table of Contents
The humble Portable Document Format file (PDF to its mates) is one of the most versatile formats you could ask for. It solves a very simple problem: how do you ensure that a file you share with other people looks identical on their computers even if they don’t have access to the application in which it was created?
After starting off as a simple way of sharing and displaying documents in a consistent way, PDFs have evolved to become ever more useful. Armed with the right tools you can search them for specific text (then extract that text), annotate them, add comments and even use them like digital forms, filling in sections by typing text or selecting from drop-down menus. And if the PDF is a ‘true’ one (see the box right), you can even edit its content and layout. In this tutorial we’ll reveal what free PDF tools are available in Linux, plus how to use them to meet your every PDF-related need.
Creating PDFs
Before we delve any deeper, let’s quickly recap how you can create PDF files of your own. The easiest way to generate them is from existing documents. In LibreOffice, for example, choose ‘File > Export as > Export as PDF’ to generate a PDF from your Writer, Calc, Impress or Draw document. You’ll see lots of different options are available, which you’ll come to understand better later on in this tutorial – for now, in most cases the default settings are fine, so simply click Export.
Other programs – if they support PDF directly – should work in a similar way, so look under the Export or ‘Save as’ menus for options. If none exist, try File > Print instead. Select the ‘Print to File’ option and make sure the output format is set to PDF. You’ll be able to generate a PDF from the entire document or by selecting specific pages.
Viewing PDFs
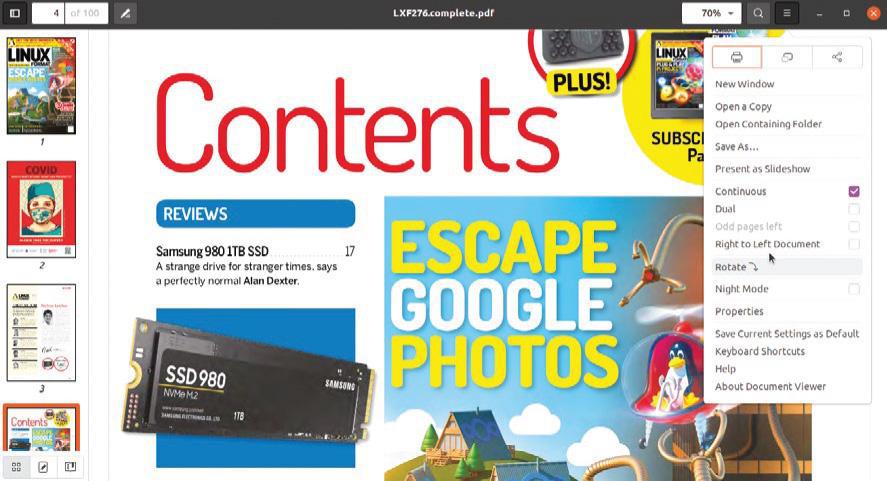
Most distros ship with tools for viewing PDFs (along with other files) – in the case of Ubuntu that tool is evince, better known as Document Viewer. It’s pretty basic but does provide all the core functionality you need for viewing PDFs. Simply double-click a PDF file, and it’ll open in Document Viewer.
Once opened, if the file has an editable text layer, you can easily search for, select and copy text to the clipboard for pasting elsewhere, say into your text editor. You can also extract images from the PDF – simply right-click on an image in the document and choose ‘Save image as…’
Document Viewer can also fill in certain PDF forms – basically any except those created in Adobe’s XFA format (see the box on page 64). You can also rotate individual pages of a PDF to switch orientation between portrait and landscape – you’ll find this option under the ‘hamburger’ () button, which opens Document Viewer’s main menu.
Document Viewer is adequate for basic PDF usage, but if you want to go further with your PDFs then start by installing a more powerful tool in the form of Okular.
It’s a universal document viewer with more flexible viewing and text selection options, plus it enables you to annotate PDFs in several different ways.
Focus on Okular
Okular is available through Snap and the Software Centre, but if you’ve installed Flatpak you can install the very latest version directly from the command line:
$ flatpak install flathub org.kde.okular
Once installed, Okular can be opened via the Launcher. You’ll immediately see its user interface is more feature-packed than Document Viewer, so let’s see what additional tools it offers for interacting with PDFs.
First, it offers additional ways of selecting content: in addition to the basic text selection tool (click and drag to select one or more lines of text), there are area and table selection tools. The area selection tool is particularly powerful: click and drag a rectangle around the area of the page you wish to capture, and you’ll be rewarded with a pop-up menu.
This is divided into two sections: text and images. The former allows you to copy any text within the selection to the clipboard, have it spoken out loud, or used as the basis of a document or web search. The image section allows you to either copy the selection to the clipboard or save it as a file. The table selection tool is designed to make it easy to extract columns and rows of data.
Annotate PDFs
When reading paper documents, there may be times when you’d like to record some notes – typically in the margin – or highlight text. Maybe you’d like to insert a bookmark to jump back to a key passage at a later date. Thanks to Okular, you can take these tools into the digital sphere too. The aptly titled annotation opposite reveals how each different tool works, and you’ll find six of the most popular are accessible from the Quick Annotation Tools pop-up menu on the main toolbar.
They’re all pretty self-explanatory to use – Okular supports undo (Ctrl+Z) if you’d like to experiment, but you can also access additional tools by clicking the drop-down menu and choosing ‘Show more annotation tools’ to bring up a separate toolbar. Alternatively, add additional annotation tools to the Quick Annotation Tools menu by selecting ‘Configure Annotations’. Click Add to set up a new tool – you can create variations on existing tools (say a different coloured inline note) or set up additional types.
These extra types include lines (freehand or straight), shapes (geometrical or freehand polygon) and stamps. The latter is interesting as it enables you to – for example – ‘stamp’ the document with phrases like ‘for public release’ or ‘approved’, but at present those stamps won’t appear to other users unless they open the PDF in their own copy of Okular.
One final annotation tip: you can hide all annotations from view for a clear view of the document without removing them by pressing F6. Press the key again to bring them back.
More viewing aids
Away from annotating documents, Okular also supports bookmarks. These enable you to bookmark individual pages to jump between. Simply navigate to the page in question and choose ‘Bookmarks > Add Bookmark’ (or press Ctrl+B).
Once added, bookmark icons appear on top of the page thumbnails in the left-hand navigation page, but you can also view all bookmarks via their own dedicated Bookmarks tab from here too. By default, each bookmarks is named after its page reference, but right-click an entry under Bookmarks and you can rename it to something more descriptive. In terms of navigating between bookmarks in a document, use the Bookmarks menu where you’ll see all bookmarks conveniently listed. You’ll also see options for removing or renaming the current page’s bookmark if it exists.

One final handy tool that Okular offers is a magnifying glass. If for any reason your PDF contains microscopic text, select Tools > Magnifier. You’ll see a crosshairs pointer appear – click and hold on the page to bring up a magnification tool that will make the text more readable or images easier to make out. Sadly you can’t adjust the magnification level from the default 10x – something for a future update, perhaps?
Create a digital signature
Because they deal with documents, PDF files may occasionally require some form of validation to prove they’re from a specific source. This comes in the form of a digital signature, which requires you first set up a digital certificate you can use to prove you’re who you say you are.
The simplest way to sign PDF documents is through the web using a tool like eSign PDF (https://smallpdf.com/sign-pdf). But if you’ve already got a digital certificate installed, you can use it to sign PDFs locally too. Okular can technically do this, but it requires you install version 21.01 or later of the Poppler PDF rendering library (see https://poppler.freedesktop.org), which basically means compiling and installing the latest version manually if you’re running Ubuntu 20.04.

Instead, you can sign PDFs using LibreOffice Draw – choose ‘File > Digital Signatures > Sign Existing PDF…’ After loading your file, you’ll see LibreOffice Draw has opened it read-only, so click ‘Sign Document’ at the top. You’ll be prompted to choose your digital signature from the list – select it and click ‘Sign Document…’ to do so.
Doing more with PDFs
So far we’ve focused on viewing and labelling PDFs, but what if you want to make changes to the page layout of a PDF? For example, you might want to delete unwanted pages from a document, change the page running order or even combine two or more PDFs into a single file.
The solution lies with two tools. The first is PDF Mix Tool (https://scarpetta.eu/pdfmixtool), which offers you nine ways to manage PDF files. Again, while it can be installed via Snap and the Software Centre, the Flatpak build is the newest available release:
$ flatpak install flathub eu.scarpetta.PDFMixTool
Once installed, open PDF Mix Tool via the Launcher. It’s a simple two-paned window, with available options clearly laid out on the left. Most are self-explanatory – Merge PDF Files allows you to combine multiple PDF files into a single document. Simply click ‘Add PDF file’ to select your files in any order, then use the ‘Move up’ and ‘Move down’ buttons to arrange them in the order you wish them to appear in the document and finally click ‘Generate PDF’.
If you’d like to mix things up a little, choose ‘Alternate mix’ instead. You add and arrange files in exactly the same way, but on clicking ‘Generate PDF’ PDF Mix Tool will extract the first page of each document in turn to add to your single file, then move on to the second page of each document, then the third page and so on until all the pages have been merged into a single PDF.
Work with single files
The rest of PDF Mix Tool’s feature set works with single files only. ‘Extract pages’ allows you to extract individual or groups of pages from your document, then either output them as individual files for each page, or as a single, truncated document. Select ‘Pages’ to select your pages using the following syntax: 1-3,4,7,8-10.
‘Delete pages’ allows you to remove pages from your document, then either save over the original or choose ‘Save as…’ to create a copy. It follows the same pages-election syntax as the ‘Extract pages’ option.
‘Rotate’ works in a similar way to Document Viewer’s rotate tool, except it’s far more versatile: first you can set a specific 90-degree rotation (90, 180 or 270), plus you can apply the change to multiple pages of your choosing. And again, you get to choose between overwriting the original with your changes or creating a fresh copy – this feature is of most use when trying to change the orientation of pages from portrait to landscape (and vice versa).
The ‘Pages Layouts’ section is particularly interesting. It enables you to change the size, orientation, alignment and margins of each page, but in addition you can also compress multiple pages into a single page (similar to how you’d create a photo thumbnail sheet) – the step-by-step guide on the opposite page reveals how it works.
If you’d like to make changes to a document’s metadata – its title, author, subject, keywords and so on – then navigate to ‘Document Information’. Again, don’t forget to click Save or Save as… when you’re done to record your edits.
‘Booklet’ is designed to allow you to convert a PDF document into one optimised for printing double-sided and folding in half. The resulting PDF will look nonsensical in your viewer, but when you print it out and fold it, you should find it creates the perfect half-fold documents, ready for stapling in the middle, saddle-stitch style.
Last, but not least, ‘Add empty pages’ does what it says on the tin: open your file, choose how many blank pages to add, whether to make the same size as the rest of the document (or specify your own size and orientation), and finally where to place those empty pages within the document (before or after a specified page, for example).
Rearrange the order of pages
PDF Mix Tool is packed with useful features, but it has one glaring omission: the ability to easily move pages around within a single document. Thankfully that gap is filled by the aptly titled PDF Arranger (https://github.com/pdfarranger/pdfarranger). It offers a similar set of features to PDF Mix Tool but wraps them up in a very different user interface. Once again, the Flatpak build is the latest version:

PDF Arranger’s UI is clearly designed with one principal aim in mind: to make it easier to rearrange pages within a document using drag-and-drop. Start with the button in the top left corner to add your first document. You’ll see it’s displayed in a grid-like thumbnail view, making it easy to identify individual pages within the document.

From here, you can add more documents to the mix, combining them all into a single document like PDF Mix Tool’s ‘Merge PDF Files’ feature, but here’s the clincher. Once all your pages are in place, you can simply drag and drop them around the main window to change their running order.
To move groups of pages together, simply Ctrl-click to select each page in turn (or Shift-click to grab consecutive pages). Once highlighted, you can drag these to their new location, or right-click for more options.
The right-click menu reveals a host of tools, from deleting and rotating pages to changing the page format (basically scaling or cropping margins). You can duplicate pages, split them, reverse their order or export the selection as a new PDF. Most of PDF Mix Tool’s functionality is duplicated here, but there are enough omissions – specifically the page layout tools – to ensure both apps serve more as friendly companions than competition.
LABEL PDFS WITH OKULAR

TYPES OF PDF
There are, broadly speaking, two types of PDF: ‘true’ or digitally-created PDFs, and ‘image-only’ or scanned PDFs. When you snap a document using a digital camera or scanner, you effectively take an image of that document, one image per page snapped. Each image can be viewed by the naked eye, but any text on that image is inaccessible to you unless you perform OCR (Optical Character Recognition) on the document using specialised software, which basically scans the image for recognisable text. It then places this text onto a separate – but invisible – layer that allows you to search for, select and extract text from the document.
A‘true’ PDF is one that’s created within a program – either via its Export or ‘Save as’ menu, or by printing to a PDF virtual printer. This creates separate text and image layers, each of which can be accessed via the right PDF tools, such as those featured in this tutorial. One variation of a ‘true’ PDF is one that’s been generated to allow users to fill in forms by typing in details into fields on the document or by making selections using options such as tick boxes, radio buttons and drop-down menus.
Note, however, that not all forms are equal – many use Adobe’s XFA format, which won’t work in Okular or Ubuntu’s built-in Document Viewer.
FILL IN ADOBE FORMS
Not all PDF forms are created equally. Those that adhere to Adobe’s XFA standards can’t be filled using either Document Viewer, which simply won’t allow you to edit the fields, or Okular, which will at least warn you that it can’t be used to fill in the form.
If you’ve received an XFA-formatted PDF that needs filling, then you’ll need to install the free version of Master PDF Editor, which you can download and install as a DEB file via its website (https://code-industry.net/free-pdf-editor). Once installed, simply open the file in Master PDF Editor, and you should find the form can now be filled.
The free version of the program also offers some other handy features: you can create PDF documents from scratch – either by importing compatible image files, or from paper using your scanner. Other features supported without a registration code include splitting, merging, commentating and annotating, plus bookmark management.
The full version adds full editing capabilities as well as support for digitally signing your PDFs. You can road-test all these features within the free version – Master PDF Editor will embed a watermark into any documents saved using the unregistered version. If you like what you see, registration costs £64.50.
CREATE A PDF THUMBNAIL SHEET

1 Set up thumbnail sheet
Open PDF Mix Tool, select ‘Pages layout’ and click ‘Open PDF file’ to select the file you wish to display on your thumbnail sheet. Once imported, use the ‘Page size’ fields to select the size (and orientation) of the sheet itself. If you plan to print the sheet, then A4 or – if your printer can handle it – A3 is best.

2 Choose thumbnail layouts
Use the ‘Pages layout’ to set how many pages will be displayed on each individual page of the sheet – use the Rows and Columns fields as shown (for A4 portrait, 2×4 or 3×6 is a good choice; for landscape, reverse it to 4×2 or 6×3). Use the Spacing field under ‘Pages Layout’ in conjunction with the Margins settings to create spacing around each page.

3 Save and review
Click ‘Save as…’ to create your PDF thumbnail sheet without overwriting the original document. Once done, open it in your PDF viewer tool to review how it looks – you’ll see pages are listed sequentially left to right along each row, enabling you to see the document’s overall layout. If necessary, you can return to PDF Mix Tool to make further tweaks.
QUICK TIP
Looking for a way to edit PDFs without having to pay for the privilege? If you don’t have access to the original document and its parent application, open the PDF in LibreOffice Draw. You can swap graphics, make changes to the text and more besides.
QUICK TIP
If you’d like to make Okular your default PDF viewing tool in Ubuntu, right-click any PDF file and choose Properties. Switch to the Open With tab, select Okular from the list and click ‘Set as default’.
QUICK TIP
If you’re happy to use the command line, you can convert image-only PDFs into files with an editable text layer using OCRmyPDF. Visit https://github.com/jbarlow83/OCRmyPDF for details of how to install and use it, plus what additional dependencies you’ll need.


