Tiny11 Review
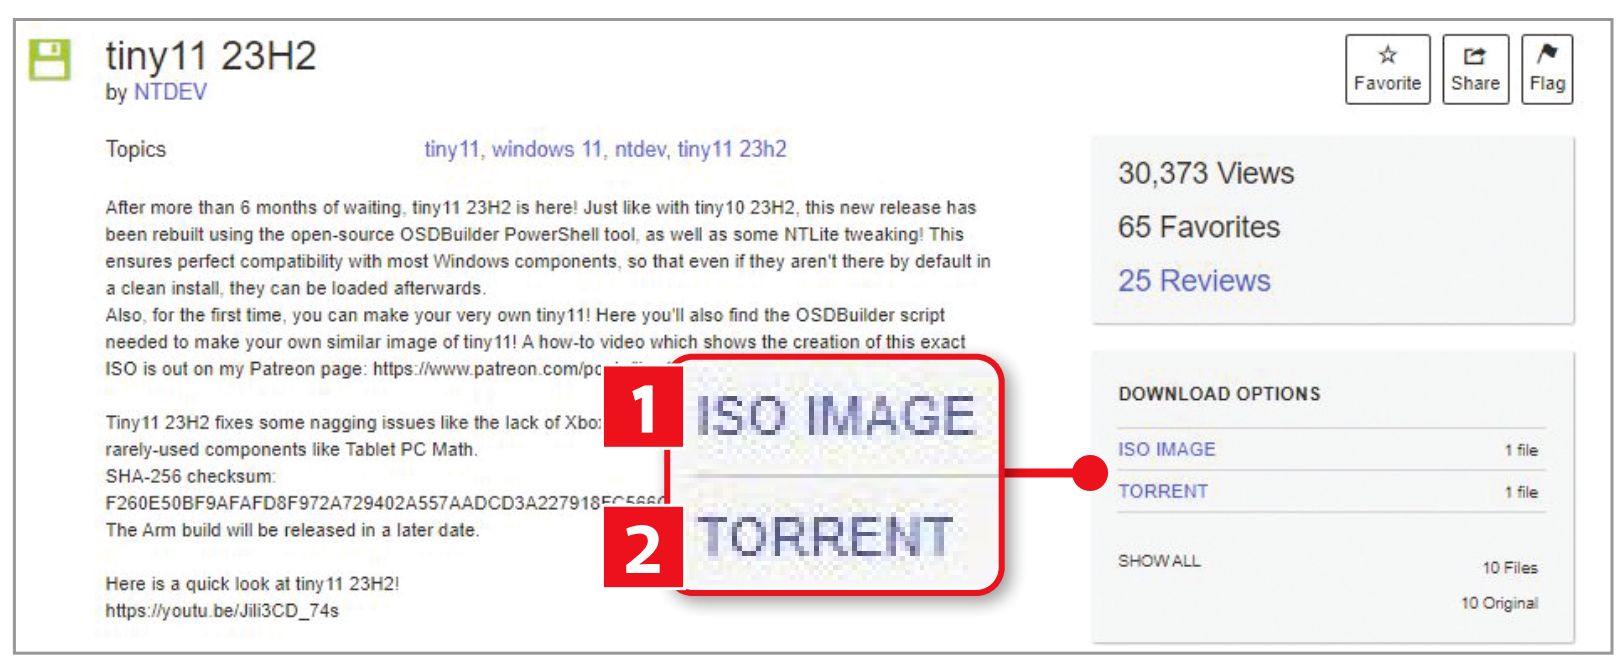
Confusingly, It’s called ‘23H2’, referring to Microsoft’s forthcoming 23H2 update for Windows 11, though it’s actually based on the 22H2 update released last year. To download the 4.2GB file, click TSO IMAGE’ on the right ([1] in our screenshot above). The IA limits users’ bandwidth so the download might take a few hours. If you find this is too slow, choose the Torrent option for downloading instead [2].
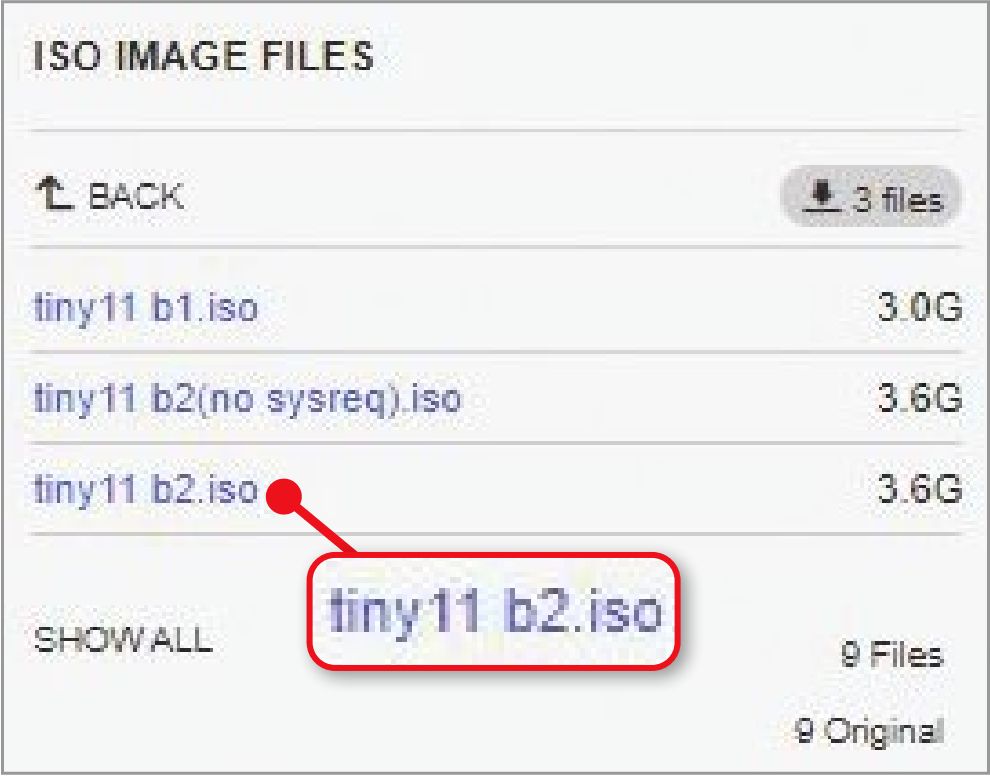
This version doesn’t require TPM 2.0 and Secure Boot. If your machine does have these features but you’d still like to run Tiny11, visit https://archive.org/details/tiny-11_202302 instead, then click ‘ISO IMAGE’ on the right and select ‘tiny11 b2.iso’ file (see screenshot bottom of page 60) – it’s a 3.6GB file.
When Tiny11 downloads, you’ll need to create a bootable USB stick (or CD) for the ISO file. For USB sticks, we recommend the software Rufus (https://rufus.ie/en/); for CDs try WinCDEmu (https://wincdemu.sysprogs.org/).
Once you’ve placed the ISO file on your stick or CD, you’ll have to set your computer to boot from it. This requires opening your machine’s BIOS or UEFI when booting – check your manufacturer’s manual or website for instructions.
When in the BIOS or UEFI, open the ‘Boot options’ (or similar) menu, then select the USB stick or CD and press your keyboard’s arrow keys to move it to the top of the list. Press Enter and wait for Windows to confirm the change.
You should next reach the ‘Windows Setup’ screen. Select the language, time format, and keyboard method, then click ‘Next’. Accept Microsoft’s terms, click Next, select the drive where you want to install Tiny11, then click Next at the bottom.
Now complete the remaining steps, such as selecting the country and the keyboard layout method and setting up a local account by entering a name and a password. You can sign into your Microsoft account later through Settings if you want to. Follow a few more security steps and the installation should start.
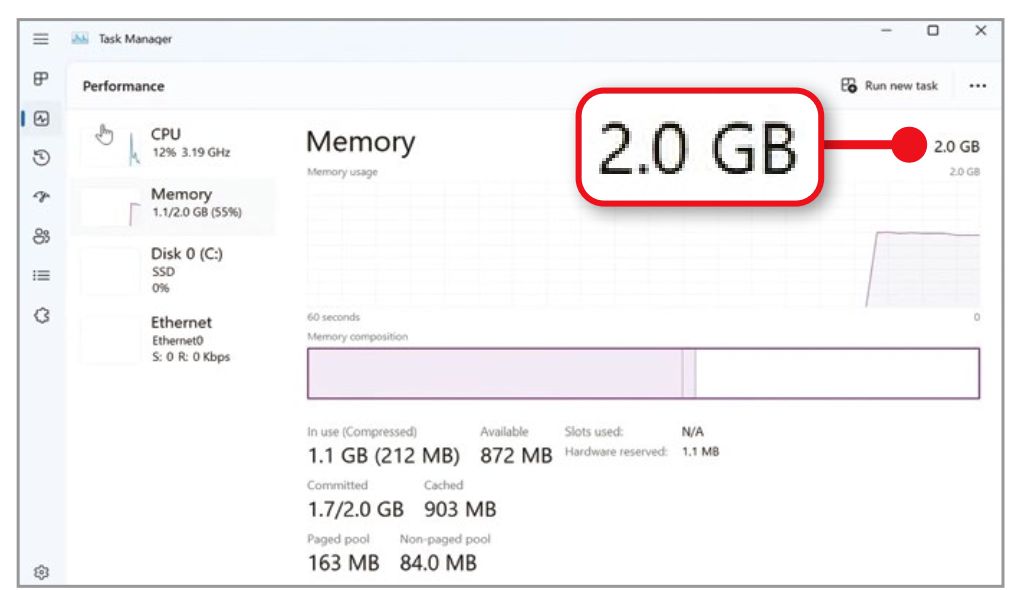
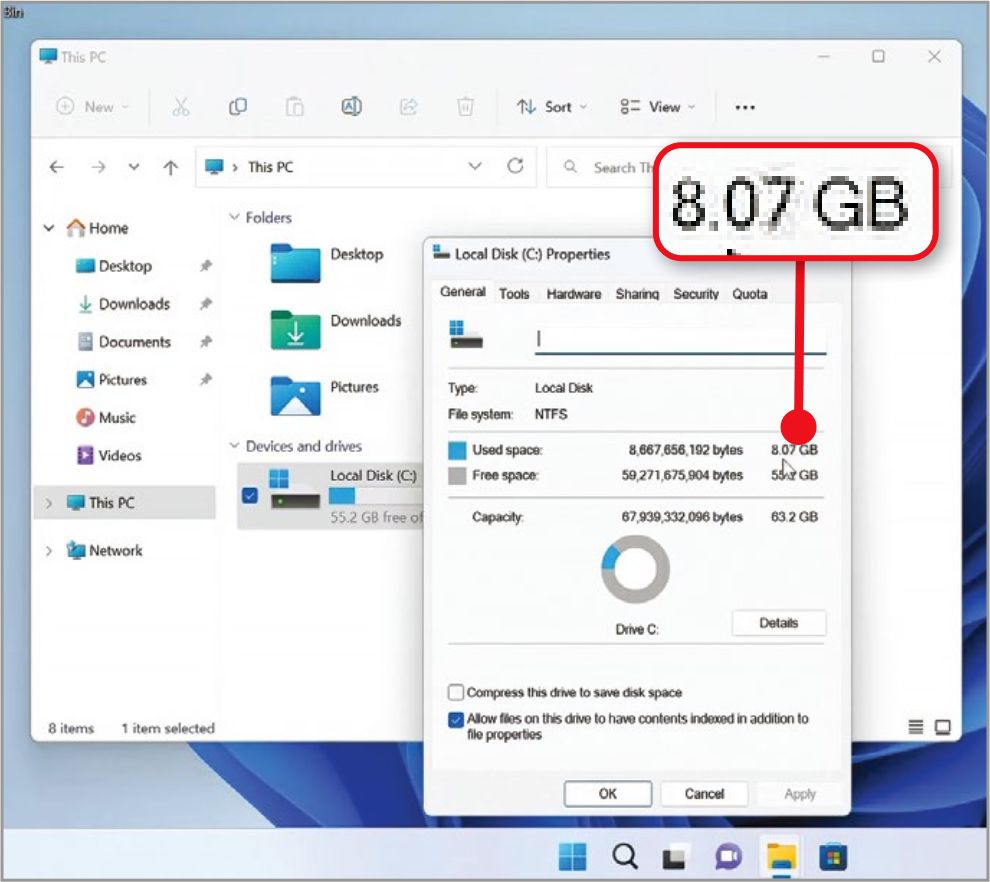
When it’s running, open Task Manager to see confirmation that its RAM is a petite 2GB (see screenshot below). Then search for and open Local Disk on your machine, then right-click it and choose Properties and you’ll see that Tiny11 takes up around 8.07GB (see screenshot below).
The case for Tiny11
The most obvious benefit of Tiny11 is that it should continue running efficiently on older hardware over the longer term, not merely the next year or two. Nor does it come with many – often unwanted – tools that Microsoft adds to Windows 11, such as Edge and Teams.
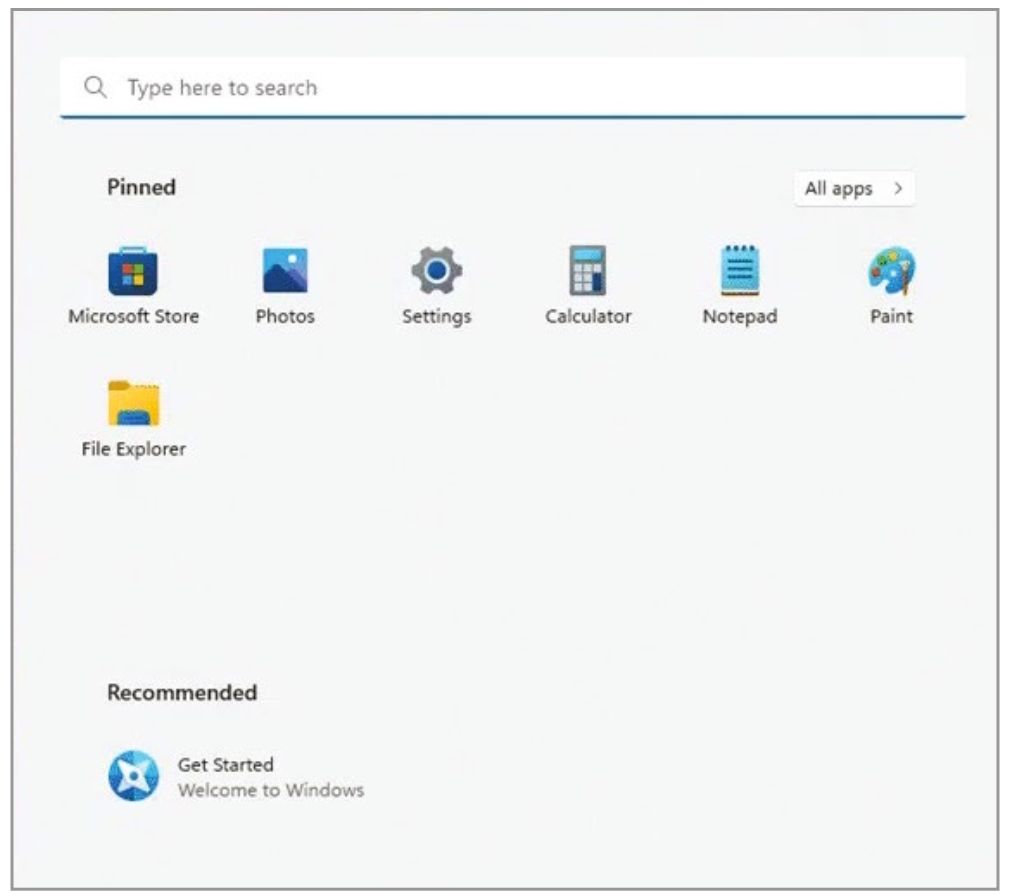
You’ll notice the difference as soon as you click the Start button. Only a few apps will appear, including Notepad, Microsoft Store, Calculator, File Explorer, Photos, and Settings – see screenshot below
By default, Tiny11 uses a local account, rather than a Microsoft account, so your activities are not so closely linked to your profile (you can revert to a Microsoft account if you prefer). If you’re not keen to let Microsoft track what you do on your PC, this could be a reason to switch in itself – particularly as Microsoft is now encouraging Microsoft Account login as the standard option.
Tiny11 hasn’t come out of nowhere: it’s a follow-on from Tiny10 for Windows 10 (available to download from https://archive.org/details/tiny-10-23-h2), so it has been in active development for several years and is improving all the time.
The case against Tiny11
Some of Tiny11’s benefits are also reasons to be cautious – chiefly, the fact it’s an unofficial build of Windows. This means Microsoft does not support it, so it won’t update automatically, and there’s no guarantee that it will continue working in the future.
You may be put off also by the anonymity of Tiny11’s developer, known only as NTDev. He describes himself as “an electronics student who does dumb things in their spare time” (https://github.com/ntdevlabs). This is knowingly self-effacing: Tiny11 is an impressive achievement and has many positive reviews online. What’s more, NTDev has an excellent reputation among software developers.
But there’s no doubt it’s an experimental operating system that should be downloaded with care. You won’t get any support if anything goes wrong. Also, remember that while Tiny11 is a free download, you’ll still need a valid code to activate Windows 11 Pro. Without this, you won’t be able to activate Tiny11.
OUR VERDICT: SHOULD YOU UPGRADE TO TINY11?
We’re going to assume that you’ve tried and failed to install the full version of Windows 11, but you’re still keen to try it and are prepared to bypass Microsoft’s technical specifications.
If the Windows 10 computer you want to upgrade is your main machine and you’re happy with it, then you’ll naturally be reluctant to risk running Tiny11. Only do so if your enthusiasm for Windows 11 outstrips your caution. Bear in mind that if you stick with Windows 10, you’ll need to buy a new computer with Windows 11 (or possibly 12) before October 2025, when Microsoft plans to end support for 10.
But if the computer you want to upgrade is a spare machine gathering dust, then what have you got to lose? This is the attitude many users have taken, and have reported great success stories of reviving neglected PCs and laptops.
So, at the risk of sitting on the fence, whether you should install Tiny11 depends entirely on the status of the Windows 10 computer you want to upgrade. It might help to watch NTDev’s YouTube video below explaining how Tiny11 works. If nothing else, it will show you that the system looks and feels much like the full version of Windows 11.


