Introduction to the Software Manager
The Linux Mint Software Manager is a one-stop console where you can browse, download and install tens of thousands of different apps. You can find apps for Science, Education, Programming, Games, Video and Music, Graphics and more.
APPS GALORE!
Before we get into the nitty gritty of how to install an app from the Software Manager, it’s worth spending a moment or two just looking around it and seeing what’s available.
STEP 1
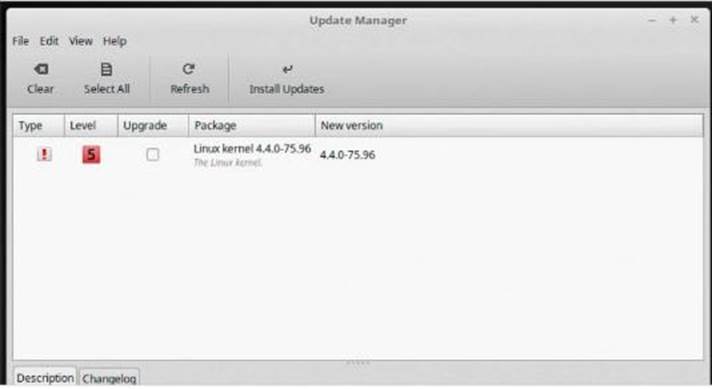
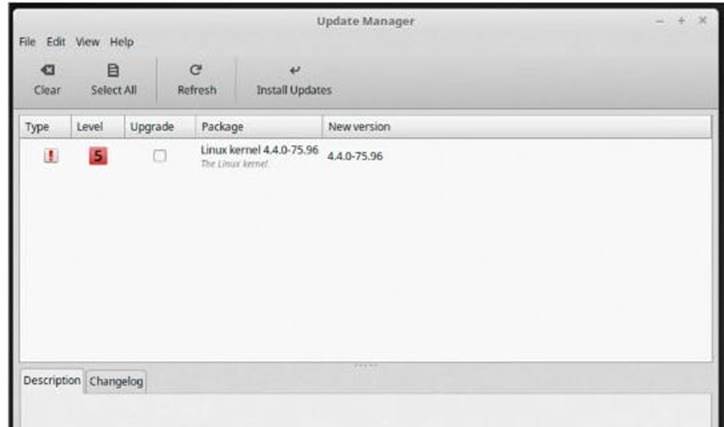
As we’ve done in previous sections, before we open the Software Manager it’s worth making sure that Linux Mint is up to date and has the latest versions of its apps and packages available. Once again, click the shield to launch Update Manager, and apply any necessary updates.
STEP 2
Restart Linux Mint if needed and when you’re ready, find the Software Manager in the Mint Menu, up the left-hand side under the Firefox icon. You need to enter your password when you launch it.

STEP 3
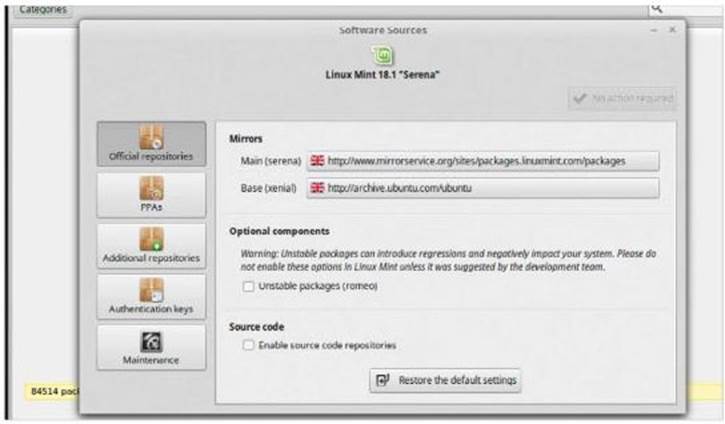
The password is required because you’re going to be doing some administrator level stuff here, chiefly installing new apps. You are also able to change the Software Sources and include additional installations servers, called repositories.
STEP 4
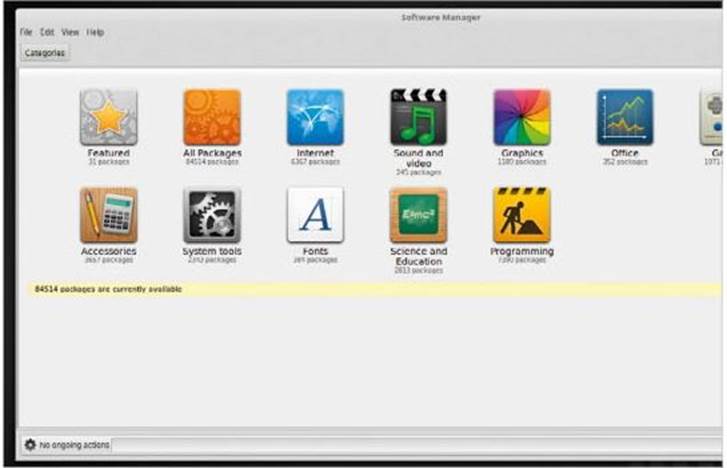
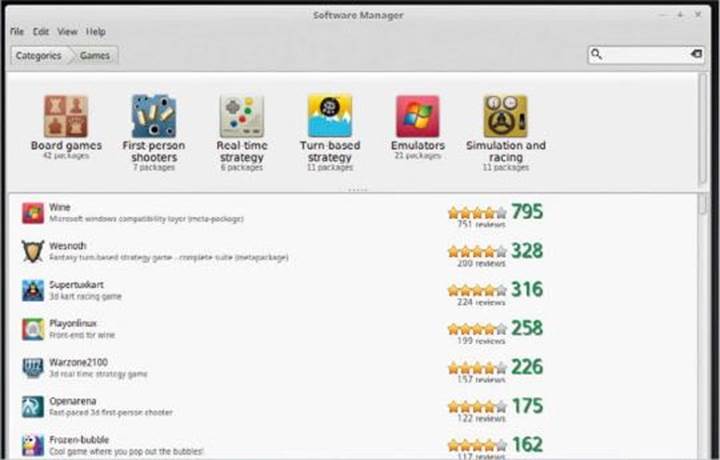
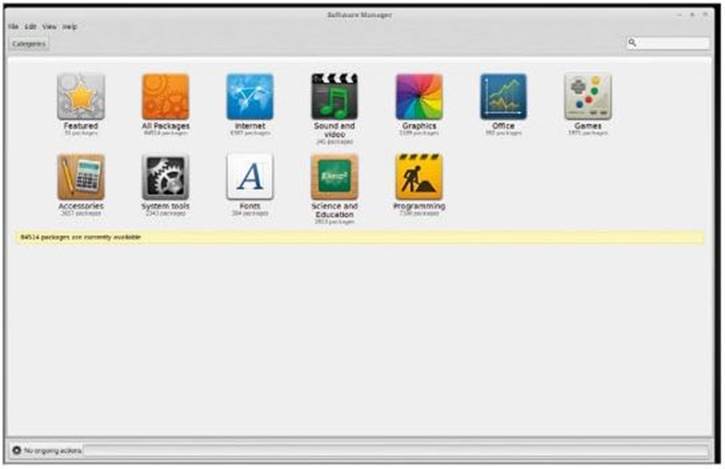
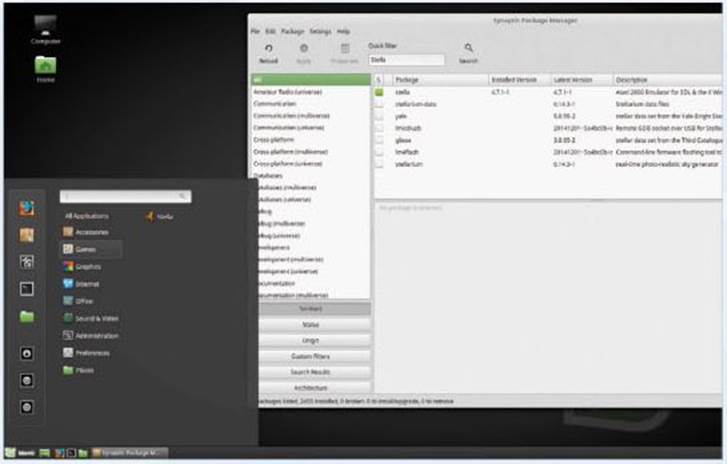
To begin with, you can see that the Software Manager has categorised the available apps: Featured, all Packages, Internet, Sound & Video, Graphics, Office, Games, Accessories, System Tools, Fonts, Science & Education and Programming. Aside from the Featured and All Packages, each category be broken down into the appropriate apps. There’s also a search box in the top right of the window.
STEP 5
When you click on one of the categories, such as Games, you are presented with the list of apps associated with that category; and along the top of the screen you have several more sub-categories that you can drill further down into.
STEP 6
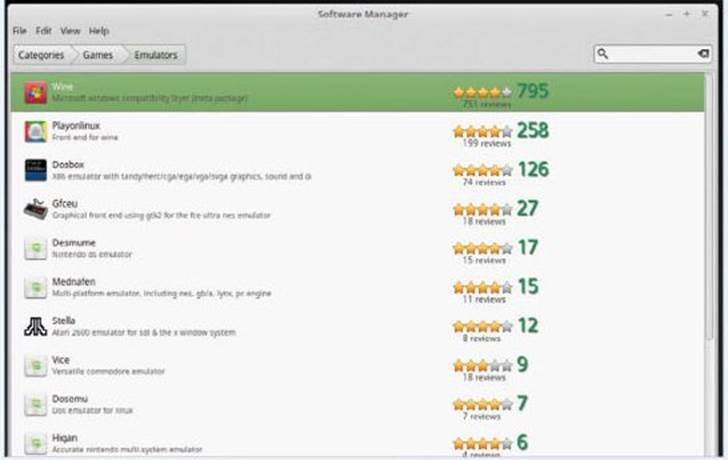
If you now click the Emulators sub-category, the apps are displayed as a list for you to scroll through. Notice, you can return to any of the parent categories or back to the main Software Manager page by using the bread-crumb titles at the top of the screen. In this case it’s: Categories > Games > Emulators.
STEP 7
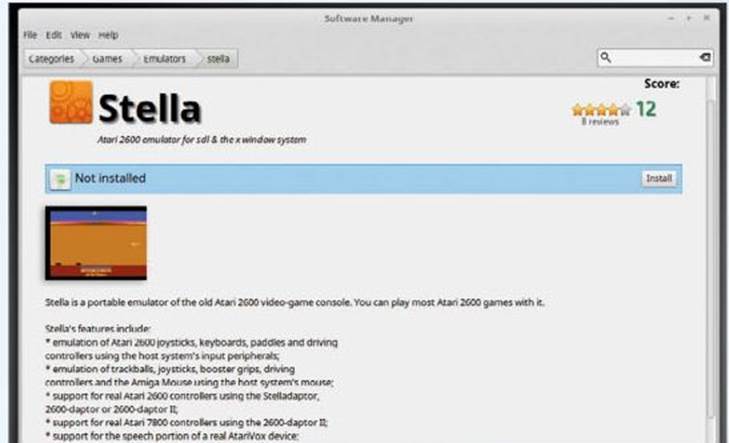
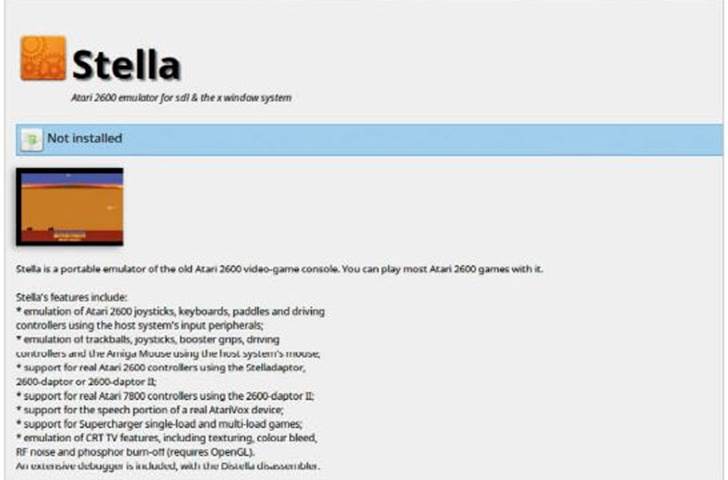
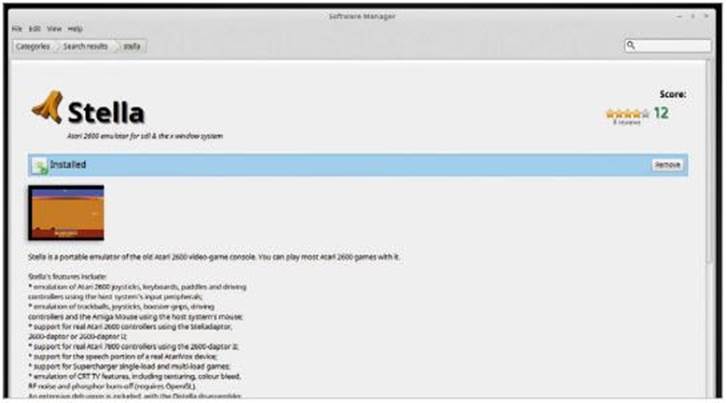
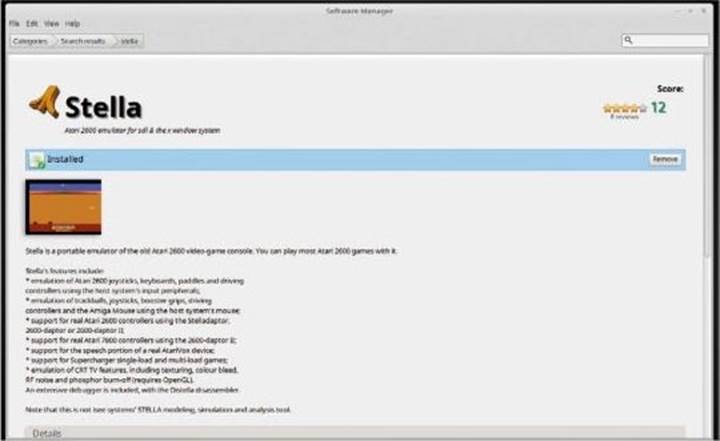
If you double-click one of the apps, we’re using Stella in the Emulators sub-category for this example, you are taken to the app information page. This details the name and features of the app in question. You can scroll down the page for further details, and even add a star rating and review if you wish.
STEP 8
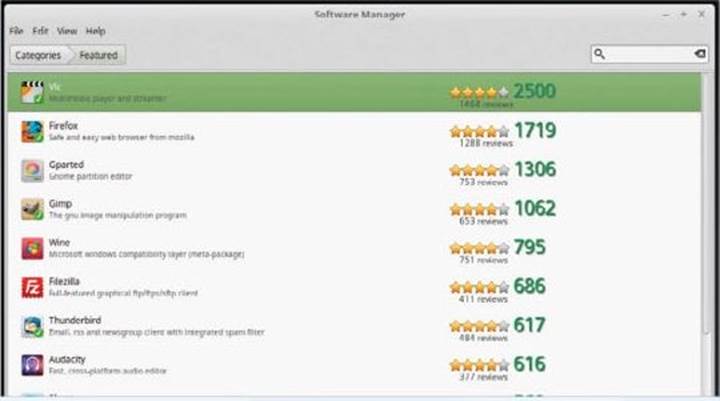
Now return to the Software Manager main page by clicking on the Categories bread-crumb link in the top right of the console window. Click on the Featured category, to be taken to the highly-rated apps that the community has reviewed. These are, as the name suggests, the Featured apps for Mint, and worth checking out.
STEP 9
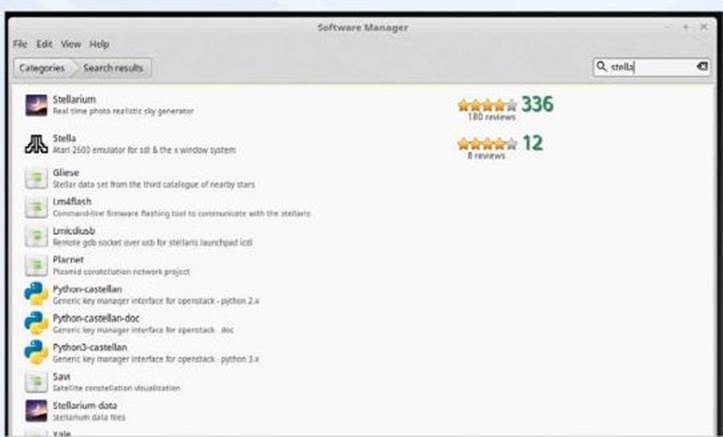
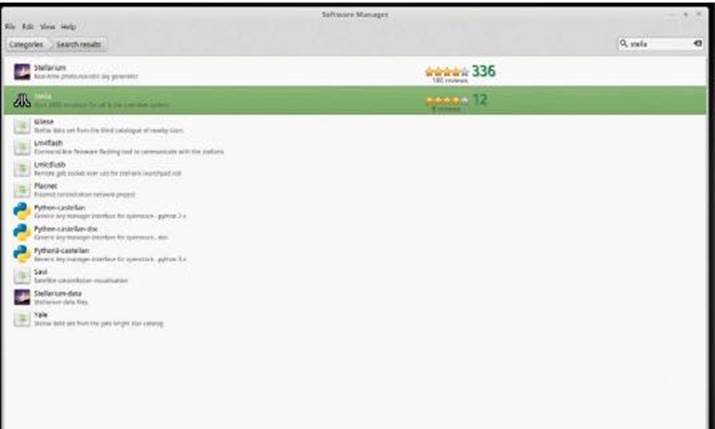
Returning to the main Software Manager page again, you can search for any of the apps within the categories or any category specific items, such as Science. The returned list will be made up of any related apps. If you search for Stella, the example app we looked at in Step 7, you have several results on offer.
STEP 10
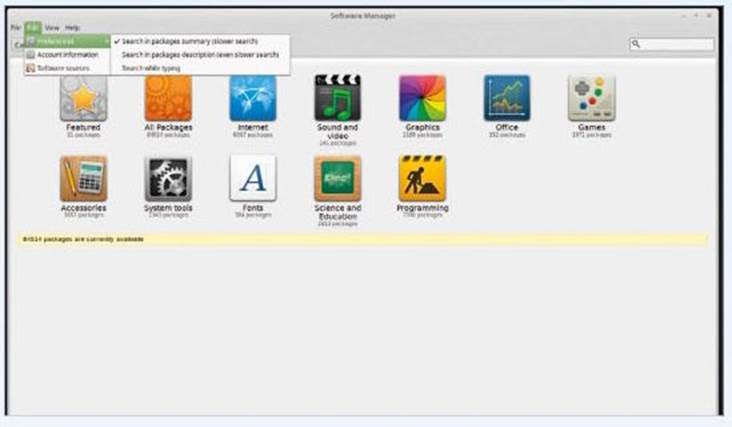
Once more at the main page, if you click Edit at the ^ top of the console window you have several options available: Preferences, where you can alter the app search pattern; Account Information, where you can enter your Mint community login details (to leave reviews for apps); and Software sources, where you can alter server locations and add more.
Installing from the Software Manager
Now you’ve had a little look around the Software Manager, how you access it and search for apps, it’s time to actually install something. There are tens of thousands of apps available, so being able to install them is certainly handy.
NEW APPS
Installing a new program or app to an operating system used to be a perilous affair, involving armfuls of floppy disks, and the patience of a saint. These days things are a little easier, thankfully.
[sc name=”ad 1″]
STEP 1
Start by opening the Software Manager, found in the Mint Menu, left-hand quick launch pane, under the Firefox icon. Enter your password and see the main Software Manager console window, or page.
STEP 2
Installing an app via the Software Manager is an extremely easy affair; the difficult part is finding a single app out of the many that are listed. Let’s begin by installing the Stella app we looked at on the previous page. Stella, if you recall, is in the Games > Emulators category and is an Atari 2600 console emulator.
STEP 3
You need to get to the Stella app page in Software Manager before you’re able to install it. You can do that either by navigating through Games > Emulators > Stella or you can simply search for Stella in the search box and double click the Stella result as it appears in the list of apps.
STEP 4
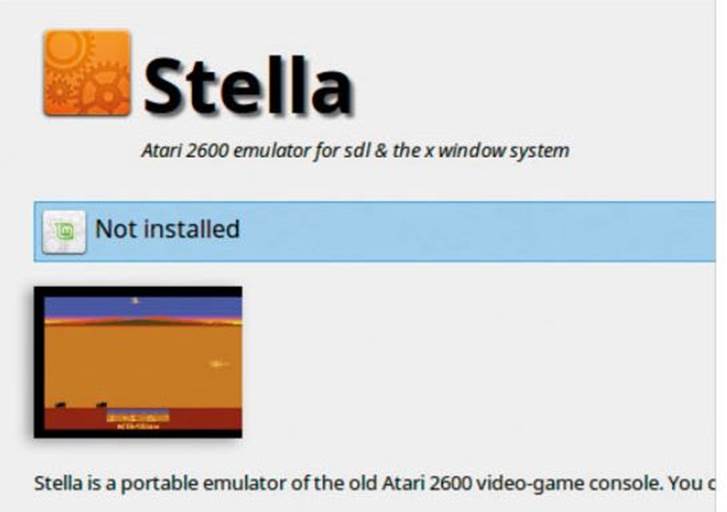
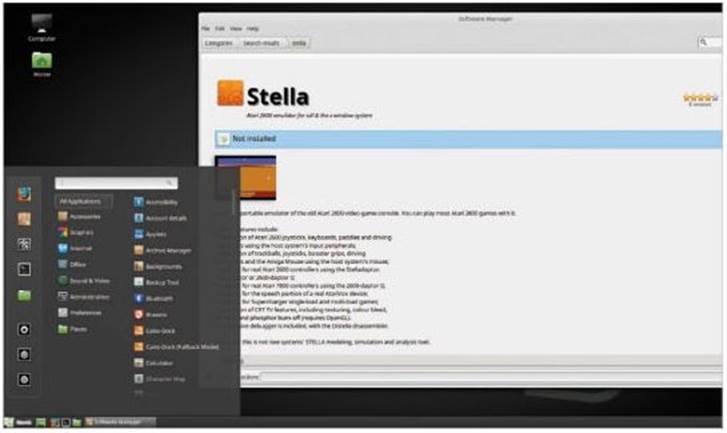
You should now be at the Stella details page we looked at on the previous page. You can see that, at the moment, the app isn’t installed; it says ‘Not Installed’ above the screenshot of the app in action in the blue bar.
STEP 5
As you most likely suspect, what we need to do is click on the Install button that’s at the right-hand end of that blue bar. As soon as you click it the Software Manager will begin the installation. In this example, the install is quite fast as Stella is a reasonably small app. Bigger apps though will take longer.
STEP 6
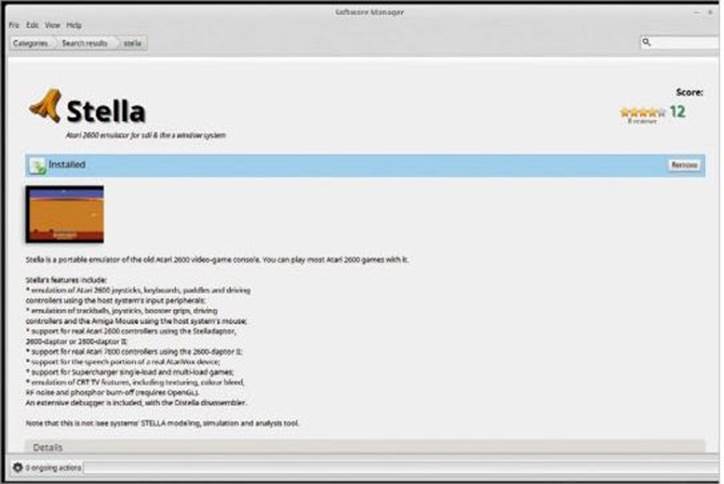
You can see a couple of things happening during and after the installation of a new app. The section at the bottom of the Software Manager page will display a green progress bar in the Ongoing Actions section. When it’s filled the app is installed. The Software Manager also reports when the app is Installed, and the Install button now reads Remove.
STEP 7
If there were any problems with the installation, you would have received a pop-up box informing of what went wrong: a sudden loss of internet, or a broken package for example. Hopefully you won’t see many of these during your time with Linux Mint. Moving on, if you minimise the Software Manager and click the Menu you can see some changes.
STEP 8
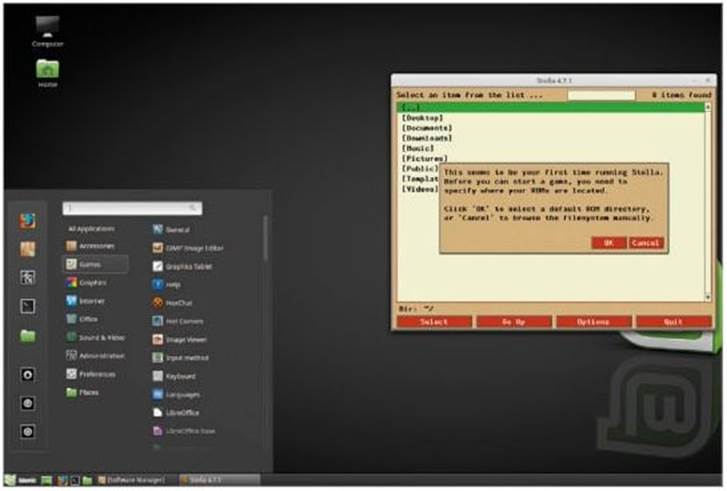
You’ve installed an app that’s under the Games category, so Linux Mint has automatically added both the category and the app itself to the Menu. Prior to the install there was nothing in the Games category in the Menu, so it was omitted. If you hover over Games, Stella will be present.
STEP 9
Obviously clicking the Stella app in the Menu will launch the program but it’s interesting to see that Mint will automatically organise the Menu structure for you. Returning to the Software Manager, we can now look to uninstall the Stella app. Simply put, just click the Remove icon located to the right, in the blue bar.
STEP 10
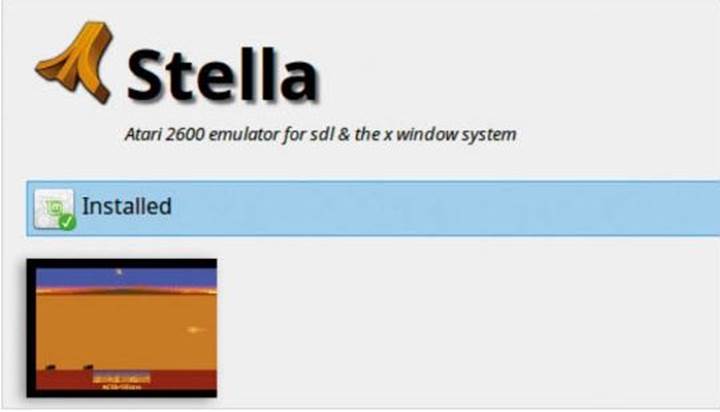
As with the installation process, the Ongoing Actions progress bar will work through the removal of the app and the app’s details page will change from Installed, to Not Installed. Notice also that in the Mint Menu the app and its category have been removed. If you should reinstall it, then they reappear.
Introduction to Synaptic Package Manager
There are a number of ways to install apps in Linux Mint: the Software Manager, via the Terminal and Synaptic Package Manager. Synaptic was released over fifteen years ago, and is designed for Debian-based systems, to install, remove, and manage software.
PACKAGE DELIVERY
Apps and software in Linux are delivered in packages, regardless of whether you’re using Ubuntu, Red Hat or Linux Mint. There are tens of thousands of packages available, so you need an easy way to get to them.
[sc name=”ad 1″]
STEP 1
You need to make sure the system is up to date as you’ve done numerous times before. Drop to the Update Manager, via the shield icon, and Refresh and Install any level-3 or less updates. Depending on the type of updates, you may need to reboot your system.
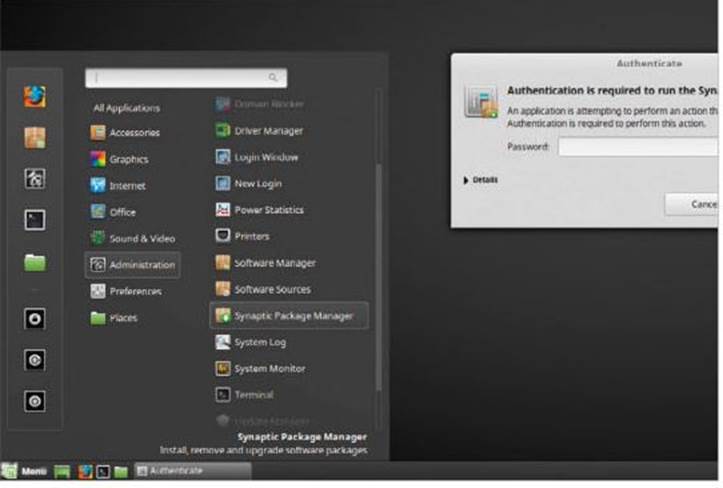
STEP 2
Synaptic Package Manager can be found in the Administration category in the Mint Menu or by entering synaptic into the search box. You need to enter your password to open the console window; as with the Software Manager you’re dealing with the installation and removal of system software.
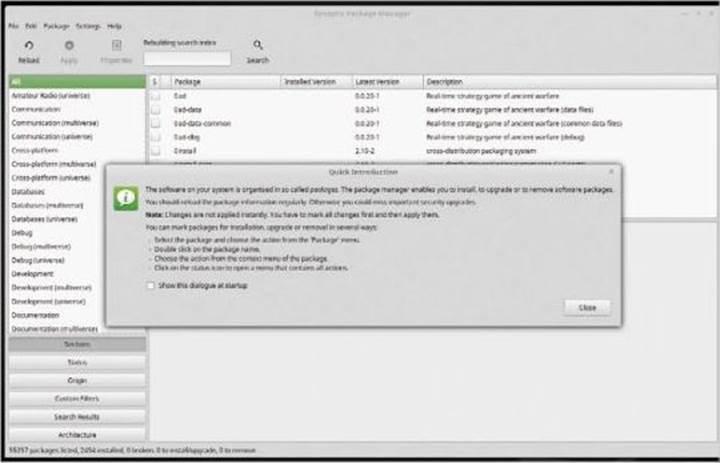
STEP 3
When you first launch Synaptic Package Manager you are presented with a Quick Introduction window. It’s worth reading through it and you can tick the box at the bottom to enable it to pop-up every time you launch Synaptic should you wish.
STEP 4
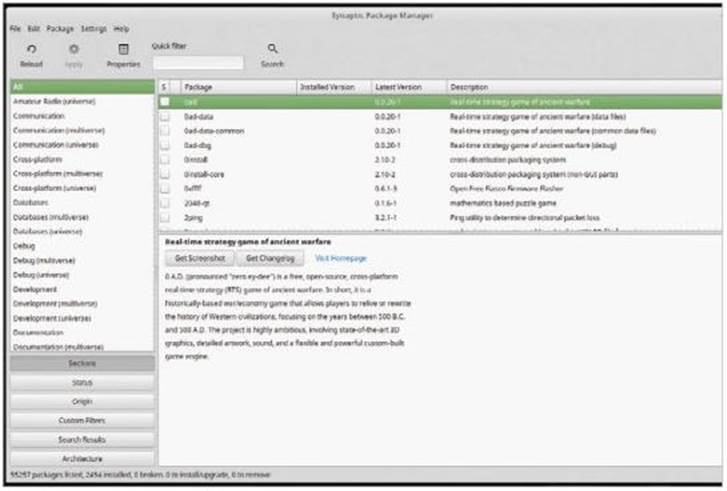
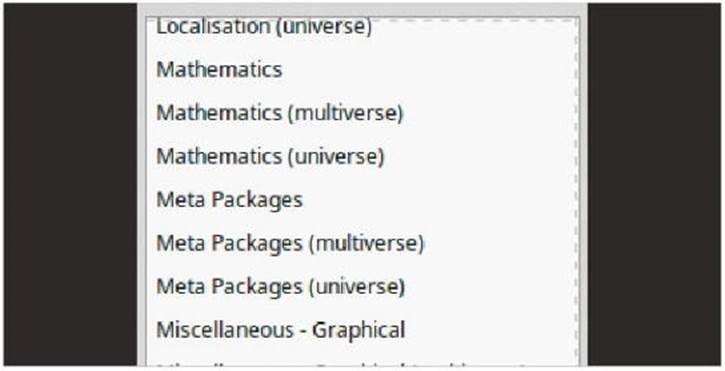
With the Quick Introduction window closed you can start to take a look around Synaptic. As you can see, the console is split into several sections. The left column lists the available categories of packages (apps) available and below that there’s a selection of category and app filters to apply.
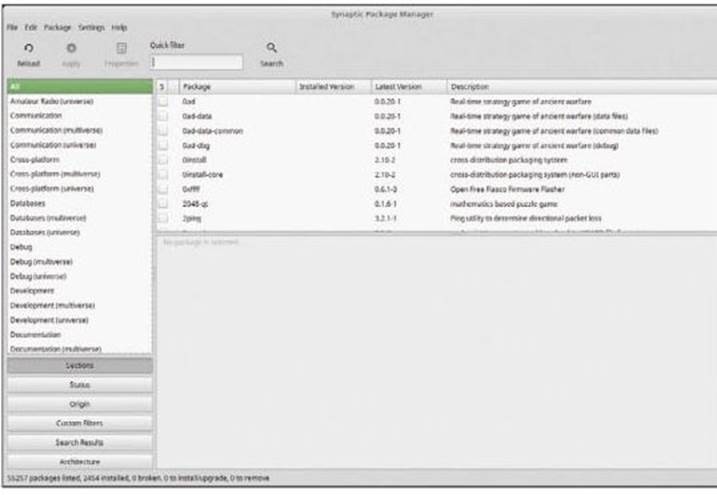
STEP 5
The right-hand side of the console is split into two sections. The top section lists the apps within the chosen category, from the right column; and the lower section displays details regarding the app you’ve selected to view, install, remove and so on.
STEP 6
The details section is interesting, in that you can view any screenshots or the developer’s notes with a click of a button; or visit the homepage and in some instances gain extra information regarding the app itself, including further installation instructions, or first run instructions if needed.

STEP 7
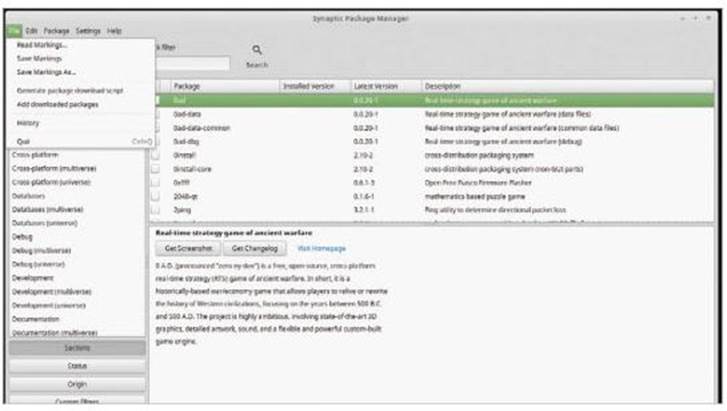
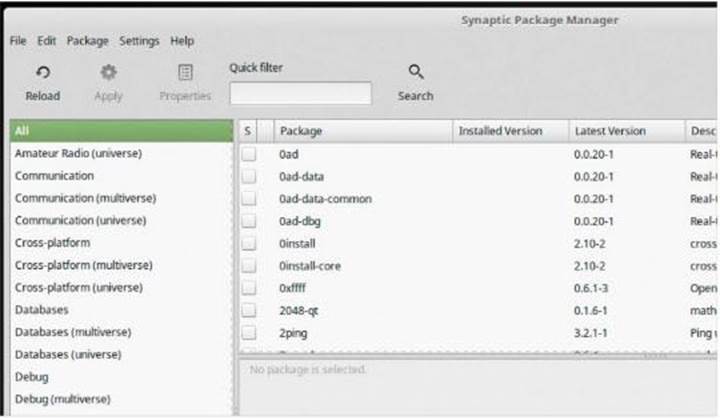
At the top of the console window there’s a search box and buttons for Apply and Properties; more about these on the next page. There are also numerous options via the top menu toolbar: File, Edit, Package, Settings and Help. We’re not going into too much detail with these in this instance, as some settings are for more advanced users.
STEP 8
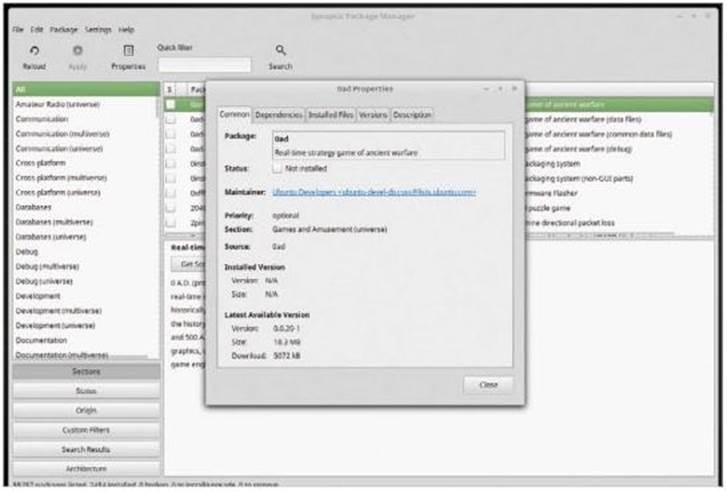
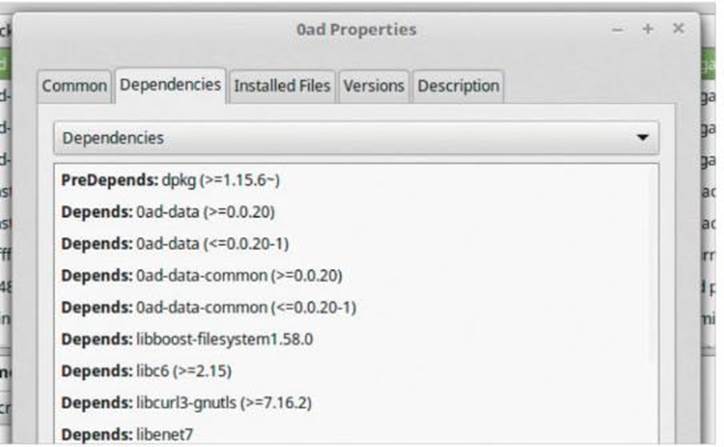
One element we are looking at though is the Properties button (next to the search bar). If you click the first app listed, Oad (or 0 A.D. as it’s known), then click the Properties button you are presented with a detailed pop-up window relating to the selected app.
STEP 9
The Common tab, for example, details the app’s current version, size when installed and a link to the developer or maintainer’s email, as well as its current status. The Dependencies tab lists the files and other packages the app requires to be able to run, so you can check what exactly is being installed on your system.
STEP 10
One last element worth mentioning. Within the list of categories in the left-hand column, you can see entries with Universe, Multiverse, Non-Free or Restricted. All they mean is: Universe or Free, packages that are part of the Debian repositories; Multiverse or Non-Free, packages like video codecs, may be closed source; Restricted, packages with closed source elements, such as drivers.
Installing from Synaptic Package Manager
Let’s look at how you go about finding and installing an app from the available 55,078 (at the time of writing) packages. The apps available cover a multitude of categories, for many different languages, so you’re spoiled for choice.
INSTALLING APPS
Although the User Interface for Synaptic isn’t quite as friendly as that of the Software Manager, it’s still a remarkably powerful front end to package delivery and installation. Think of it as another excellent tool to use.
[sc name=”ad 1″]
STEP 1
If you’ve closed down Synaptic Package Manager, relaunch it via the Mint Menu as we did on the previous page. Enter your password and expand the console window edges to get a better view of what’s going on.
STEP 2
Let’s install a package, or app, that we’ve already looked at, Stella. If you recall from the Installing from the Software Manager section, Stella is an old Atari console emulator. You can scroll through the Games categories on the left-hand column but you may be there for some time. Instead, enter Stella into the search box and hit Enter.
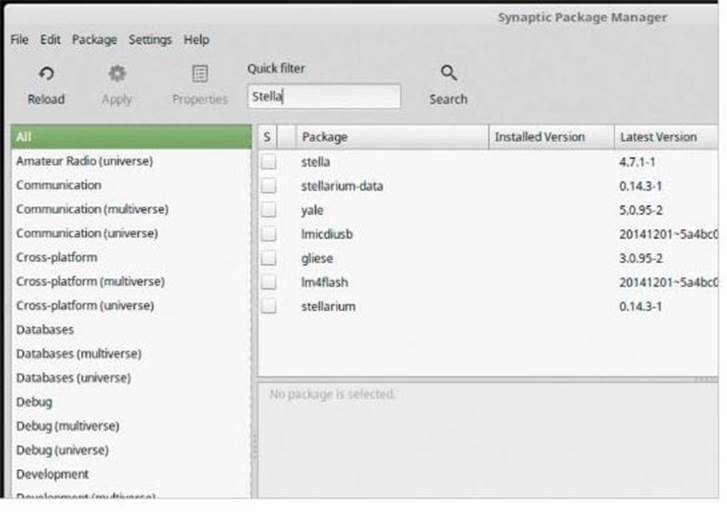
STEP 3
You can see a number of returned search results, all relating in this instance the word ‘stella’. The one we’re after is the top most result, Stella version 4.7.1-1 (correct at the time of writing), with the Description: Atari 2600 emulator for SDL & the X Window System.
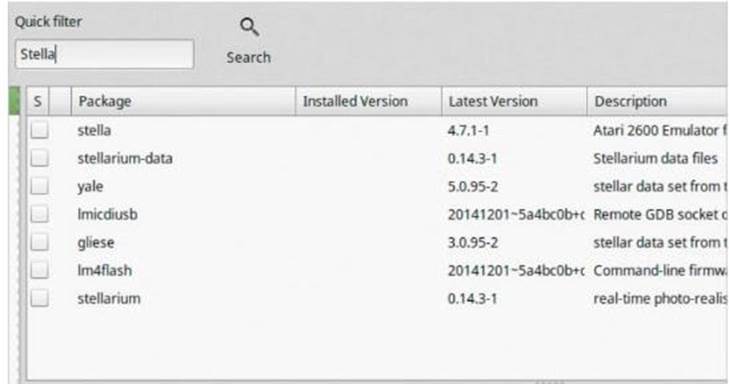
STEP 4
If you click the Stella entry in the right top section the relevant app information will be detailed in the lower section; as we looked at on the previous pages. To install the app, click the box to the left of the app’s title. You can then see a menu pop-up, click the Mark for Installation option.

STEP 5
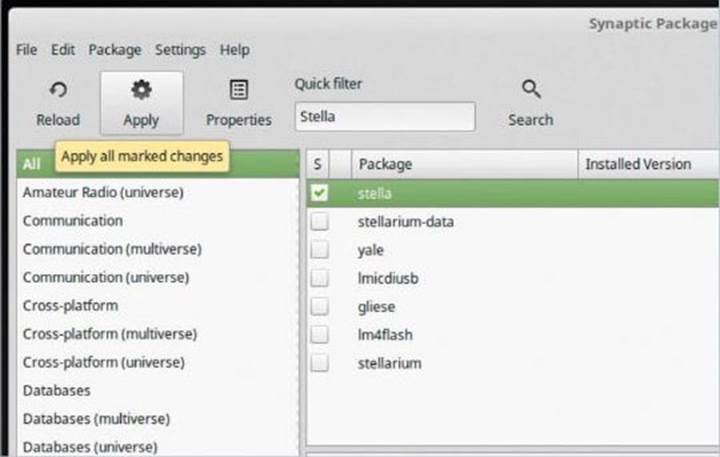
Stella will now have a green tick in the box, meaning that it’s marked to be installed. There is a brief set of information at the very bottom of the Synaptic console window, in this case telling you that there’s one package to install/upgrade and 4364KB will be used.

STEP 6
The app you’ve marked installs when you click the Apply button, found at the top of the Synaptic console window. This gives you time to look for other apps you want to install, so you’re not having to go back and forth marking and installing. When you’re ready, click the Apply button to begin the installation.
STEP 7
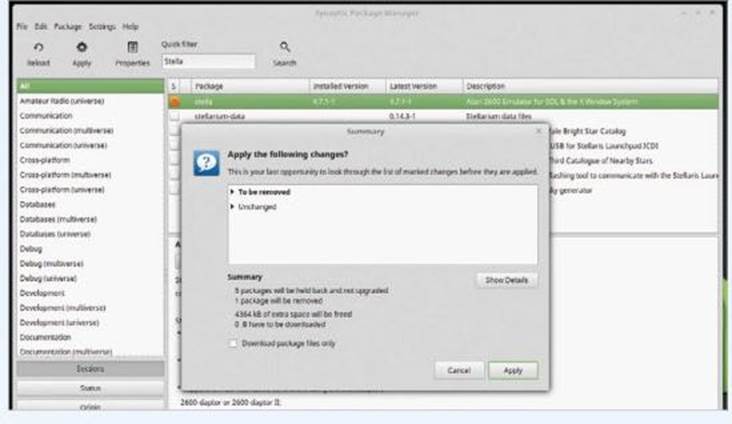
When you click the Apply button, you get a Summary box detailing the actions that are about to take place. In this example, we’re installing Stella. You can view the details and expand the information if you want, but when you’re ready, click Apply in the Summary window.

STEP 8
Depending on how big the app you’re installing is, Synaptic will display a progress bar detailing the installation process. When it’s done you are presented with a Changes Applied window, along with any success or failure message. You can read the details but otherwise click the Close button.

STEP 9
After clicking Close, Synaptic will refresh and Stella will have a solid green square next to its name to signify it’s installed in Linux Mint. If you click on the Mint Menu once again, as with the Software Manager installation process, you can see that Mint has automatically added it under the Games category.
STEP 10
The uninstallation process is the reverse of what you’ve just done. Tick the green box next to Stella and choose the option Mark for Removal. Mark for Complete Removal isn’t always advised, as you could remove a package that’s needed by other apps. Stella now has a red X next to its name. Click both Apply buttons to uninstall.


great stuff. thanks.
Thanks for the overview, Bill! 2021-08-07
I enjoy exploring. I also enjoy positive constructive critique.
To make Mint 20.** more attractive I would improve the Software Management! = App Store!
I mean (1) it is good to have that. But with better-educated testing and qualitative better comments on programs.
I hate comments like “nice”, “effective”, ..
I like comments like =
from my testing, these are my pros: 1. …, 2. , 3. …
from my testing, these are the needed improvements; 1. .., 2. ..
I would DELETE all not qualified software evaluations.
I know, no we have of 10th of thousand software pieces 3 quarters never tested.
But useless tests are worse! From my experience less than a quarter of all software listed is commented (= maybe evaluated?)
I would open a second group: “Please evaluate one of this per week?
You help us and all users.
We thank you with a list of technically well-done evaluations.
Which also serve as good examples and teach improving our communications, and animate others to follow suit.
If you can improve my suggestions, you are very welcomed.
If not, maybe you make critical contributions later; that is quite ok.
Thanks