Chrome OS is brilliant. For the type of user Chromebooks are generally aimed at, it does exactly what it needs to do. It’s fast and easy to use – what more could you ask for? Well, you may find yourself missing some of the features associated with more traditional operating systems. Don’t worry, help is at hand, in the form of Crouton.
Crouton is a set of programs that create a chroot environment within Chrome OS, from which you can run a Linux OS, with Debian and Ubuntu currently supported. A chroot is not the same as a virtual machine – you’re still running on the standard OS, but within a new environment. This has several advantages. It doesn’t touch the existing OS installation, making reversal easy; it uses the Chrome OS drivers, so there are no compatibility issues; and it’s written by the Chrome OS authors, so it should remain compatible with future updates. The only real disadvantage is there may be a slight performance hit, but you didn’t buy a Chromebook for its blazing speed. Read on to learn how to get an assortment of Linux distros up and running.
Before you start installing another OS, it’s a good idea to create a rescue disk to restore your Chromebook should anything go awry. Even if you’re not installing another OS, this is a wise step to take, especially as it’s so simple – all you need is a USB stick or SD card with a capacity of at least 2GB. Because of the cloud-based nature of Chrome OS, 2GB is enough, because you only need to back up the operating system – your data and settings are safe on Google’s servers.
» Plug in the USB stick or SD card, open Chrome and type chrome://imageburner into the location bar. Chrome OS downloads and installs the recovery image for your Chromebook. If you’ve more than one Chromebook, run this separately for each one. After downloading, the image is written to your USB stick. If you don’t create a recovery disk, it’s also possible to get this image from another computer and copy it manually, by following the instructions at http://bit.ly/1zSC3xr, but you have to make sure you get the right image – they’re specific to each model.
» If you corrupt Chrome OS and get the scary ‘Chrome OS is missing or damaged’ message, plug in your recovery medium. You can also force a recovery, if you want to go ahead and restore it anyway, by pressing the hard reset button or key combination, which varies from model to model. Check your Chromebook’s documentation for whatever applies.
Using Crouton means putting your Chromebook into Developer Mode first, which means you get root access and even a Bash shell. This isn’t a hack. It’s a fully supported, if hidden, official option. A warning to start with – enabling Developer Mode wipes your storage. It doesn’t affect your cloud storage, but any files stored locally should be uploaded to Google Drive before you proceed. The method of enabling Developer Mode is device-specific, so find instructions at the Chromium website: http://bit.ly/1gDHPGd. On the Acer C720 we used for testing, as with most Samsung devices, you turn the device off and then hold down [Escape] and [Refresh] keys before pressing the power button. This gets you into the recovery screen, then press [Ctrl]+[D] to enable Developer Mode. Other devices have a hardware button for this.
» Once Developer Mode is enabled, you’ll see the ‘OS verification is OFF’ screen each time you turn on – press [Ctrl]+[D] to continue booting, or wait 30 seconds.
When you’re ready, start downloading Crouton from http://goo.gl/fd3zc. This is a script that downloads and installs everything you need. You run it from a shell – yes, Chromebooks come with a shell. Press [Ctrl]+[Alt]+[T] to open the Crosh shell in a browser tab.
» This is a limited shell and Crouton needs to know which distro you want to install; it calls these releases and selects them with the ‘-r’ option. Then it needs to know the target environment you want to install. A target is a collection of software packages, such as a particular desktop. These two commands will list the options:
sh -e ~/Downloads/crouton -r listsh -e ~/Downloads/crouton -t list 2>&1 | more
» The second command needs to be passed to ‘more’ because it is several screenfuls – hit [Space] to page through them all. Once you’ve decided the release and target you want, you can run Crouton. To install Ubuntu 13.10 (Saucy Salamander) with the Unity desktop, for example, run:
sudo sh -e ~/Downloads/crouton -r saucy -t unity
» This uses ‘sudo’ because you need root to install the software. You can also specify multiple targets, like this example that installs Debian Wheezy with the LXDE desktop and the XBMC media centre:
sudo sh -e ~/Downloads/crouton -r wheezy -t lxde,xmbc
Depending on the target(s) selected and the speed of your internet connection, this could take a while. When it’s finished, it tells you the command needed to start your chosen distro in the chroot, such as:
» Run that command and you’ll be in a standard Ubuntu desktop. When you’ve finished, log out in the usual way and you go back to the familiar Chrome OS. You can switch between the two by holding [Ctrl]+[Alt]+[Shift] and pressing [Forward] or [Back], too. In fact, the Chrome OS navigation keys above the numeric row are treated as the [F] keys by Linux, so these are really [Ctrl]+[Alt]+[Shift]+[F1] and [Ctrl]+[Alt]+[Shift]+[F2].
» The installation you end up with is not the complete distro as you would get if you’d installed it natively, but any extra packages can be installed in the usual way. If using Unity, the Software Centre is not installed, so open a terminal in Unity, [Ctrl]+[Alt]+[T], and run:
sudo apt-get install software-center
» Now you can install any other packages you need from the GUI. You can also install extra target environments with the ‘-u’ flag. For example, to add the LXDE environment to the Ubuntu chroot we created before, we’d run:
sudo sh -e ~/Downloads/crouton -r saucy -u -t lxde
As you may have noticed, enabling Developer Mode gives you root access through ‘sudo’, without requiring a password. This is slightly less secure for Chrome OS.
» Your login and files are still protected by your Google login, but it means all the files in your chroot are readable, even with a passwordless guest login. If this concerns you, it’s possible to encrypt the entire chroot by using the ‘-e’ flag for Crouton. This prompts for a password and uses that to encrypt the entire chroot directory, meaning you can neither read nor run the chroot without the password.
For example:
sudo sh -e ~/Downloads/crouton -e -r wheezy -t xfce
» There are lots of distribution releases and targets to choose from; you could install them all at once but that would get pretty bloated, so how do you try them all out?
» The answer is you can have as many chroots as you have space for. If you plan to do this, you may find it easier to use Crouton’s ‘-n’ option to give each chroot a name, otherwise they’re simply named after the release. Naming is important when installing multiple releases because the name is needed when running the startup commands, otherwise Crouton just loads the first release in which it finds the target you gave. Adding ‘-n’, like this, lets you ensure the right release is loaded:
» Crouton also installs a couple of useful tools, particularly ‘edit-chroot’. This can be used to back up a chroot.
» This creates a backup file in ‘~/Downloads’, which you can restore with the following:
sudo edit-chroot -r ~/Downloads/backup-file.tar.gz
» Copy this somewhere safe. Even if you do a full reset/recovery, you can still restore it by downloading Crouton again and running:
sudo sh -e ~/Downloads/crouton -f backup-file.tar.gz
» You can also use ‘delete-chroot’ to delete a chroot, which you could probably have worked out for yourself, or you can simply delete the directory holding it from ‘/usr/local/chroots’ and go back to a vanilla Chrome OS. Assuming, of course, that you’d want to do that.
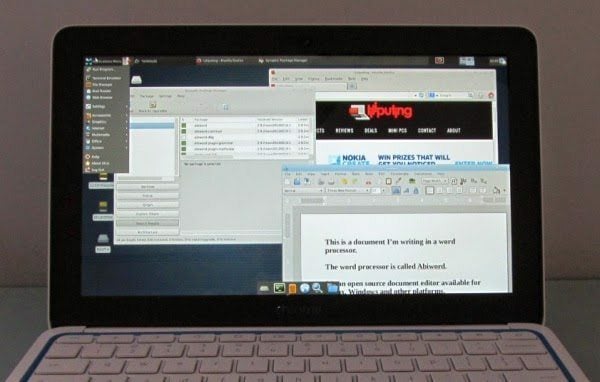
Comparing a cheapo Chromebook to a full laptop may seem unfair, but we’ll do that anyway. Running Ubuntu or Debian on a Chromebook is just like running it on a proper laptop.
The only differences are down to the use of a chroot and the scary bootup messages you get. This means you have to boot into Chrome OS first and then open a shell to start the chrooted session. But Chromebooks are designed to be suspended rather than shut down, so this isn’t necessary often. It uses the hardware through Chrome OS, so you need to do things like set up your network connection in there, but as you can switch between the OSes at will, this isn’t a problem. It’s not dual boot – it’s running both at once. Far more convenient.
The main limitation is the lack of storage space and dependence on a network connection and cloud services. While Chrome OS handles this transparently, you need to set up some sort of online syncing from your chrooted distro, using services such as OwnCloud, Spideroak or Dropbox.
There are other ways of installing Linux on a Chromebook, but Crouton does it in the least intrusive way, leaving your existing operating system untouched (apart from needing to enable Developer Mode). You can also try multiple distros, and remove them when done, which is also a key benefit of this approach. A real strength of Crouton is that it’s developed by the Chrome OS authors themselves – it’s not a third-party hack. This means that future updates to Chrome OS could potentially break your chroots temporarily, but a quick update through Crouton should fix it.
1. OPEN A SHELL AND CHOOSE A RELEASE
Open a terminal window by pressing [Ctrl]+[Alt]+[T]. You can see the set of commands by typing ‘list’. One of the commands is ‘shell’, which gives you a full Bash shell (patched for Shellshock). Run Crouton with ‘-t’ to see all the available targets. Chromebooks are relatively low-powered, and a lightweight desktop such as LXDE is a good choice. Unity is better suited to running everything full-screen.
2. ENCRYPT YOUR FILES AND INSTALL THE DISTRO
Adding ‘-e’ to Crouton’s command line causes your chroot to be stored in an encrypted directory (this isn’t the same as the ‘e’ that follows ‘sh’). Choose a decent passphrase, but remember most of your data will be saved in the cloud because Chromebooks have very little storage. Crouton is only an installer, so it needs to download the distro release files before installing. Even with a fast connection, it can take 30 minutes.
The default targets include only the command line package manager, ‘apt-get’. For most people, the first step is to open a terminal and use it to install a more friendly option, such as ‘software-center’ for Ubuntu or ‘Synaptic’ for Ubuntu and Debian.
Run ‘sudo apt-get update’ to make sure you get the current version, then ‘sudo apt-get synaptic’.
Once you’ve Synaptic installed, you have easy access to all the software in a distro’s repository. Most of the targets are slimmed down, to save on downloads and give a faster installation, but you can install anything you want from here. Either use the ‘Search’ button or just browse the categories to see what’s available.