Run windows 10 on mac using virtualbox
TNR will show you how to run windows 10 on mac free with virtualbox.
VIRTUALBOX is a free app in which you can create a Windows 10 ‘virtual machine’.
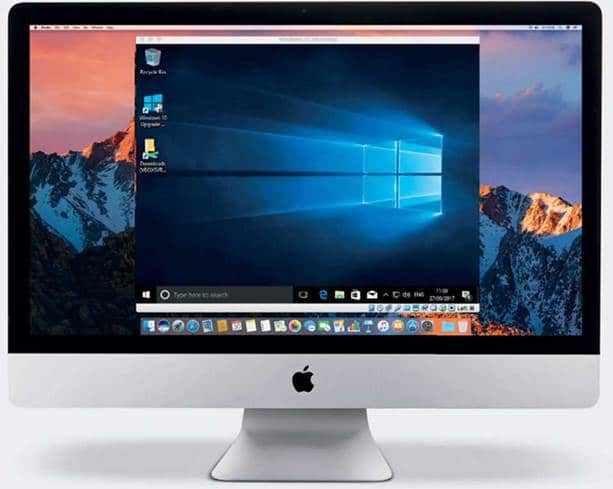
This means you can run Windows, use programs written for it, and share files from the comfort of your macOS desktop. In order to proceed, all you need to do is buy a Windows 10 DVD or download an ISO file, as well as obtain a valid product key for your chosen version.
Table of Contents
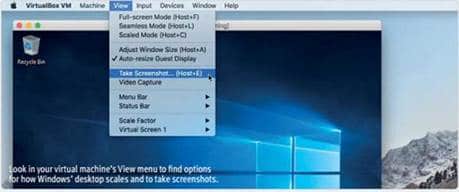
Our guide also contains tips on installing the VirtualBox Extension Pack and Guest Additions. These allow for the more advanced features that you would find in a physical computer, including fullscreen mode (press Command-F to switch to it) and support for USB devices. Once you have followed our walk-through, check out VirtualBox’s Devices menu for more hidden treasures. Choose ‘Devices > Shared Clipboard > Bidirectional’ to be able to copy and paste text between macOS and your virtual Windows machine.
You can use drag and drop to move files and folders between systems. PCs are more prone to malware than Macs, so you may want to enable the ‘host to guest’ setting.
For further peace of mind, you can choose only to share specific folders from your Mac, such as Downloads. Pick ‘Devices > Shared Folders > Shared Folders Settings’ to add a specific Mac folder. You’ll then have access to your designated folders in Windows’ File Explorer under ‘Network > VBOXSVR’.
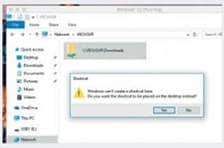
You can access shared Mac folders under Networks in Windows; right-click to create a shortcut on the desktop.
Install VIRTUALBOX
01 – INSTALLATION
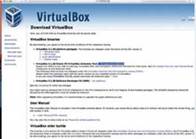
Open Safari and visit virtualbox.org to download the current version of the software. Once you’ve installed the app, return to its site and click ‘All supported platforms’ next to ‘VirtualBox Extension Pack’ and install that as well.
02 – GET WINDOWS
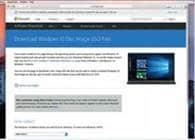
To proceed, you need a DVD or ISO image of Windows 10. ISO images are available from https://www.microsoft.com/en-gb/software-download/windows10ISO. You must enter a valid product key within 90 days of installing Windows 10 in order to keep using it.
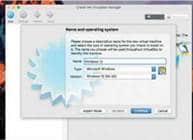
03 – MAKE A VIRTUAL MACHINE
Click New at the top left of the app. Next to Name, enter ‘Windows 10’ then click Continue. Adjust the slider on the Memory Size page to allocate memory to your virtual machine. Assign at least 2048MB to it.

04 – CONFIGURE ITS STORAGE
Leave the default ‘Hard disk file type’ selected and click Continue. Do the same for ‘Storage on physical hard disk’ by clicking Continue again. Choose the size and location for your virtual disk, then click Create.

05 – ADD WINDOWS MEDIA
Choose ‘Machine > Settings’, then click Storage. Select the CD in the Storage Devices tree, then click the CD icon near Optical Drive, and then either your DVD drive, or Virtual Optical Disk File and your Windows 10 ISO file.
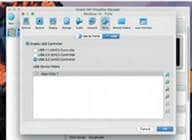
06 – ADD USB SUPPORT
Click Ports and then the USB tab. Click the small blue icon at the top right of the device filters box to add one or two empty filters; this enables you to connect USB devices to Windows. Click OK to save your settings, and then click Start.
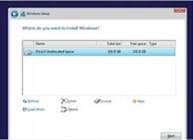
07 – SET UP WINDOWS
When the virtual machine opens, dismiss alerts about mouse and keyboard integration. At ‘Where do you want to install Windows’, pick your virtual disk and click Next. Continue setup as you would on a regular PC.
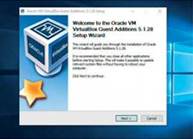
08 – GUEST ADDITIONS
Once Windows’ desktop appears, Choose ‘Devices > Insert Guest Additions CD image’. Go to that CD in File Explorer and run VBoxWindowsAdditions.exe to install extra features. When prompted, select Reboot Now and then click Finish.

09 – ATTACH USB DEVICES
Connect a USB device — for example, a memory stick — to your Mac, but ensure you eject it in Finder before proceeding. While your virtual machine is running, go to ‘Devices > USB’ and select your device there to make it available to Windows.


