Watch anything on KODI

Who needs Sky anyway? Wayne Williams explains how you can expand your viewing horizons using the amazing free software that everyone’s talking about
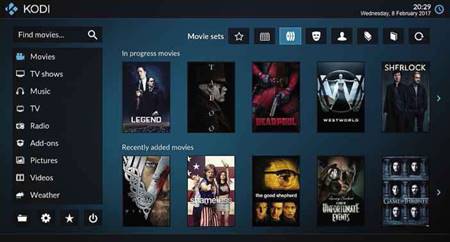
Kodi ( kodi.tv) has been around in one form or another since 2002, but in the past year its popularity has exploded, and it will undoubtedly continue to rocket in 2017. From the latest add-ons to the legal issues surrounding Kodi set-top boxes, there’s always something new to discuss about this fantastic free media centre and although TNR has given Kodi plenty of coverage already, there are still loads of tips and tricks to reveal.
In this Kodi special, we explain how you can watch all Kodi content on a variety of devices, from your phone to your television, while staying on the right side of the law. Over the following six pages, we pick the 13 essential Kodi add-ons you should be using, explain how to install them and show you how to get more from this versatile streaming software. We also take a look at the legal intricacies of using Kodi.
HOW TO INSTALL KODI ADD-ONS
Installing third-party add-ons in Kodi is mostly easy, but it’s not particularly intuitive to the uninitiated and the process varies depending on the add-on. At its most basic, you can install an add-on through Kodi by going to Videos, Add-ons, and clicking ‘Get more’. Scroll down the list to the add-on you want (assuming it’s listed – it might not be), select it and click Install. You’ll then be able to open it by going to Videos, Add-ons and clicking its name.
Add-ons that don’t appear in the ‘Get more’ list can be trickier to install, and the process is likely to require more steps. However, there’s a brilliant add-on you can use to install them (and remove them if they’re no longer required), which is called – appropriately enough – Addon Installer.

Install the Addon Installer to make installing Kodi add-ons much easier
To use this, you’ll first need the Fusion Installer. Go to the System menu, open the ‘File manager’ tab and double-click ‘Add source’. Click <None> under the field ‘Enter the paths or browse for the media locations’. Type http://fusion.tvaddons.ag and click Done. In the ‘Enter a name for the media Source’ box, type fusion and click Done, then OK. Return to the main menu and go to Settings, under
System. Select Add-ons on the left and click ‘Install from zip file’. Select the Fusion folder, click the ‘Begin here’ folder and select the ‘plugin. program.addoninstaller-1.2.9.zip’ file from the list (the exact number will change to reflect the latest Kodi build). Return to the main menu and go to Programs, then launch ‘Addon Installer’. The installer will run and configure itself.
Once this rather convoluted process is complete, you can use Addon Installer to install any available add-on. Select a category, pick an add-on and click its Install button. When the ‘Success’ message appears, click OK.
You’ll find your installed item in the Add-ons tab under Videos. If an add-on fails to open, try selecting or right-clicking its entry, then update it or enable any required settings.
INSTALL THE BEST KODI ADD-ONS
There are thousands of Kodi add-ons of widely differing quality. Here, we pick our 13 favourites for streaming TV shows, films and more
Exodus
Probably the most popular addition to Kodi, Exodus comes from the maker of the now-defunct Genesis add-on. It provides free access to pretty much anything you could wish to watch, including movies, TV shows, your own videos and live TV channels (including Sky Premiere, Sky Showcase and Film4). Films and TV shows are sorted by category, such as People Watching, Most Popular and Highly Rated. When you select something to watch, the add-on works its way through a list of providers and presents you with a choice of viewing options.
You can get Exodus directly through the Addon Installer, which we covered in the section above. See our Mini
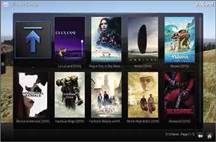
Exodus lets you watch virtually anything you can think of – not always legally Workshop on page 40 for instructions on how to find and view content on Exodus.
UK Turks Playlists
This add-on is easily one of the best available for Kodi and offers a huge selection of content to watch, ranging from classic TV shows and films to cartoons and documentaries. It also offers live TV (the list of channels is exhaustive) and live sports. You can view adult content, too, if you enable this in Settings.
If you want to find out about future changes coming to the add-on, you can follow @uk_turk on Twitter. The account’s tweets are protected, so you’ll need to send a follow request. You can

Whatever you enjoy watching, you’ll find loads more of it on UK Turks get UK Turks Playlists through the Addon Installer mentioned in the previous section, above.
Specto
Specto is an updated offshoot of Genesis that lets you stream and enjoy the latest TV shows and movies, and watch live TV channels. It’s very similar to Exodus but with a greater choice of streaming-quality options. You can customise the movie and TV sources and numerous other settings.
You can’t currently get Specto through the Addon Installer so you’ll need to install it directly through Kodi instead. The process is straightforward, if a little longwinded. Follow the instructions at bit.ly/specto416.

Fans of the now abandoned add-on Genesis will like the very similar Specto

Watch your favourite BBC channels via the unofficial iPlayer WWW add-on

Catch up with A Touch of Frost and loads of other classic ITV series
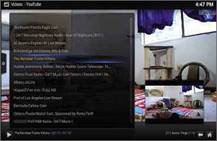
When you’re bored of TV shows and films, you can watch user videos on YouTube
iPlayer WWW
BBC iPlayer is available for loads of devices, so it only seems right that you should have access to it through Kodi. The iPlayer WWW add-on is unofficial, but it does a great job. You can view catch-up and on- demand content, and also tune into BBC channels live. You can’t currently get iPlayer WWW through the Addon Installer, but it’s very easy to install. Go to Videos, Add-ons and click ‘Get more’. Scroll down the list to iPlayer WWW. Select it and click Install, then go to Videos, Add-ons and click iPlayer WWW to launch it.
ITV
You can watch ITV’s channels live on Kodi and enjoy catch-up and on-demand content. To install the add-on, go to System, File Manager, double-click ‘Add source’ and click <None>. Type http://xunitytalk .me/xfinity and click Done, then click OK and go back to the Home screen. Select System, then Add-ons. Select ‘Install from zip file’, then ‘xfinity’, then ‘XunityTalk_Repository’ and ‘Install from repository’. Finally, select ‘.XunityTalk Repository’. Select ‘Video add-ons’, followed by ITV, and click Install.
SALTS
Short for Stream All The Sources, SALTS comes from the creators of 1channel.ch. Once launched, you can select Movies or TV Shows, then browse by categories such as Trending, Popular, Anticipated and Recently Updated. Hover over any item to display stills and artwork.
Select something to watch and, once the add-on has fetched all the sources, you can select the one you want and begin viewing. SALTS offers a lot of

If you like watching US TV shows, SALTS puts them all at your fingertips choices, and works quicky to find the content you’re looking for.
You can get SALTS through the Addon Installer.
YouTube
What good is a streaming service without YouTube?
As you’d expect, this unofficial Kodi add-on gives you access to everything on Google’s video site and lets you adjust the picture quality. You can sign into your YouTube account to view your subscriptions, see what’s popular right now, browse channels and search for videos. It’s also possible to browse and watch live YouTube broadcasts.
Install it through the Addon Installer.
Velocity
Velocity is one of the newest Kodi add-ons and comes in two versions – the standard release for everyone; and Velocity Kids for younger viewers. When you launch the add-on, you’ll be faced with a screen that gives you access to Movies and TV Shows, along with various settings. The Movies section offers the standard category options, such as Most Popular, Trending, Most Watched and Most Played.
MINI WORKSHOP | Watch anything on Kodi using Exodus

1 Once installed, launch Exodus by going to Videos, Add-ons and clicking Exodus on the left. Select Movies or TV Shows 1 at the top, depending on what you want to watch. You can also catch up on New Episodes, 2 browse the list of Channels 3 or search for something by name. 4

2 Select TV Shows. You can find something to view by exploring one of the categories on the left. Most Popular or Highly Rated 1 are good places to start and present you with thumbnails for popular series. People Search 2 lets you find shows featuring a particular actor, or you can run a regular search. 3

3 Select a show by clicking its thumbnail. You’ll be presented with a choice of seasons. Pick one to view a list of episodes. 1 Hover your mouse over an entry to find out what it’s about. 2 Double-click an episode and the add-on will check the available streaming ‘providers’ and list them. Double-click one to start watching.
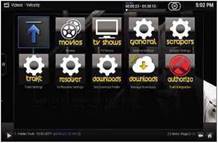
Velocity has one edition for everyone and another that’s just for kids
You can get both versions of Velocity through the Addon Installer.
FilmOn Simple
This add-on gives you access to the masses of international content on FilmOn, including TV programmes, movies, sports and music, as well as live UK television. It’s not as polished or as reliable as other add-ons, but it’s still worth a look. You can get it through the Addon Installer. There’s also a FilmOn.TV add-on but we’ve found that this mostly offers dead links and doesn’t play live channels.

The FilmOn add-on is a little scrappy, but it’s great for watching global TV
Disney Junior
If you want to keep young children entertained, then fire up Disney Junior. The add-on lets you watch episodes of popular Disney shows, such as The Lion Guard, Doc McStuffins, Sofia the First and Mickey Mouse Clubhouse. To install it, go to Videos, Add-ons and click ‘Get more’. Scroll down the list to Disney Junior, then select it and click Install. You’ll find it under Videos, Add-ons, Disney Junior.

Cartoon-loving young viewers can get as much from Kodi as their parents
Freeview
This handy add-on provides quick and reliable access to live and catch-up UK TV. Live channels include those from BBC, ITV, Channel 4 and 5, as well as plenty of others offered by Freeview. The Catchup section covers seven channels – Blaze, Dave, Drama, Quest, Really, truTV and Yesterday – but nothing from the main four broadcasters, unfortunately.

Hello? Is it the Freeview add-on for Kodi that Lionet Richie is looking for?
You can install Freeview through the Addon Installer.
1Channel Primewire
This add-on lets you enjoy a wide selection of movies and
TV shows, sorted into categories including Genres, Featured and Highly Rated. You can customise it by installing themes and icons, and tinker with settings relating to the website, user interface, video playback and
IS KODI LEGAL TO USE?
In short, yes. Kodi itself is perfectly legal. The software is designed to give users easy access to lawfully owned content – including videos, music, games and other media – across a range of devices. However, many third-party add-ons for the platform provide access to pirated content, and that’s where the problems start. If you install an add-on that offers the latest blockbuster movies for free, it shouldn’t come as a surprise to find that the content isn’t there legally, and you’ll be breaking the law by watching it.
Kodi is keen to distance itself from add-ons that allow easy access to illegal media. Its About Kodi page (kodi.tv/about) clearly states:
“The official Kodi version does not contain any content whatsoever. This means that you should provide your own content from a local or remote storage location, DVD, Blu-ray or any other media carrier that you own. Additionally Kodi allows you to install third-party plugins that may provide access to content that is freely available on the official content provider website. The watching or listening of illegal or pirated content which would otherwise need to be paid for is not endorsed or approved by Team Kodi”.
As we reported last issue, UK ISPs recently started sending “educational” letters to suspected pirates on behalf of Get it Right from a Genuine Site (www.getitrightfromagenuinesite.com), a government-backed initiative acting on behalf of copyright owners that warns about sharing illegal content. Kodi was mentioned in a BBC News story about these anti-piracy letters but the company objected, stating: “this is of course completely wrong and is even damaging the integrity we as Team Kodi try to keep and distance ourselves from any form of content stealing”. BBC News added a correction (see bit.ly/kodi416). As we went to press, a Middlesborough shopkeeper was in court charged with selling set-top boxes with Kodi pre-installed. He pleaded not guilty.
In conclusion, watching copyrighted movies and TV shows for free on Kodi is still illegal, but it won’t (for now, at least) result in your ISP delivering a slap on the wrist.

Kodi was wrongly featured in a BBC News story about piracy
performance. It’s definitely worth spending some time getting the add-on set up as you require.

1Channel is easy to use and can be customised to suit your tastes
You can install 1Channel Primewire through the Addon Installer.
Phoenix
You’ll never again be stuck for something to watch if you install Phoenix because this add-on is the gateway to a vast amount of content. In addition to Phoenix TV, Phoenix Sports and Phoenix New Releases, there are themed categories to explore such as Incredible TV, Diva’s Den, Documentary and Cartoon Crazy.

Phoenix provides a gateway to a vast amount of content
You can get Phoenix through the Addon Installer.
WATCH KODI ON ANY DEVICE
The beauty of Kodi is that you aren’t limited to using it on a PC but can also install it on phones, tablets, Raspberry Pi and TV-streaming sticks. Here, we explain how to install the media centre on different devices
Android phones and tablets
If you have an Android device, you can install Kodi directly from Google Play. Go to bit.ly/kodiandroid416 and install it from there, or access Google Play on your device. Give the app the permissions it wants and, once installed, Kodi will look and behave as it does on any other device. To use Kodi on an iPhone or iPad, you’ll need to jailbreak the device, which isn’t advisable.

Watch Kodi in your hand or lap by installing the free Android app
Raspberry Pi and other mini systems
Instead of using a PC as your Kodi media centre, you can use a Raspberry Pi or similar mini computer. There are

The tiny and cheap Raspberry PI runs Linux-based Kodi software
a couple of good Linux-based operating systems based on Kodi – try OpenELEC (openelec.tv) or OSMC (osmc.tv). You can download an OS directly from the developer’s website or install it through Raspberry Pi’s NOOBS (New Out Of the Box Software, bit.ly/noobs416).
As an alternative to the Raspberry Pi, you could try Asus’ Tinker Board (bit.ly/ tinker416). This costs just £55 but it can handle 4K video and its Linux-based operating system comes with Kodi pre-installed.
TV-streaming stick
Arguably the best way to enjoy Kodi is by installing it on a streaming stick, such as the Amazon Fire TV Stick or Google Chromecast. Installing Kodi on the Fire TV Stick is a little complicated and requires you to navigate to Settings, System, Developer Options and turn ’Apps from Unknown Sources’ to On. You’ll then need a file-management app such as ES File Explorer. Install this through the Appstore, then launch it and go to Add. In the path box, enter http://kodi.tv/download and add the link to your favourites. Click the ARM link, then click the three-dot icon in the bottom-right corner and select ‘Open in new Browser’. Once Kodi has downloaded, select Open, Install.

You can stream content directly from Kodi to your Amazon Fire TV Stick
For the Chromecast, you just need to install Kodi on your Android device and ‘cast’ to the device. Open the Chromecast app and select ‘Cast screen/audio’. Once it’s linked to your Chromecast, open Kodi and find something to watch. The content will play simultaneously on your device and your TV.
Pre-loaded box
There are numerous set-top boxes that come with Kodi pre-installed. Just type ‘Kodi box’ into Amazon or eBay, and you’ll be presented with a long list of options at varying prices. The benefit of buying a box like this is you don’t need to get hands-on with the software – Kodi should be pre-installed and ready to use – but make sure you read both device and seller reviews.
If you don’t mind spending a lot more money (around £200), the Nvidia Shield (www.nvidia.co.uk) is one of the best options and includes automatic Kodi updates, fast performance and 4K support for Netflix. It’s also more trustworthy than knock-off Kodi boxes.

SECRET HACKS FOR WATCHING KODI
Once you’re up and running with Kodi, you can try lots of tricks for improving your viewing. Here are our favourite tips for making the most of the media centre
Stop videos buffering
If your Kodi streams keep hanging and buffering, you may be able to improve playback by increasing the size of Kodi’s video cache. However, this involves a spot of programming and then copying the results to your user data file, the location of which varies depending on the device you’re running Kodi on. The instructions for expanding the cache can be found at bit.ly/cache416.
A simpler solution is to reduce the quality of the video playback. This may mean that your streaming doesn’t look as good, but it should be a lot smoother.
Set up multiple profiles
If you plan to use Kodi with other family members, you may want to set up separate profiles for each user – especially if you have very different tastes! To do this, go to System, Profiles, Profiles, ‘Add profile’. You can customise each profile in whatever way you like.

Set up user profiles in Kodi so that nobody interferes with your viewing
Change your ISP security settings
If your router was supplied by your ISP, you may find that some of its security settings interfere with Kodi. These security settings are designed to keep you safe from dubious software, but they may also prevent you from getting the best from the streaming service. The TV Addons site provides helpful suggestions for customers of BT, EE, Sky, TalkTalk and Virgin Media (bit.ly/isps416).
Change the look of Kodi
One of the best things about Kodi is its customisability. To change the default skin, go to System, Settings, Appearance, Skin, Skin and click ‘Get more’. Browse the selection for a skin you like. You can also change the background by going to System, Settings, Appearance, Skin, Settings and clicking Background Options. Select ‘Enable custom background’, then click ‘Background path’ and browse for an image to use.

Change Kodi’s appearance and background to make it feel more your own
Use keyboard shortcuts
If you’re using Kodi on a PC, you can use keyboard shortcuts such as ‘\’ which switches the media centre between full screen and windowed view, along with ‘P’ for play, ‘F’ for fast forward and ‘R’ for rewind.
Try a different build
You can download and install special builds of Kodi which have their own individual look and come with third- party apps pre-installed. Some of the most notable include Dad Life (created for British families) and Nemesis.
You’ll find a list of the best builds at bit.ly/kbuilds416, along with links explaining how to install them.
Turn on subtitles
Some (but not all) add-ons offer support for subtitles and one of our favourites is the excellent AutoSubs. To install it, go to System, Add-ons, and select ‘Install from repository’. Click ‘Kodi Add-on repository’, then select Subtitles in the list. Choose a subtitle service – Subscene.com or OpenSubtitles.org (you need to create an account for the latter), then click Install and go back to the previous screen. Select Services and install AutoSubs. On the Home screen, go to System, select ‘Video and Subtitles’ and set your preferred subtitle language and the language(s) in which you want to download subtitles. Click ‘Default TV show service’ and pick the subtitle service you selected earlier.

Add subtitles to Kodi so you’ll always know what people are saying on-screen


