Cheap smart home devices

Wayne Williams shows that you don’t have to spend a fortune on expensive gadgets to make your home smarter. Read our cheap smart home devices guide.

Set up a smart home as cheaply as possible
We still don’t have flying cars or personal jetpacks, but one sci-fi staple that’s within everyone’s grasp is the smart home. Many people can now switch on their lights, change the TV channel and control the temperature of their homes by uttering a few words or using an app.
If you’ve yet to embrace the smart home revolution, there’s never been a better time to start. Smart products are available to buy everywhere – but what if you’re on a tight budget and you can’t afford the latest and greatest smart home technology? No problem. In this Weekend Project we explain how to set up a smart home while spending as little as possible, thanks to a few intelligent purchases and some clever workarounds.
Upgrade your lighting
One of the most popular smart upgrades is to replace standard light bulbs with intelligent ones that you can control using your voice, an app or a controller. There are many different types available, ranging from the basic but affordable Lumiman bulbs to the pricey but more feature-packed Philips Hue sets. Philips Hue lighting is excellent, with support for Alexa, Google Assistant and Apple, and a wide range of different lights that you can add to your setup with ease.
However, you pay a lot more for it than with other products. A Hue Starter Kit Bundle, which includes three B22 Bulbs, a bridge and dimmer switch, will set you back around £170 (meethue.com) – although, as with anything, there are savings to be made if you shop around.
On the other hand, you can buy a couple of Lumiman B22 bulbs for around £23 from Amazon (bit.ly/lumi487). Lumiman’s products work with the PlusMinus app on Android and iOS, which lets you change the colour of your lights, dim them, set a schedule or countdown and much more. As with Philips Hue, you can also control Lumiman bulbs with your voice using Alexa and Google Assistant. We’ll show you how to set up and use a Lumiman bulb in our Mini Workshop, opposite.

Make sure you buy the right type of bulb for your light socket – screw or bayonet fittings. Philips Hue systems are more expensive than Lumiman’s but offer lots of useful features
Given the huge savings, it’s a bit of a no brainer to opt for Lumiman bulbs, but before you splash out. consider whether you really need the features they offer. Will you ever cycle through the different colours, or do you simply want to be able
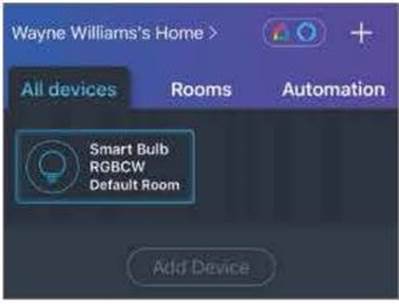
Add a Lumiman product and it appears in the app, organised by device or by room
to turn the lights on and off when required? If the latter is all you need, you can forget about buying smart bulbs and plug your table lamps into a smart plug instead. Something like the TP-Link Smart Plug WiFi Outlet (bit.ly/tplink487) will do the trick, and although it’s a little more expensive than a Lumiman bulb (around €16 for one) you can use it for other tasks besides lighting.
The plug works with the Kasa app, which lets you control any TP-Link smart home devices. You can use it to turn your lamps on and off, set schedules and timers, and check the status of your smart tech. It also has a useful ‘Away mode’ which basically turns your devices on and off at different times of the day to give the appearance that someone is at home, even when the house is empty.
The Kasa app isn’t the only way to control the plug, however: it works with Alexa and Google Assistant, too. so you can activate it using voice commands. You can even use it with IFTTT (ifttt.com) to chain events and actions together.
Invest in smart plugs
There are quite a few makes and models of smart plug available. The TP-Link Smart Plug WiFi Outlet we mentioned in the previous section is a good, affordable choice. Smart plugs aren’t limited to turning lights on and off, however. You can use them for plenty of other tasks.
Smart plugs essentially control the power supply, so if you wanted to use one to boil a kettle, say, it would only work if you had already flicked the
MINI WORKSHOP Set up and use Lumiman bulbs
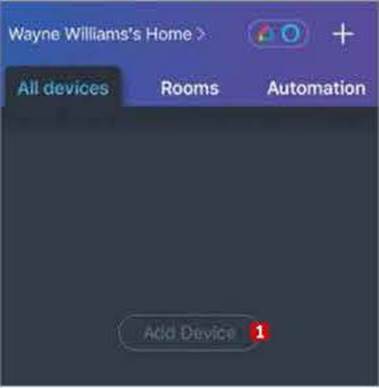
1 Once you’ve got your bulbs, use your phone to scan the supplied QR code or download the app from www.plusminus.ai/app. It’s available for Android and iOS. Insert a bulb into a light socket but don’t turn it on yet. Open the app, allow it to use Bluetooth and access your location, then create an account and tap Add Device. 1
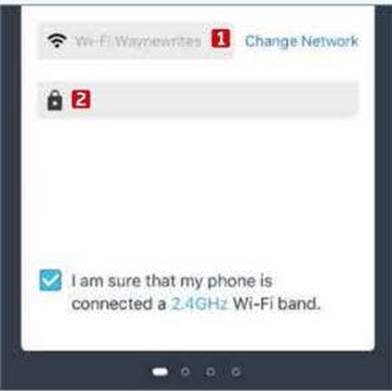
On the next screen, choose the type of smart device you want to add – Lighting, in our case. Select your Wi-Fi network 1 and enter the password for it. 0 You need to connect your phone to the 2.4GHz wireless band for it to work. Turn the light on and off repeatedly every two seconds.
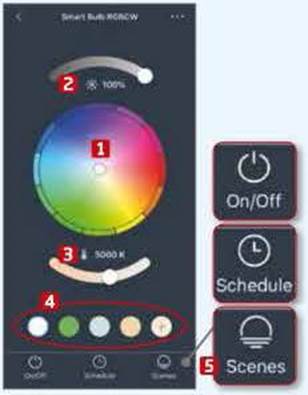
The light will eventually start flashing and appear in the app. Tap it, and you can then change the colour using the wheel, 1 alter the brightness 0 and colour temperature 0 or pick a preset. 4 You can also turn it on or off, set up a schedule or pick a scene 0 (such as Christmas or Halloween).
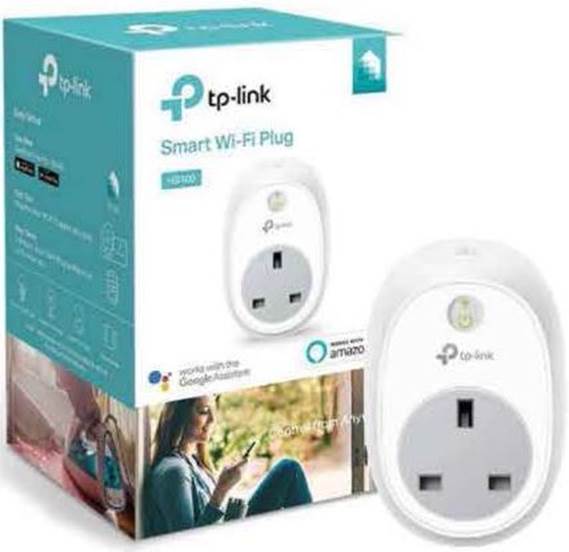
Smart plugs are an affordable way to control ordinary household items, such as lamps, heaters and anything else you can think of
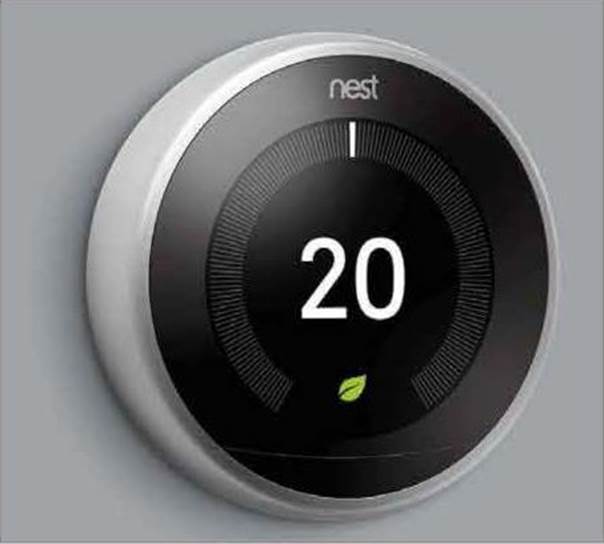
The Nest Learning Thermostat may seem expensive, but if you use it correctly it should pay for itself in the long run
kettle switch on. You can’t use a smart plug to start microwaving food, for example, but you can power up a standalone pressure cooker or slow cooker. You can also use one to start charging a connected phone at midnight and kill the power a few hours later to save electricity.
With the ability to schedule a plug, you can control how long your children or grandchildren are able to watch TV or play on a games console, even when you’re not there. You can also use it to heat a room before you get home. Just plug in an electric radiator, make sure it’s switched on and set to the correct temperature, and set a schedule or enable it remotely when you want.
You can even use a smart plug to wake you up in the morning by turning on the radio at a preset time, like a modern version of a radio alarm clock.
With enough smart plugs and a little ingenuity, you can automate a lot of your home for very little money. We show you how to set up a TP-Link smart plug in our Mini Workshop, below.
Get a smart thermostat
Adding a smart thermostat to your home isn’t cheap. Google’s Nest Learning Thermostat (bit.ly/nest487)
and British Gas’s Hive Active Heating (www.hivehome.com) cost £219 and £249 respectively. However, you can gradually recoup the costs of those in energy savings. According to Google. Nest Learning Thermostat customers save between 8.4% and 16.5% off their bills, while Hive promises that you could save up to £120 a year by not having to heat an empty home. At the moment. Hive also bundles a free Amazon Echo Dot worth £50 when you buy a Hive Active Heating system. However, to make these savings you have to ensure that you and your family are using your smart thermostat properly. ■
MINI WORKSHOP Control your power using a TP-Link Smart plug
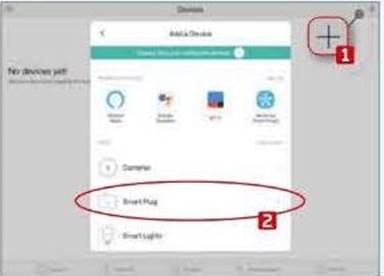
1 Start by installing the Kasa app on your mobile phone. Create an account (which gives you more options), then connect your smart plug to the mains. Launch the app, tap the plus symbol in the top-right corner 1 and select ‘Add a Device’. Tap Smart Plug. 2
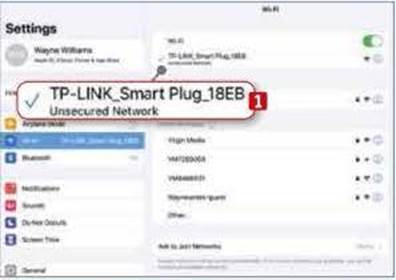
Select your device from the list. The Wi-Fi light on your plug should turn amber and then, after 15 seconds or so, start blinking amber and green. Go to your phone’s Settings, open Wi-Fi and connect to the Smart Plug’s built-in wireless network. 1 Then return to the app and finish setting up the plug.
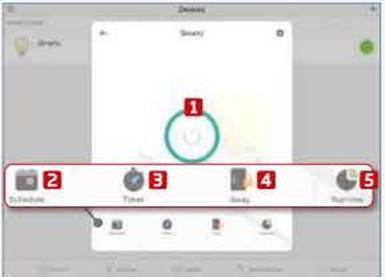
3 You can now turn the plug on and off, D and set up a schedule 0 or timer. 3 Away mode 4 lets you tell the plug when to switch on and off, while Runtime 0 lets you see how long it has been switched on today, this week and for the past month. Repeat these steps to add extra devices.


