Small is beautiful. There’s a lot of truth in that saying, but small can also be inconvenient and, where laptops are concerned, ‘small’ can mean an absence of ports and no disc drive.
You might argue that drives are no longer necessary when many of us stream films and download software, but not everybody’s broadband is fast or reliable enough to do this, and some who do enjoy decent broadband speeds may be on a capped contract that limits the amount of data they can download.
What you need: External disc drive, Time required: One hour
by Nik Rawlinson
Disc drives aren’t just used for playing content either. With a DVD writer, you can reliably back up 650MB to a CD and 4.7GB to a DVD. That might not sound like much when you could pick up a 128GB USB stick, like the SanDisk Ultra Fit (https://amzn.to/3Gw55bN), but price and capacity aren’t everything.
You should also consider convenience.
USB sticks are great for backing up data that changes often – like folders of files you drag and drop from your hard drive. Doing this doesn’t create an archive, however. Every time you drag and drop, you overwrite your previous backup. So, if you later discover that one of the files was corrupted before you dropped it, or you’d made a change you regret, there’s no rolling it back.
You could buy several USB sticks and use each one once, but they’re not as easy to store as a stack of discs, and nor are they as cheap. You can buy 100 blank Philips DVD-R discs at Amazon (https://amzn.to/3GwwI4r, pictured). With a combined capacity of 470GB, they’re costing you an average of p per gigabyte, which is less than half the price of the USB stick mentioned above (and the stick itself is something of a bargain).
Naturally, you need to factor in the price of buying the external drive, but this is a one-off cost. Also, because it’s not an integral part of your laptop, you can keep hold of it when you upgrade.
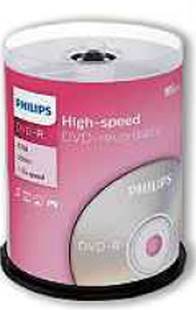
You can buy 100 Philips blank DVD-R discs on amazon
Choose a disc drive
Some drives have a tray; others, merely a slot. The difference might sound cosmetic, but if you also want to use the drive to rip music from your CDs, you should probably choose the former. Slot drives can’t accommodate 3.1in (80mm) mini CDs, which were a popular format for CD singles, and are still sometimes used for bundled software and drivers.
You’re unlikely to find a CD-only device if you’re buying new, but we’d still recommend checking that your chosen drive can also burn DVDs. Beyond that, you don’t need to worry about formats.
That wasn’t always the case, and if you’ve not bought a drive in several years, you may remember having to weigh up the relative benefits of DVD-R and DVD-RW against DVD+R and DVD+RW. In reality, they all did the same thing, but choosing one over the other would lock you into that format, and could mean the discs you burned in your drive would be incompatible with roughly half of your friends’ and family’s drives. Fortunately, that’s rarely true now, but it’s still worth checking that the drive you buy supports at least DVD-R and DVR+R (sometimes written DVD±R).
The -/+/±R and -/+/±RW after the drives’ names denote whether they work only with writable (R) or also with rewritable (RW) discs. As their names suggest, these can be written to once (R), or written, erased and written again several times over (RW).
You can also buy Blu-ray writers, which work with higher-capacity discs with one, two, three or four layers to store, respectively, 25GB, 50GB, 100GB or 128GB of data. Amazon is selling a Panasonic drive that supports quad-layer discs (https://amzn.to/3rwzcLX). You may
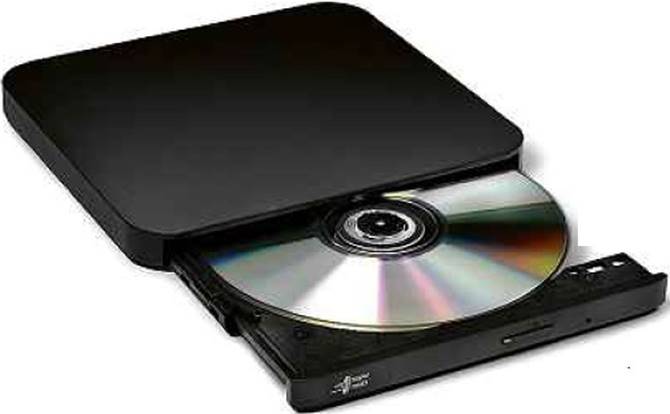
The Hitachi-LG GP95 DVD burner works with all types of disc be able to back up all of your data in one go on a Blu-ray disc, but whether this is appropriate depends on how you want to manage your files.
We think it’s a good idea to store different projects or groups of related projects on their own discs, and the 4.7GB capacity of a standard DVD feels like a fair compromise when archiving a collection of holiday photos without too much spare capacity going to waste. Of course, your experience may be different.
Create a backup
We bought a Hitachi-LG GP95 DVD burner (https://amzn.to/333VStw, pictured left), and 10 Philips DVD-R discs (https://amzn.to/3snckNR). The drive works with DVD-R, DVD+R and CD-R discs, M-Disc and DVD-RAM. It connects via USB and comes with a full-size USB connection in the box, as well as a USB-C adapter.
Connect your drive to your computer and insert your first blank disc. An alert will pop up, asking what you’d like to do with blank DVDs. Ignore that for now, and instead open a new File Explorer window, and click your drive in the sidebar. This will open a box asking how you’d like to use the disc.
You can treat it either like a USB stick, dragging and dropping files in several separate sessions, or create a disc you can use in a regular DVD player. If you choose the first of these options, the disc should be compatible with any computer running Windows XP or later. If you choose the second, it should work with a wider range of devices, including the DVD player linked to your TV. However, because it will have been ‘finalised’, you won’t be able to add any more files to it in the future.
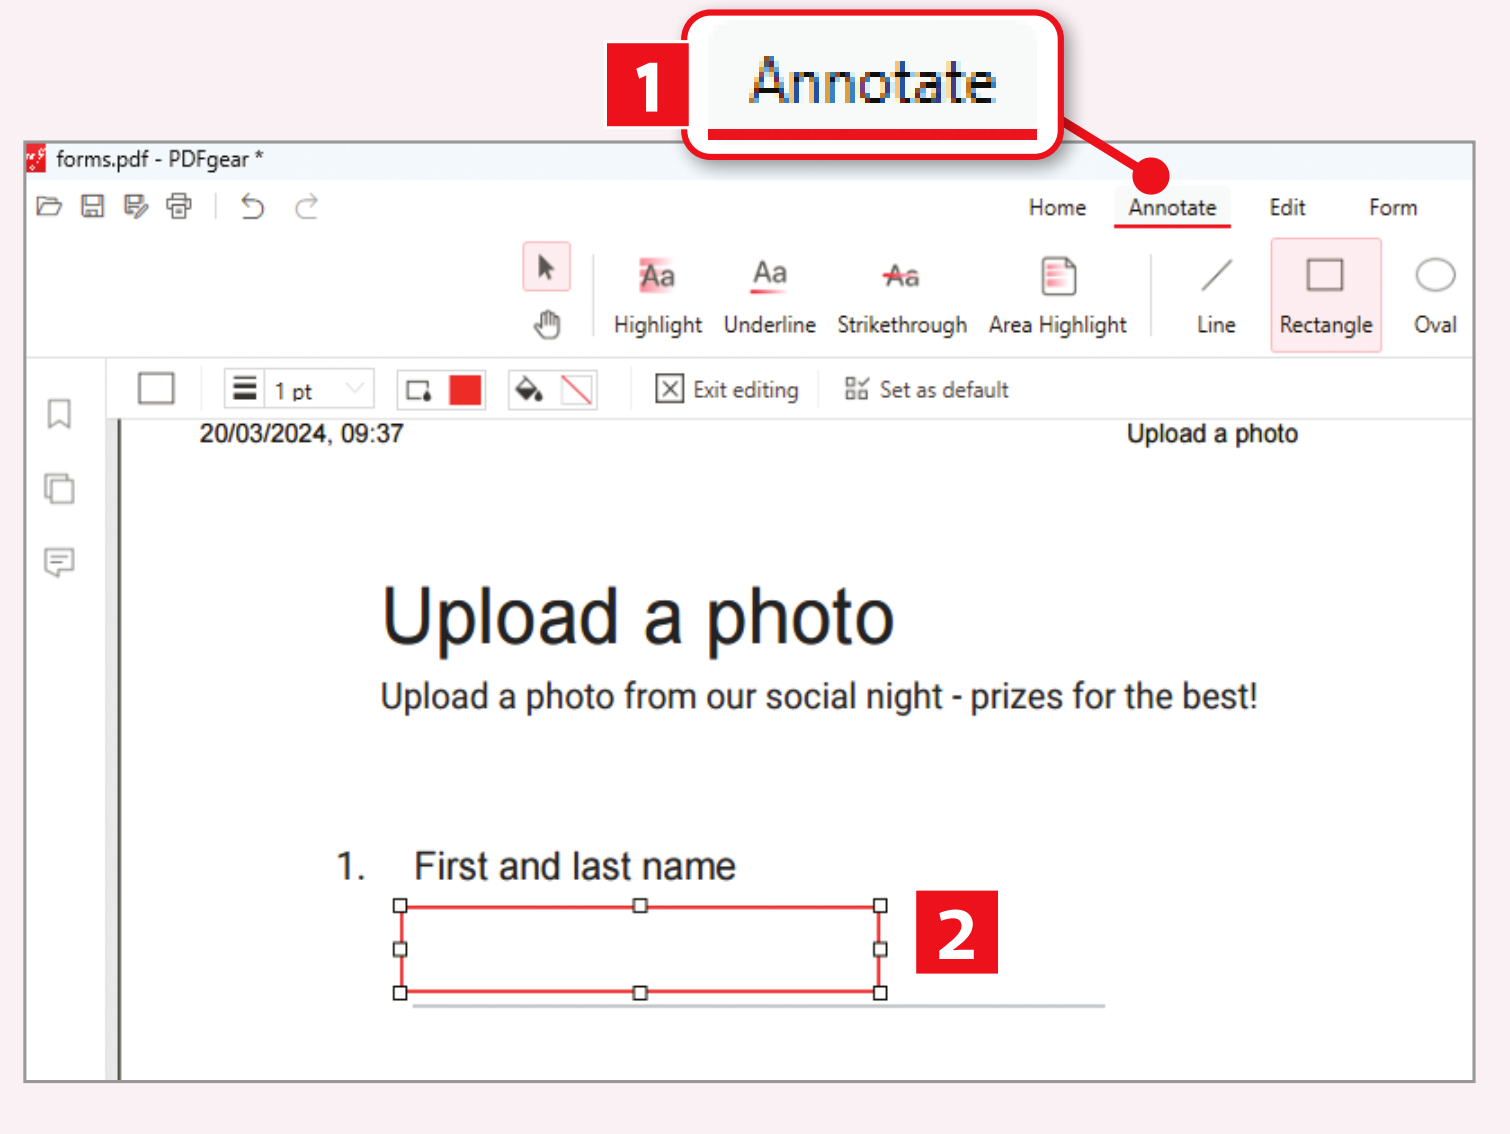
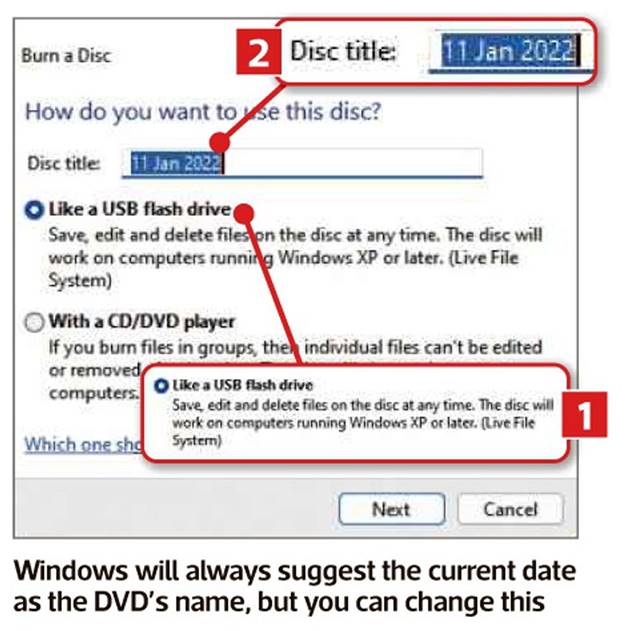
For the moment, leave ‘Like a USB flash drive’ selected (1 in our screenshot below), then give your disc a suitable name. Windows will suggest the current date 2, which is a sensible option if you’re
It swaps the dye-based layers of a standard DVD or Blu-ray disc for a ‘rocklike’ layer, the exact composition of which is a secret. This substance is the key to its longevity, because it doesn’t fade the way the dye in a regular DVD can, and thus shouldn’t suffer an unfortunate side effect known as data rot – in which the dye on a standard optical disc can start to discolour, corrupting the data that was burned into it.
The team behind M-Disc technology says that the problem is so serious that “the National Archives warns that the reliable shelf life of a standard recordable DVD is somewhere .tween two and five years”. If you want to use M-Disc, make sure your drive supports it, and buy J some M-Disc discs. Amazon sells a pack of 10 M-Disc DVD-R discs (https://amzn.to/3ru4ZNl, pictured).
Nik Rawlinson
creating regular backups, but you might prefer something more descriptive. Don’t forget, you can also use a CD pen to write on the upper surface of the disc itself before you file it away – this pack of four (https://amzn.to/3or45iE). Once you’ve settled on the name, click Next, and Windows will format your disc.
Find the files you want to back up
Now you need to locate the files you want to back up. If your work is organised into convenient folders, you can drag them across in File Explorer the way you would when copying to a USB stick. But what if you want to gather all the photos on your computer, regardless of where they’re stored? In this instance, you’d use Windows’ built-in search tools.
Click in the ‘Search Quick access’ box at the top of the File Explorer window, then type kind: jpg and press Enter. Windows will now search for all JPEG format files – commonly created by digital cameras – stored on your computer. If you’ve been using it for a long time, you’ll probably see several thousand results, which need slimming down to just the pictures you want to back up. The easiest way to do this is to keep typing in the ‘Search Quick access’ box.
Let’s start with the image date. Click just after ‘jpg’ in the Search box and add a comma and space, followed by date: 2020. Of course, if you want a different year, change accordingly. You could also be more specific, filtering things down to a single date if required, by using the formula date: 25/12/2021.
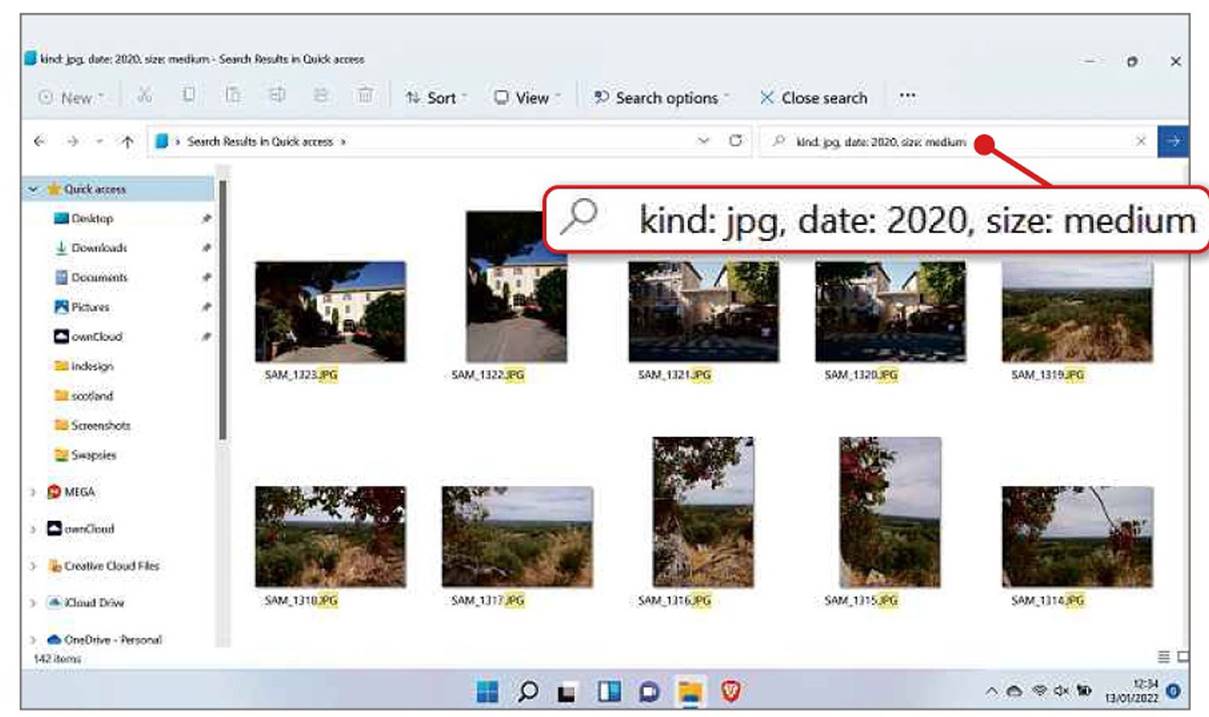
Windows lets you filter your image search results by file format, date and size
Now let’s filter the results based on the image size. You have six options here, ranging from ‘tiny’ (0-16KB) to ‘gigantic’ (larger than 4GB), with small, medium, large and huge in between. Most pictures taken by digital cameras and smartphones are somewhere between 2MB and 10MB, which would be covered by the ‘medium’ category (1MB to 128MB). Click at the end of your existing search term, add a comma, then type size: medium. You should now have kind: jpg, date: 2020, size: medium (see screenshot above). Press Enter, and Windows will refine the search, taking into account your additional filters.
While it’s searching, which can take several minutes if you have a large, cluttered drive, hold the Windows key and press the right arrow key to move the search results window to the right-hand side of the screen. Now press Ctrl+N to open a new File Explorer window, and press Windows key+left arrow, then move it on to the left half of the screen. Click your disc drive in the sidebar of the left-hand window. When Windows has finished compiling a list of the files that match your criteria, click one of them in the search-results window on the right, then press Ctrl+A to select all your filtered images.
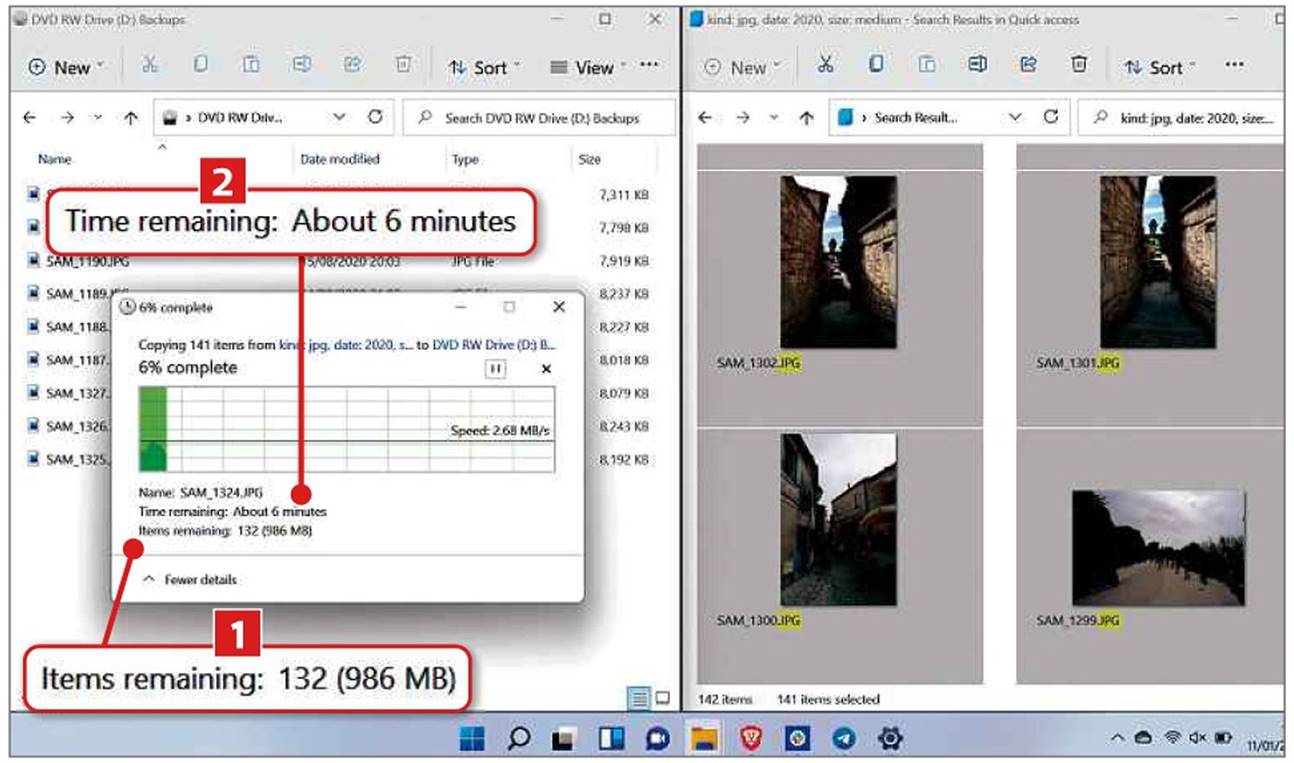
The time it takes to write your files to disc will depend on several factors, including the number of files
It’s worth scrolling through your pictures before backing them up to make sure you really do want to copy them all across. Scroll through the results and, if you spot one that shouldn’t be included, hold down Ctrl while clicking on it once. This removes it from the selection.
When you’ve finished, drag them from the right-hand window into the left and Windows will burn them to your DVD. The time this takes depends on the number of files you’re backing up (1 in our screenshot left), the speed of the drive, the port on your computer that it’s plugged into, what else your computer is doing in the background, and even the speed rating of the disc you’re using. Windows will tell you how much time is remaining 2.
When it’s finished, if you don’t need to copy any other files to the disc in this session, right-click it in the File Explorer sidebar and click Eject on the menu that pops up. This closes the current writing operation so the disc can be read on another computer.