CloudBerry Backup Review: Perfect backup!
Backing up is the single most boring subject on the face of the planet. Keep reading, though, because it’s also quite possibly the single most important task you can do on your PC.
So, how can we make backing up sexy for the Millennial? The usual answer would be to add a little gamification, but as we’re not app writers, that’s not going to happen. Our next best answer is to make it easy, quick, and as close to being invisible as possible.
With a tiny bit of planning, backups can be made super-easy today. High-speed wireless, abundant storage, and access to free cloud storage options ensure you’re able to back up your data in smart ways that protect your vital personal finances, documents, photos, and whatever else you’d like.
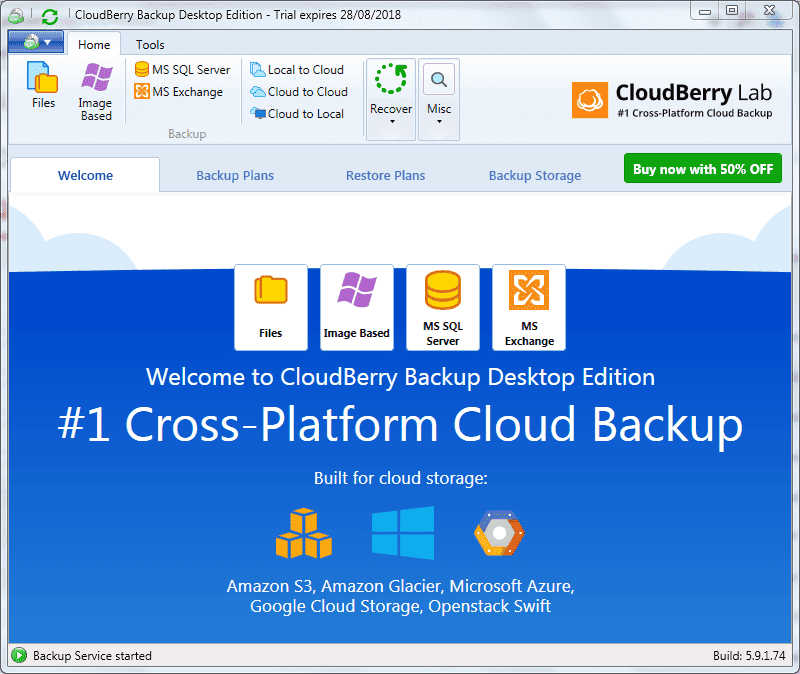
So, let’s see now easy it can be. We’ll offer up solutions from CloudBerry Lab, it’s CloudBerry Backup, one of the best options that can help you backup all types of media, often, and usually with little work involved.
Table of Contents
First of all, this is kind of an intermediary program. You can use to schedule your backups, with any kind of cloud storage. Google Cloud storage or Amazon s3 that work great for you. CloudBerry Backup works on Linux. There’s a free version for personal use. It was also very easy to set up.
The pro version has a lot of advanced features such as compression and encryption. Normally, the price is $49.99 for a single license. There’s an ultimate version which does not limit you to file storage so the main features.

We’re going to demonstrate the new features of CloudBerry Backup. The latest version packs a number of highly requested features, will enable users to enhance the backup automation and performance.
Ransomware protection
Usually, I’m not a big fan of automated scheduled backup programs. The main reason for that is if the ransomware does encrypt your data then your backups may also get encrypted. Therefore, it does not help if it’s connected to your system. However, I was recently approached by cloudberry backup, a backup utility that works with all sorts of cloud services.
Keep in mind, this is ransomware protection for your backups, not for your system. If ransomware ends up encrypting the data on your system when you run the next backup, cloudberry will actually tell you that hey look at your files they’ve been encrypted. It basically gives you a warning, so that you don’t end up deleting your previous backups. You can just restore and get all your data back!
Hybrid backup
If you follow the industry standards, you know that you have to perform at least one local and one cloud backup.
Our resource usually choose to set up two different backup plans. One to the local storage and one to the cloud storage. Of course, that is not very efficient, you have to perform encryption twice. You have to perform compression twice. Because the files are being copied from your main computer to the local storage, then from your main computer to the cloud storage with hybrid backup.
We’ve changed the game a little bit. Now, you don’t have to perform all those operations twice. Your files are being copied to your local storage, they are being compressed once. They’re being encrypted once and then once they’re compressed encrypted and copied to your local storage. Then, they are uploaded from your local storage from presumably enough storage all the way to the cloud storage. That way you have to utilize half as many disk operations on your main computer, which is very neat so to set up a hybrid backup plan.
Backup chain
The next feature we’re going to talk about is what we call backup chain. Now, as you know, cloudberry backup already allows you to automate your pre backup and post back up actions. You can perform any common line operations that our software supports such as:
- Launching a plan.
- Setting up an account performing consistency.
We take things further and enable you to select a plan that will be executed right after.
The plan that is being created will be executed so you can select the backup chain checkbox. After that, you can select the plan you want to be triggered right, after this plan is being executed. We’re going to select for this example photos and then you can specify whether you want to execute the photos backup plan regardless of the backup result or only if the backup has been successfully completed.
We’re going to select regardless of the backup result and just continue setting up the plan. Once done, launch the plan and right after it finished. You should see that after desktop files the photos, backup plan should automatically execute. That’s the essence of chain backups.
Compression/encryption support for Amazon Cloud Drive, Google Drive
Many users choose to use these cloud storage services. They’re very cheap and in the case of Google Drive, they’re even free of charge.
So with that in mind, we have enabled compression and encryption for these cloud storage services. When you set up your backup plan and reach the compression and encryption step. You can enable compression and up to bits military-grade encryption.
“If you have these features enabled you can be sure that your files are being stored securely and inaccessible to third body mole factors all right.”
Workshop: How to backup your files with Cloudberry Backup to Google Drive
When you’ve installed cloudberry backup on your Windows machine, you can just double click on that little symbol to launch the software.
The good thing about cloudberry backup is that it is not only going to backup your files to Amazon, but a variety of systems Backblaze B2, OpenStack, Azure and other services that you can use to backup your files.
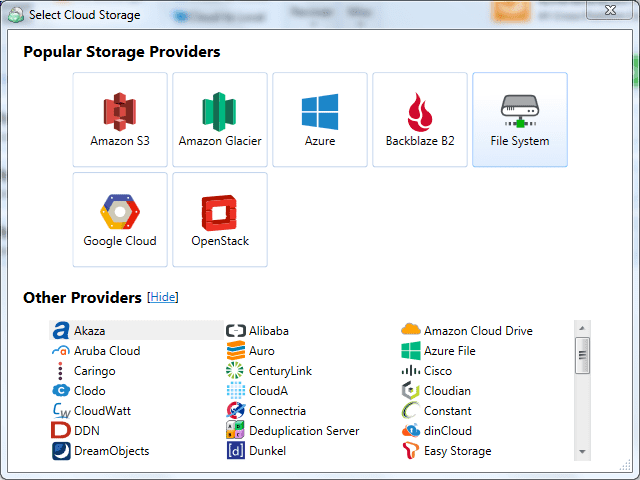
However, in this really, we’re going to limit ourselves to Google Drive. Because it is a free solution.
First of all, If you haven’t then you can create one account for yourself.
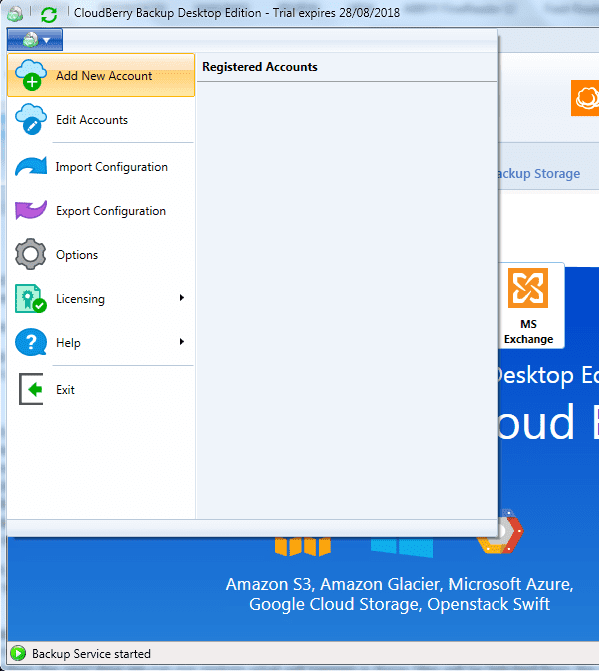
You can select any kind of storage that you like and then you have to provide your auth keys to it. Once you’ve done that, just hit OK.
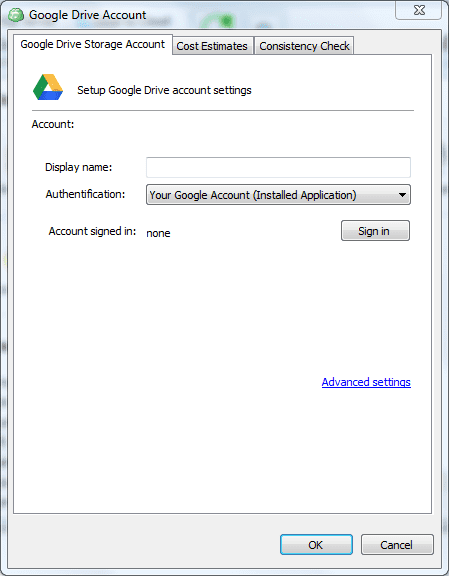
Then, we are going to start with a display name to label our backup. We want to make clear that we are backing up.
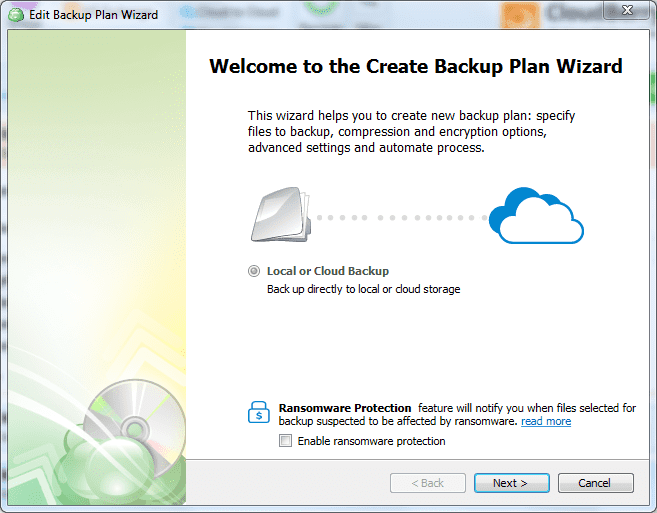
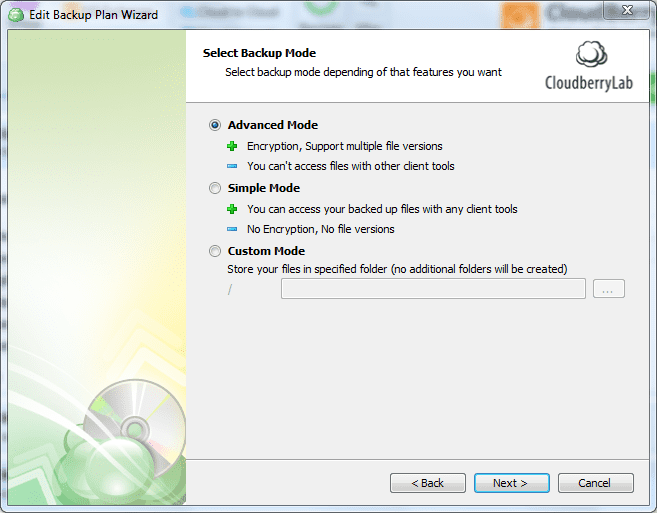
It is time to hit the next button. You can choose whether you want to backup in advanced mode which enables encryption of your files which I highly recommended. Also, it supports multiple file versions so whenever you change your files it stores the previous version of that file.
It does also block-level backup so it detects which portions of the file have changed making backups and uploads. Obviously, much faster than just having to upload or having to upload the whole file over and over again.
The next step is going to be that you will have to choose what files you want to backup. I have prepared a little test folder of one gigabyte in size.
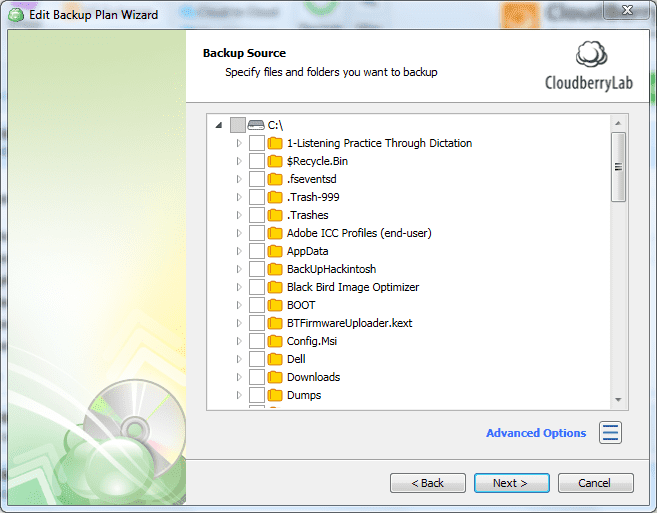
I don’t want to backup more. Because I want to speed up the process here a little bit. I just select the folder. Now, you can choose whether you want to really backup everything in that folder. If you want to exclude certain file types. For example,
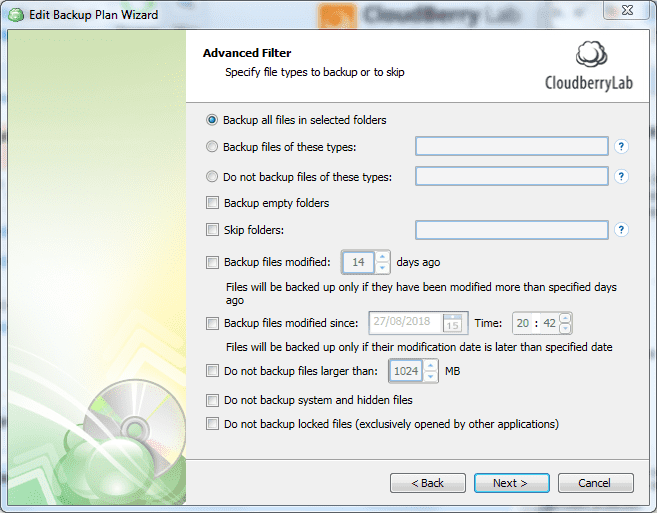
I didn’t want to backup movie files. I could exclude mp4 files for example or audio files or whatever you want. You can skip entire folders. Also, another option that is pretty interesting is only backing up files after a specific date.
You have already made a backup of other files that were created preview prior to March for example. You could exclude all those files in the next step. You can actually select whether you want to compress your files which is obviously going to speed up. The backup process it compresses your files and also you can enable encryption. This is obviously only allowed in advanced mode and also you can select the encryption mode that you want to use here. The AES bit encryption is a pretty secure encryption and you hardly need more encryption.
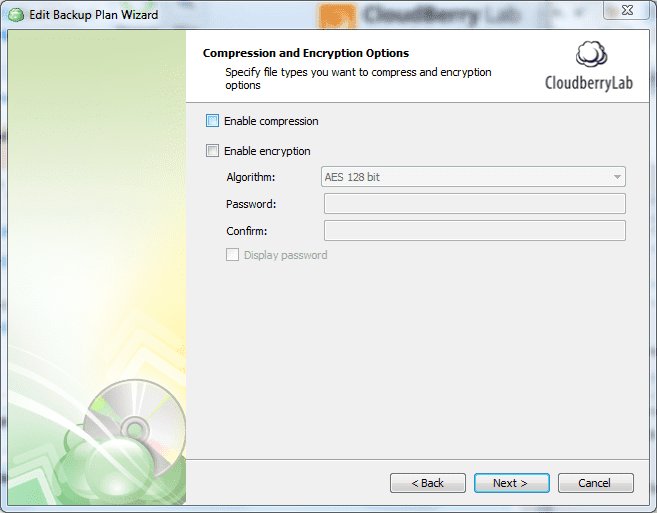
In the normal cases, you have to choose a password. But watch out, you never ever should forget this password. If you do you, you cannot decrypt your files. You will lose everything that you’ve backed up. Therefore, be very careful, don’t losing that password.
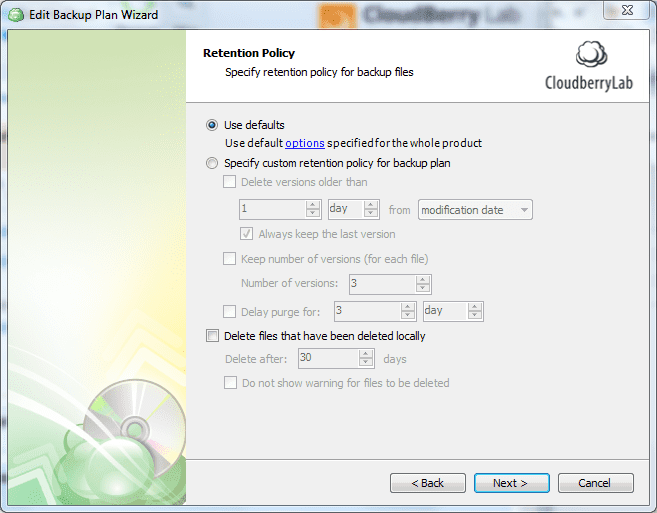
Next step, they are the purge option so when do you want file versions to be deleted from the Google Drive. Every file version actually adds up to your plan into your monthly bill. You will want to select those settings carefully to really adjust it to your budget. You can choose when you want files to be deleted after you’ve deleted those files from your PC. I choose 1 days because this is normally a good spectrum of days that I will need to recover those files.
In the next step, you will be able to select your schedule. We have a variety of options, I will always choose the real-time backup. Because it changes out well, it will backup my files whenever I do changes to them and I cannot miss to backup a file. This is something I highly recommend you doing as well.
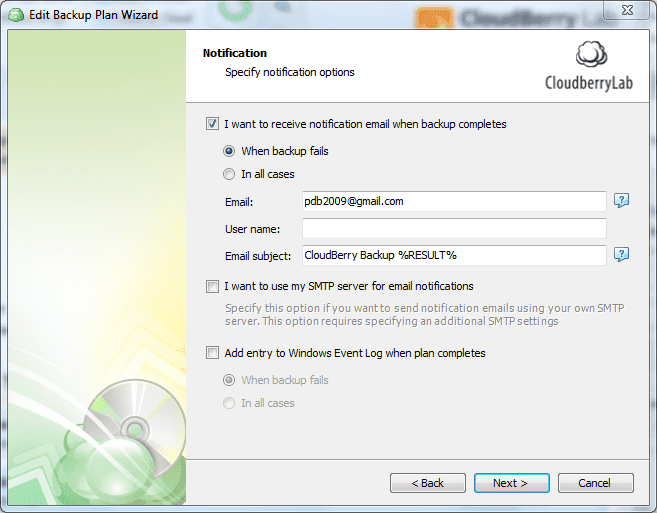
Another interesting feature is the the email notification feature. Whenever a backup completed, you can get an email where the actual status is you’re being notified.
This might be useful if you are traveling for example and have your computer running at home so you can always be sure that you have the the most recent backup ready.
Where you have an overview of the options that you configured and then your backup plan is basically successfully created. You can choose to run the backup now. And you can see that here in the dashboard or the in the backup plans dashboard, we have our custom created backup plan.
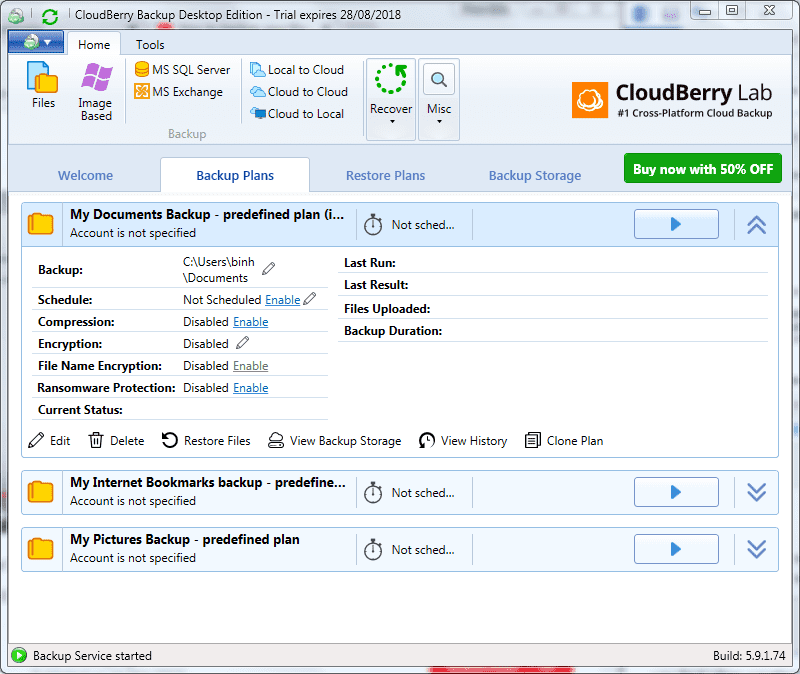
We just have it here a figure at the middle. Also, there are other plans available like my internet bookmarks that are pre created by cloudberry labs, my pictures back, documents back up the takes of files that are stored in the standard Windows folders.
Backs them up, if you choose to run the backup now. At the right hand corner, you see that it is now searching for modified files from our backup plan. It calculates the total file size which is gigabyte, start uploading immediately. We can see how much time is left, how fast is actually going to backup our files.
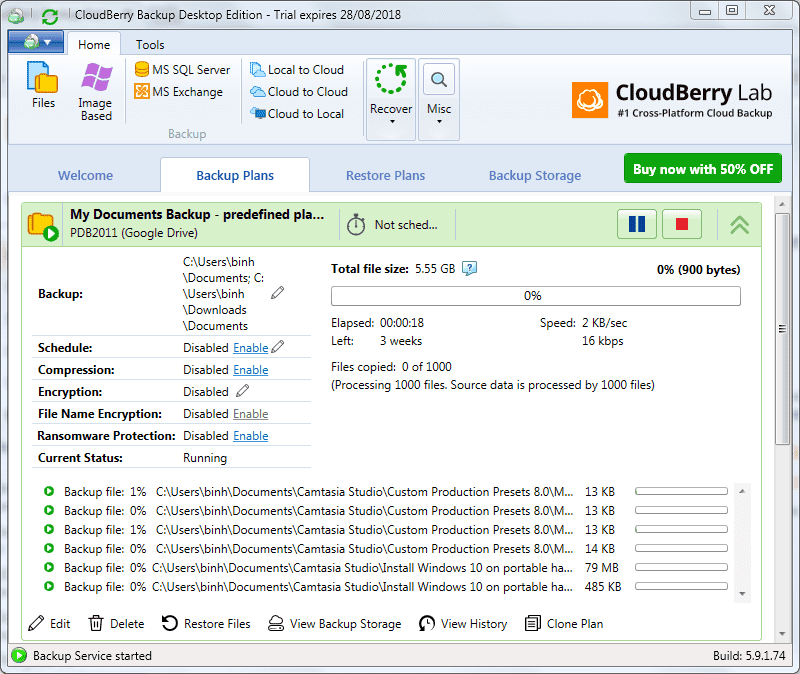
When all the files have been uploaded so when all your files have been uploaded to Google Drive’s servers, you can now be actually saved that your data is fully backed up. You can choose to restore files when clicking on restore files and you can choose when if you want to really restore: the latest version
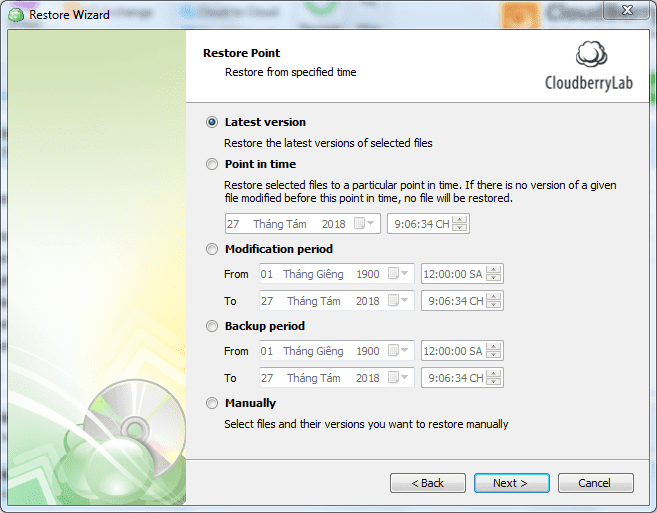
or whether you want to go back in time and choose the restore from a specific date or whether you want to select the restore manually. It will give you all the the files that we have uploaded, you could select particular files that you want to restore.
If you are working on an important project. Your computer just crashed and you need a specific file as fast as possible because the deadline is due in one hour. You could now go in and restore only that file to a specific location, on your external hard drive and then continue working on that file.
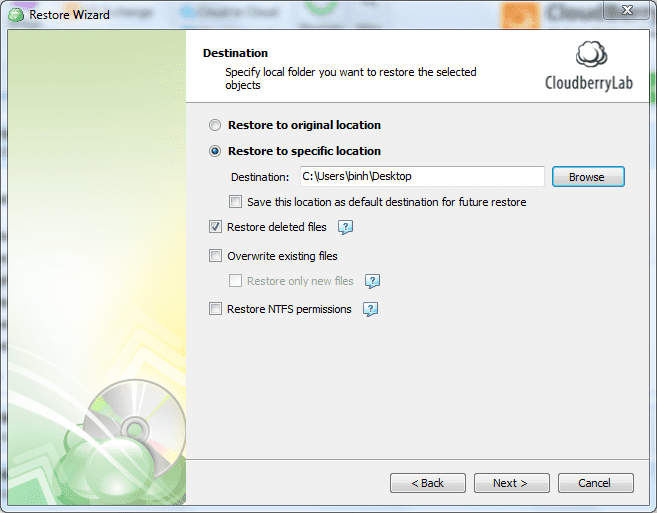
You need your decrypt your password to decrypt your data that you’ve chosen before. Without the password, you will only see file gibberish. That’s actually good thing, not a bad thing. Make sure you remember your password always and click on next.
Verdict
Cloudberry labs have done a great job of making the interface as clear as possible. With the wizard, anybody can do backups and there’s no excuse to not do your backup. The good thing is you do not have to commit to an online backup service when you don’t feel comfortable. You just choose Amazon and you really have maximum control with your data probably.
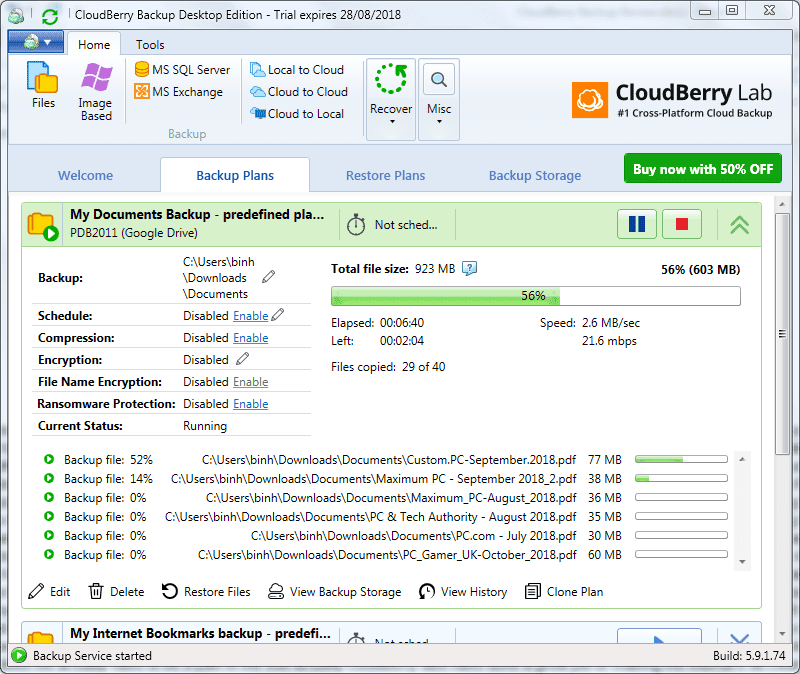
This is not the best solution for for everybody. Because, somebody might just be better suited with a service like Backblaze. Where just hit one button and then it backs up everything to their servers. It is a great service but if you want to have more control over your files, over scheduling your backup and actually geeking around a little bit with the options. Then cloudberry backup is actually a good solution.
I really hope I could show you how you can use cloudberry backup and help you getting your backups a little bit better sorted.


