HiBit Uninstaller Review: wipe junk files using a USB stick
PCs get messy as they age. Read our Wipe junk files using a USB stick.
Deleted software leaves junk behind, some programs are installed without your knowledge, folders get emptied and left to stagnate, and personal data isn’t properly wiped. The recently updated HiBit Uninstaller addresses each of these issues and more by gathering a long list of powerful file-deletion tools in an interface that’s easy to use. You can download a free copy from www.hibitsoft.ir/Uninstaller.html, where there’s a choice of installable or portable versions. As the portable version can be run from a USB stick, you can easily move it between PCs. Because it doesn’t need to be installed, it won’t contribute to the existing clutter on our drive.
“The recently updated HiBit Uninstaller addresses each of these issues, and more, by gathering a long list of powerful file-deletion tools in an interface that’s easy to use.”
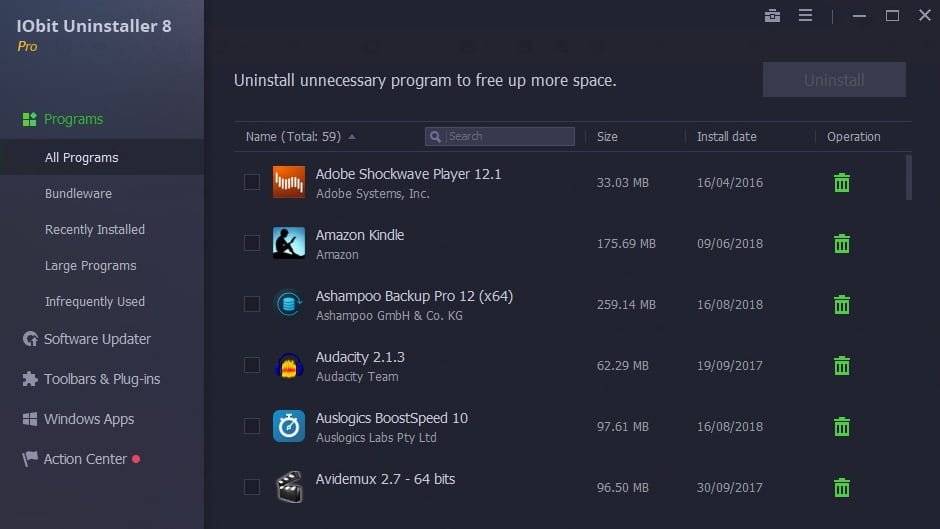
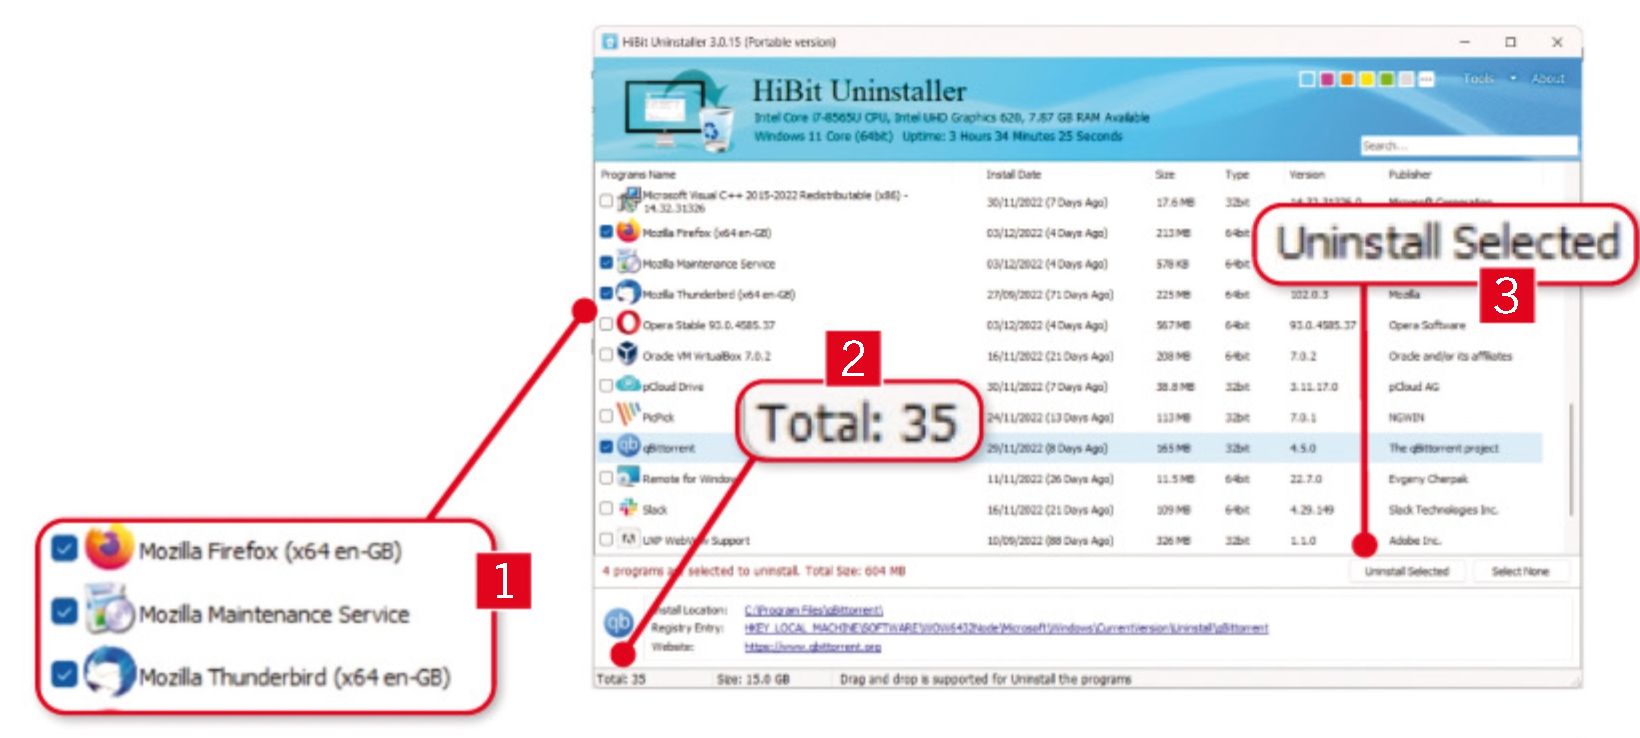
Uninstaller opens with a list of installed programs detected on your PC. Click checkbox 1 beside any that you want to remove, and a sum of the total space you’ll recover is shown at the bottom of window 2. Click ‘Uninstall Selected’ 3 to remove them. Although you can do the same through Settings (by pressing Windows key-I, clicking Apps, then ‘Installed apps,’ and clicking on each program in turn to reveal the Uninstall button), the option to remove several at once through HiBit Uninstaller is a real time-saver.
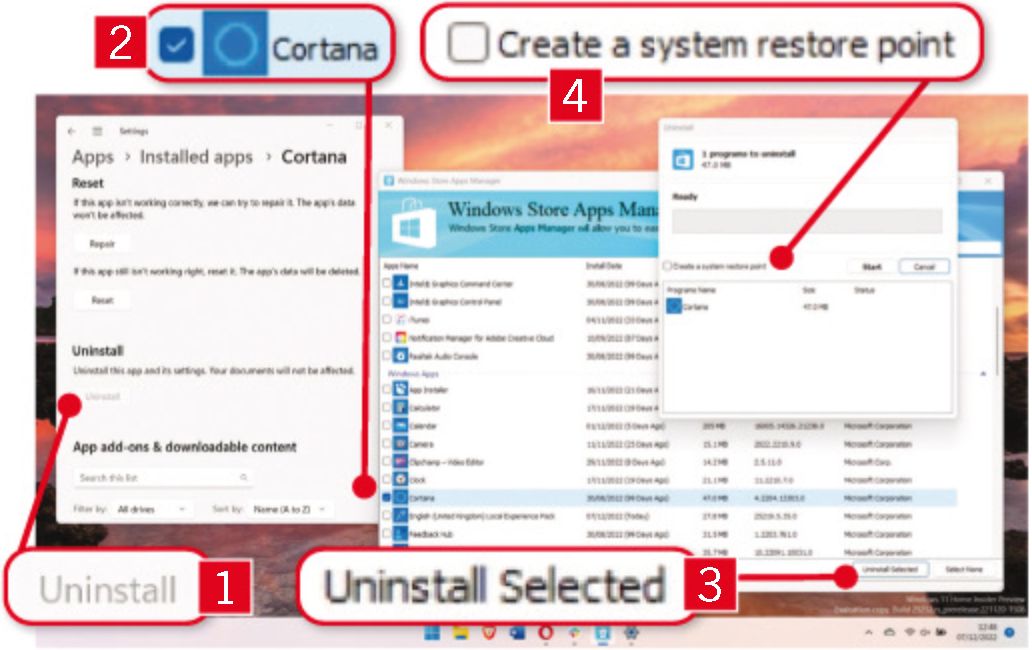
HiBit Uninstaller can also remove programs that Settings can’t. As you can see, the Uninstall button for removing Cortana is greyed out 1 in Settings on our PC, but it can still be selected in HiBit Uninstaller 2. To reach this option, click Tools and select Windows Store Apps Manager, then scroll down to the Windows Apps section. Click ‘Uninstall Selected’ 3, then tick the box beside ‘Create a system restore point’ 4 and click Start. This saves a copy of your PC’s current configuration, which you can return if anything goes wrong.

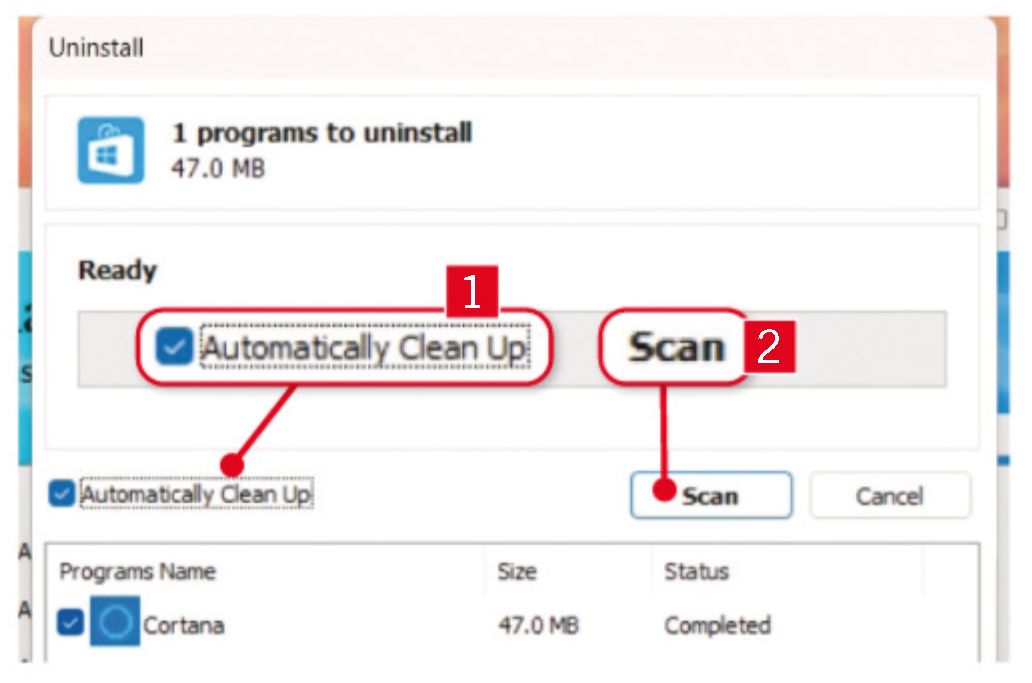
Having created your system restore point, HiBit Uninstaller removes Cortana, which will also be removed from the list of installed programs in Settings. Tick the box beside ‘Automatically clean up’ 1, then click the Scan button two, and HiBit Uninstaller will search your PC for any remnants, which it will also remove, before returning you to the list of installed software. If you’re removing software because you’re running short of space, re-order the list by clicking the Size column header so the largest programs appear at the top.
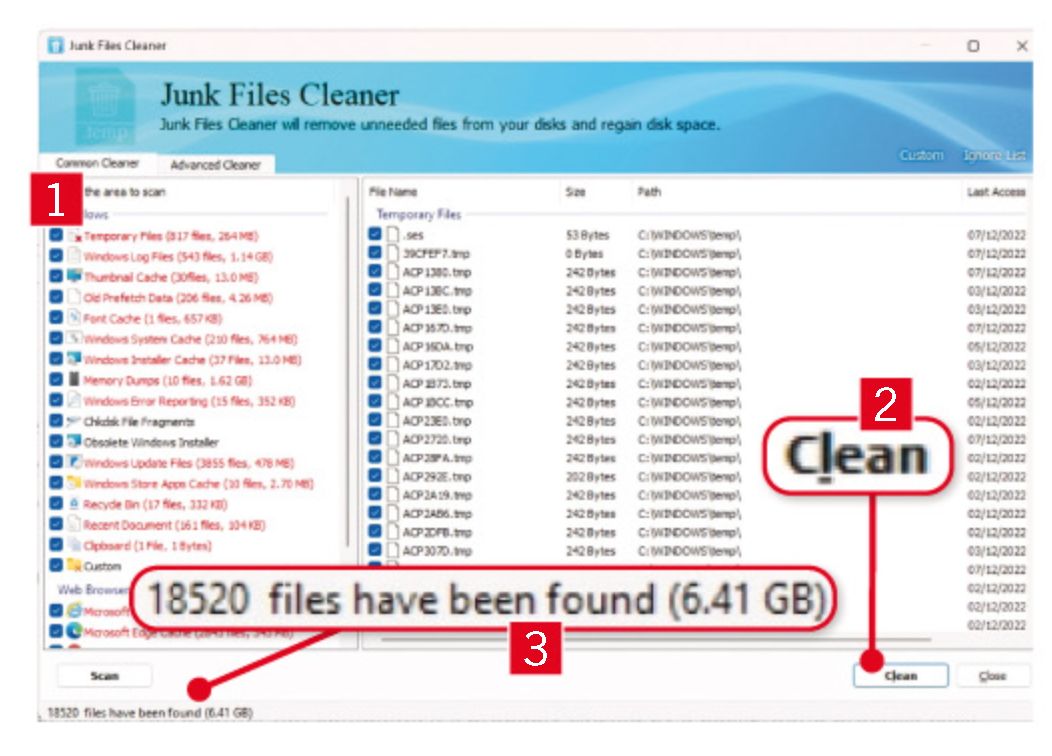
HiBit Uninstaller doesn’t only remove software; it can also find and delete junk that’s needlessly taking up space on your drive. Click Tools, followed by Junk Files Cleaner, then in the left pane, tick each of the categories of junk you want to scan for 1. When it shows you what it’s going to remove, untick any you want to keep in the right pane, then click Clean 2. As you can see from the grab, if we removed everything found here, we’d be able to reclaim almost 6.5GB of otherwise wasted disk space. 3.
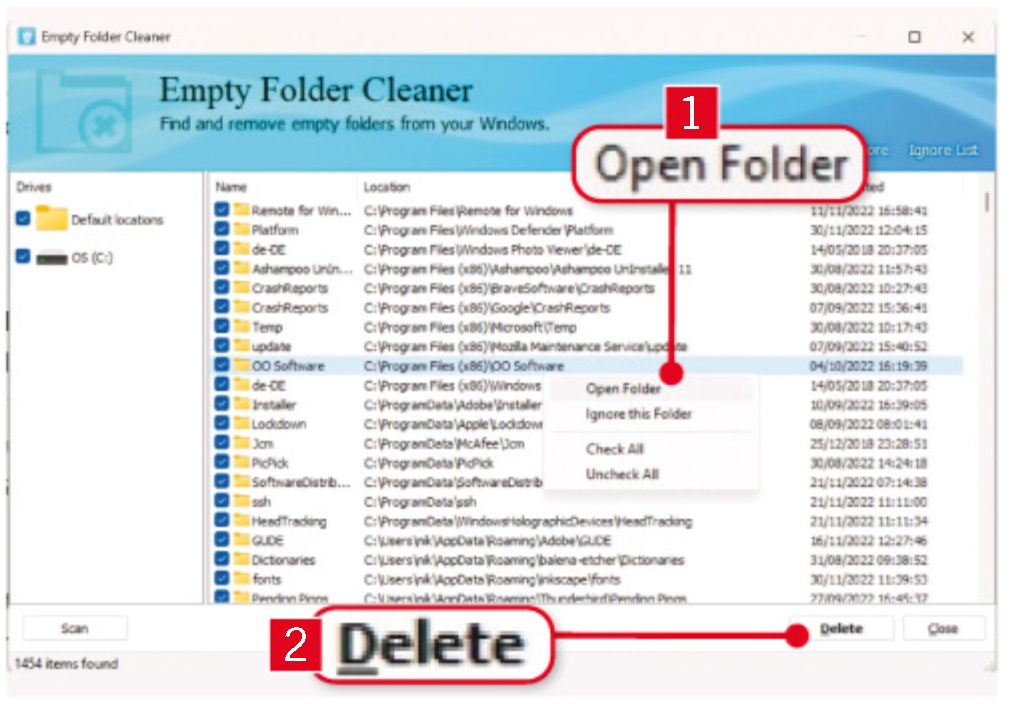
Sometimes, you want to remove items from your drive not so much because they’re taking up space but because they’re untidy and confusing. Empty directories, left over from old software, are a case in point, and they can be scattered across your drive. So, to round them up and delete them, click Tools and select Empty Folder Cleaner. If you want to check that a folder really is empty before removing it, right-click it and select Open Folder 1. To wipe away the selected folders, click Delete 2.
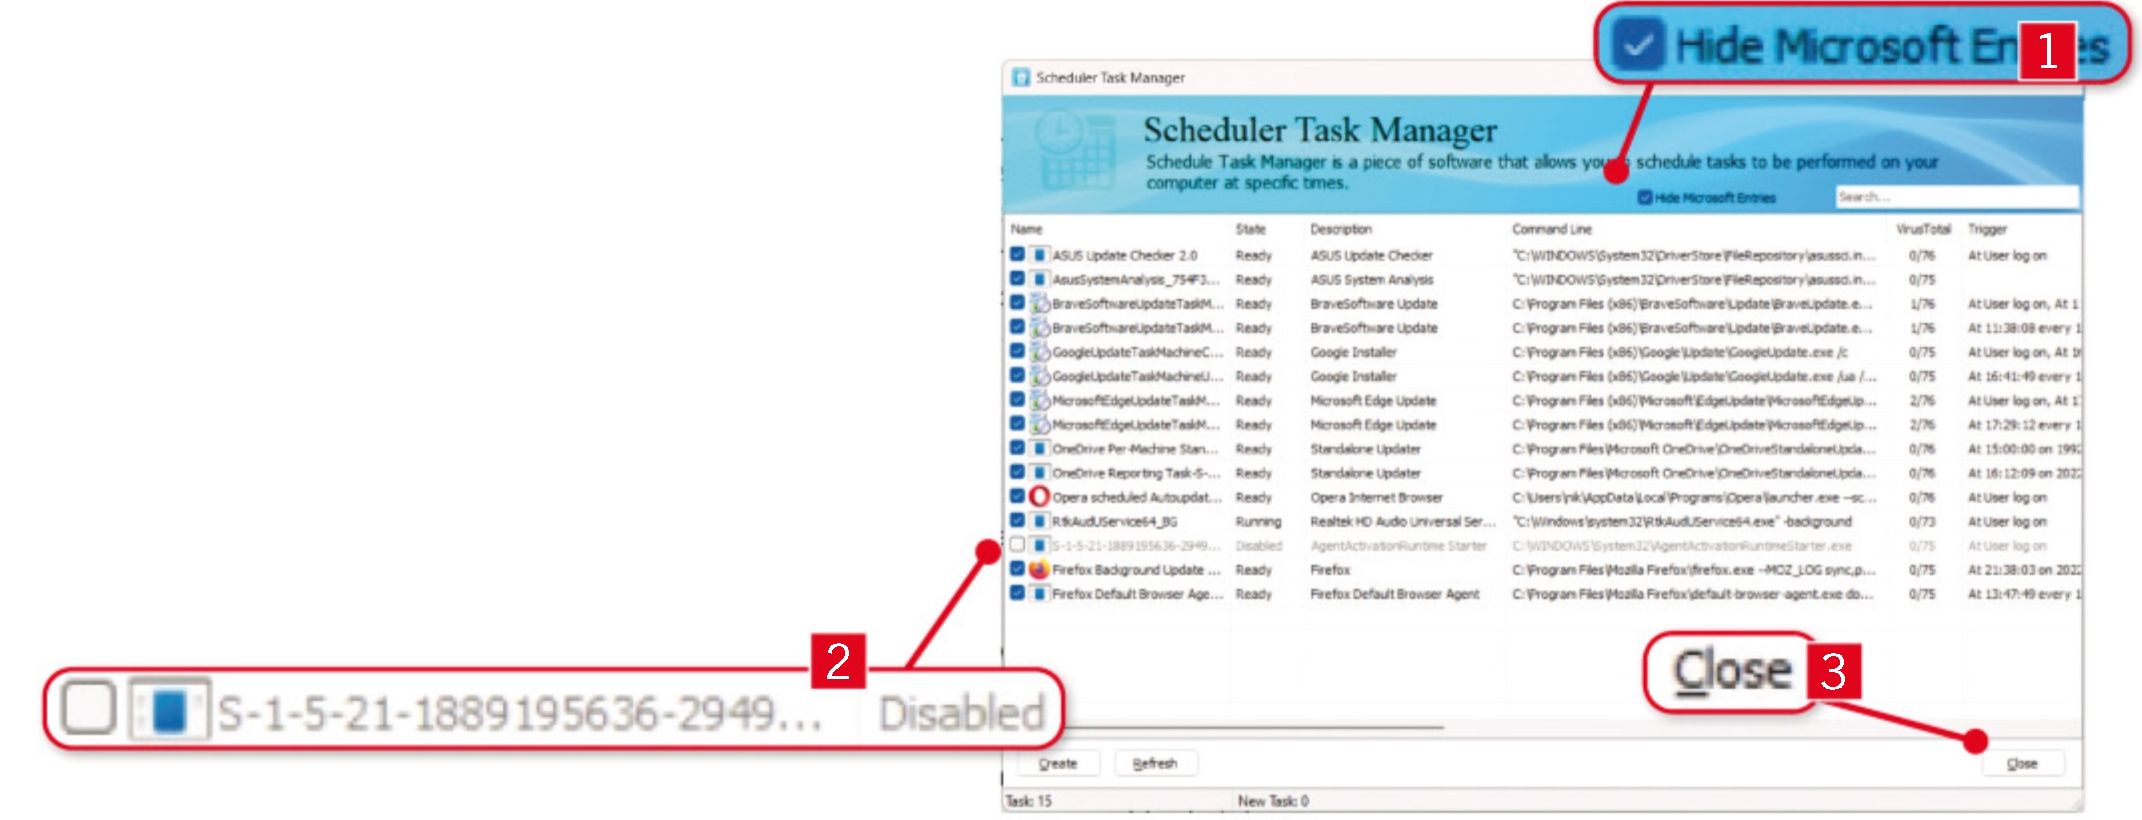
If you ever notice windows popping up asking you to update a program you rarely use or to perform some other action you’d rather not undertake, it’s probably caused by a background process. Click Tools followed by Scheduler Task Manager to see what’s set to run at regular intervals, then click Hide Microsoft Entries 1 so you don’t accidentally remove anything Windows relies on. Selectively untick any processes you want to disable 2, then click Close. 3
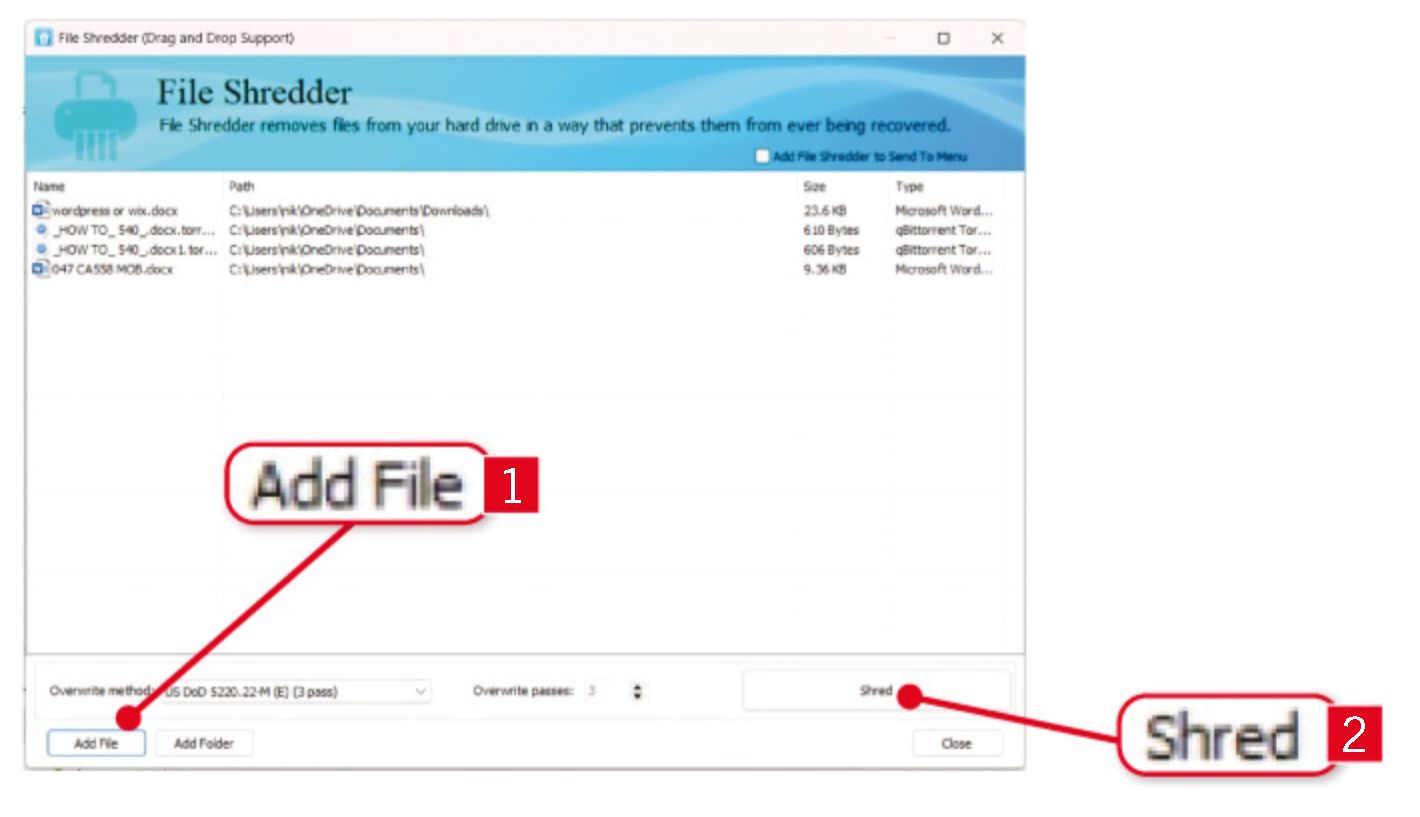
Finally, as you probably know, when you delete a file, it’s not removed from your disk – just from the index of files Windows keeps track of, which means hackers could still recover it. To delete it permanently, click Tools and select File Shredder, then click Add File 1 and navigate to the file you want to remove. Repeat for any other files you want to delete at the same time, then click Shred 2. The files will be overwritten rather than being sent to the recycle bin, so make sure you really do want to destroy the selected data before following this step.
