Photomator 3 Review

Free; $/month; $/year; $ lifetime
From www.pixelmator.com Needs macOS 13.0 or later
THE TEAM BEHIND
Pixelmator Photo has used the update to version 3 to rebrand the app as Photomator, adding a bunch of new features at the same time. It syncs to your Photos library and stores edits nondestructively in the cloud, meaning you can always undo changes and your photos will be accessible to the app both on the Mac and on iOS. Your purchase also unlocks the iOS versions and while the Mac app is free to download and use, you only get three saves before you’ll have to choose a purchase option to make any more. Read our Photomator 3 Review.

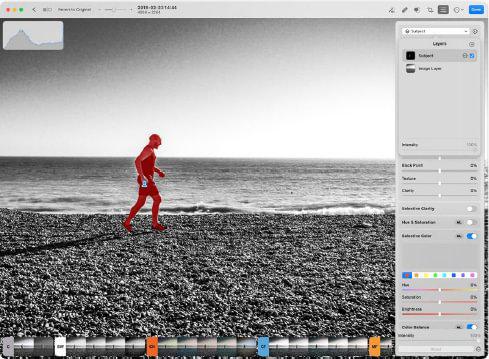
It supports RAW files and is generally pretty snappy in operation even when working with large images. You get a selection of machine learning–based tools for making quick edits, from one–click enhancement to more advanced features like super resolution to intelligently increase canvas size, match colors between images, denoise and repair. There’s also ML–powered selection with subject, sky and background all able to be identified and masked very accurately. Unlike some similar non-Adobe photo editors, Photomator uses a basic layer system to help you manage your edits. This isn’t for importing other graphics but for applying nondestructive edits like selectively changing color hues, altering the brightness of the sky, the clarity of your subject, and many other possibilities.
POWERFUL IMAGE EDITING
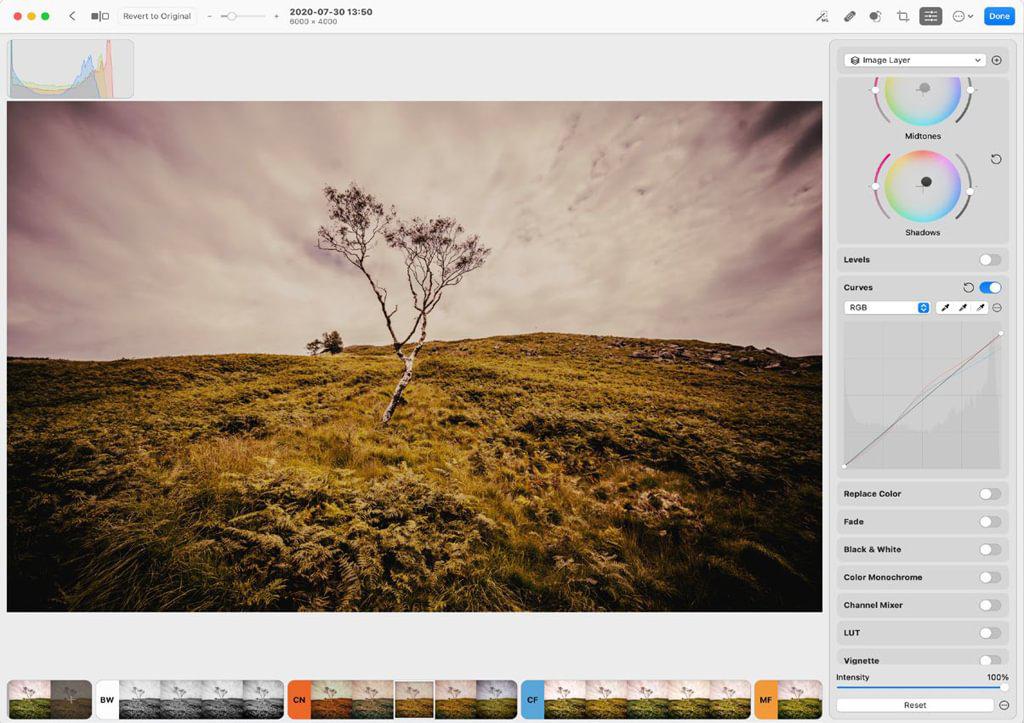
These edits are facilitated by masks, which appear in your Layer palette and can be easily inverted or modified using a brush, say for example to include or exclude an area that the auto–masking didn’t pick up. All the things you can change using these tools can also be applied to the basic image of course, without using any special tricks. Most sections have a ML button you can hit to make auto–adjustments. So you can make the whole image sharper, brighter or darker, or edit the hue and saturation of its colors. Some handy presets are available too that let you punch in a “look”, and these are subtle rather than outlandish. You can save your own presets, batch process images and even export your settings as a LUT (look–up table).
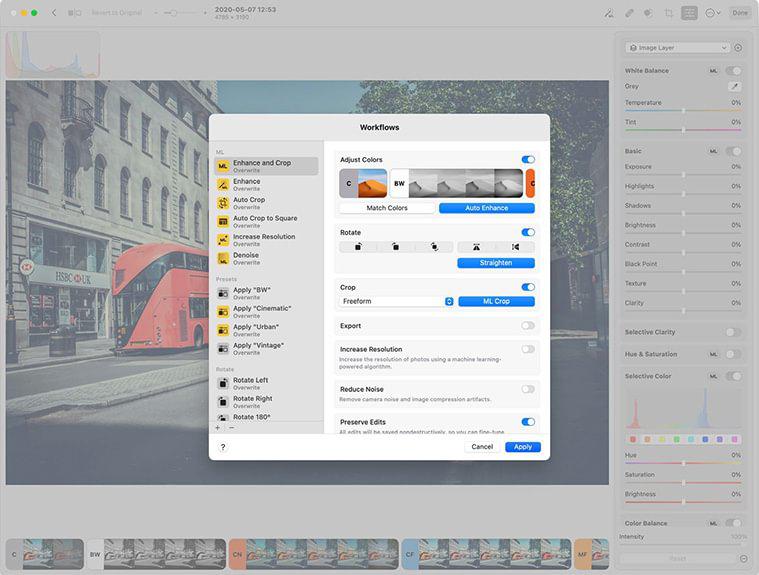
The image editing tools are powerful but easy enough for less experienced users to master after a little practice. They’re arguably on a par with Lightroom, though Adobe’s app is stronger when it comes to library management. Among the other features you will find cloning and a Repair tool that can remove objects from images. As is often the case, this is great with smaller items but can struggle a bit with larger ones. There are also some ML–powered workflows which are useful for batch processing. It can also intelligently crop images to make them more striking, though this is something that more experienced photographers would always do manually.
AN ADOBE ALTERNATIVE
Images are saved to your Photos library but remain editable from Photomator. You can also export images in a number of formats with variable quality settings, though curiously not Photoshop format. If you export a Photomator document it can be opened in Pixelmator Pro and retains its editable layers, which is useful if you want to add more graphical elements or text.


Photomator is a very adept tool for editing your pictures and the developers are working on support for features including file browser support, dehaze and video editing among other things. It all feels slick and friendly and moving effortlessly between Mac and iOS is a nice touch too. Not everyone likes the subscription model even though it’s widely used nowadays and looks set to stay — you might find that $ for a year is the sweet spot to see how this powerful editor fits into your photo life.
THE BOTTOM LINE
A powerful and well–featured image editor that’s easy to use and produces great results.
Good depth of editing tools
Layers are very useful
ML features work well
Catalog features limited
EXCELLENT

“THE IMAGE EDITING TOOLS ARE POWERFUL BUT EASY ENOUGH FOR LESS EXPERIENCED USERS TO MASTER”
Match colors between images
If you select Tools > Match Colors you can select an image to analyze and from which to transfer the color balance to your current photo. This is much quicker than doing it manually when you want two images to have the same feel.
Use workflows
Select one or more images in your library, right–click and choose Workflows and then More Workflows. Here you can access many automated tasks for batch processing images in multiple ways.
Change layer intensity
If you have used layers to nondestructively make changes to an image or parts of an image, you can use the Intensity slider for each layer to set a more moderate value than simply 0 or 100.
Image rights: Apple, Hollin Jones, Pixelmator Team./Image rights: Apple, Hollin Jones, Pixelmator Team.